Tiles have long occupied a leading position in the design of functional areas in the premises.
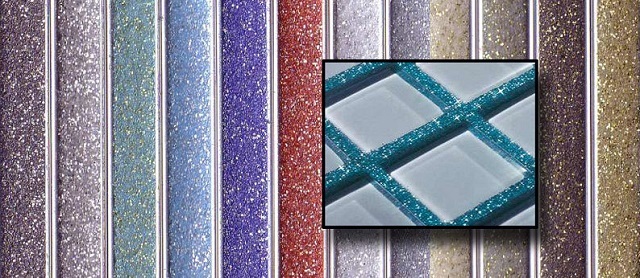
Few people will have a doubt: whether to decorate the bathroom and kitchen apron with ceramic tiles or use another consumable. The choice in most cases falls precisely on the tile: a finishing material that is diverse in shape, design and texture.
Time does not stand still and now it is not at all necessary to call a professional tile layer, thanks to modern technologies for the manufacture of tiles and adhesive mixtures, you can quite lay the tiles yourself. So, if you have decided on the choice of tiles for your bathroom or kitchen, picked up the size, thought out the interior solution - you can start lining the walls with your own hands, for this we offer a step-by-step guide describing each stage.
back to index ↑Preparing to lay tiles on the wall
In order to be able to start pasting the walls with tiles, you need to prepare the work surface itself.
Important: The wall on which you will lay the tiles must be perfectly dry, clean and free of irregularities, as this can cause improper, ugly masonry.
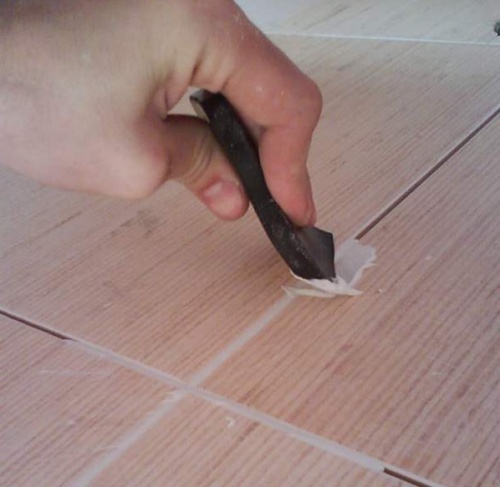
If you're going to be tiling in a room where the walls have already been tiled, it's natural to start by removing the old tile. The dismantling of the old coating includes several stages:
- Moisten the tile joints with water.
- Use a metal spatula to remove the grout from the joints.
- Starting from the top, inserting the peak of the perforator into the seam, we remove all the tiled units one by one. If you are armed with a chisel and a hammer, the technique is as follows: insert a chisel under the tile and knock it down with a hammer, striking it.
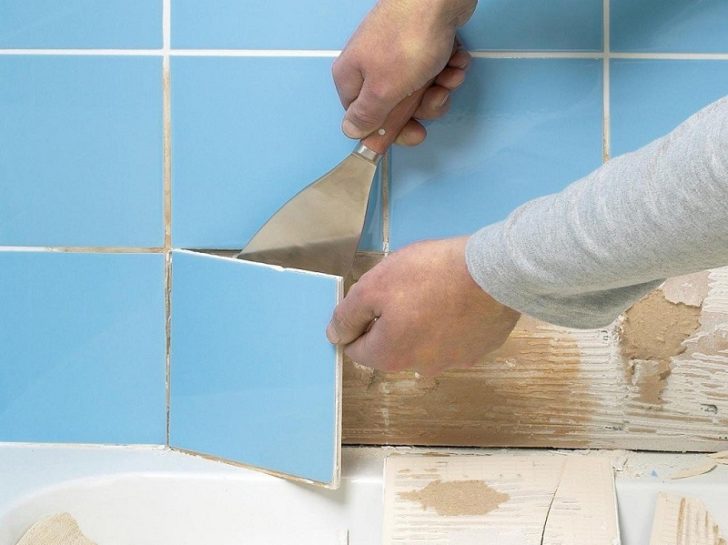
Removing old tiles
Useful advice: In order to maximize the adhesion of the tile and the work surface, it is recommended to apply shallow, frequent notches with a hatchet. As a result, the adhesive mixture will hold on to these notches, and the masonry will be very strong (this is also necessary if the wall is painted).
For better adhesion, make notches on the wall
If we talk about what exactly to “plant” the tiles on, the choice here is very large. Hardware stores offer many adhesive options. The CERESIT mixture is very popular - an excellent composition, but not an economy option if cost is an important factor. Be sure to read the characteristics of the adhesive on the packaging: it is important what exactly you will lay the tiles on, whether it will be drywall, concrete or another surface. Also pay attention to the inscription: "for rooms with a high level of humidity" when choosing a mixture for the bathroom. The firms LUX, WEBER, LITOKOL, KNAUF, KREPS have proven themselves excellently. In general, glue comes in two variations: mastic and cement-sand composition.

Before buying glue, be sure to study all the characteristics
Important: To prepare the walls, you can also use a primer: it enhances adhesion and provides excellent adhesion without the use of building mesh.The tool turns a smooth surface into a rough one, dries quickly and is resistant to moisture.
If you find signs of mold on some areas of the walls, you will need to treat the entire wall. Get a special tool with antiseptic properties of deep penetration and prime the surface. If this is not done immediately, soon you will have to dismantle the new tile one way or another, as the fungus will spread.
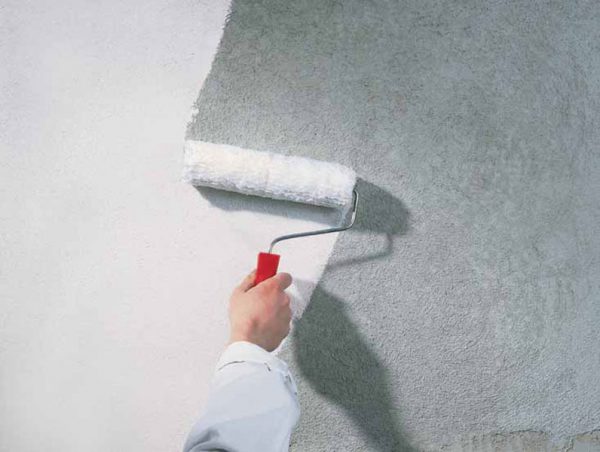
Coating surfaces with a primer
For the increasingly popular sandwich panel houses, the best option is to lay the tiles on drywall sheets - this is the ideal basis for ceramic tiles.
Remember! A flat surface is the key to the durability of your tiles, do not neglect the preparation of the walls!
back to index ↑Calculation of the required number of tiles
In order to reduce the number of tiles that will have to be cut, you need to find out the location of the rows of tiles. You need to calculate the vertical and horizontal tile rows. Decide how many tiles you can lay wall to wall. Very rarely, in practice, the boundaries of the tile and the room coincide. You can use the option of sketching the layout of the units on the floor, in this case, do not forget about the place for the seams - otherwise the calculations will not be correct. For expansion joints between the tile and the wall, it will be enough to leave 6-8 mm. You can maintain the exact distance for the seams using special seam crosses, you can purchase them at construction markets. The arrangement of the rows will also depend on the order in which you want to lay the masonry.
General calculation rules:
- The length and height of the wall, the length and width of the floor are measured.
- Measure the length and height of the front door, if any, and subtract it from the dimensions of the wall in which it is installed.
- Choose the size of the tile itself.
- Make preliminary calculations in square meters, for a more accurate result, individually count the required number of units.
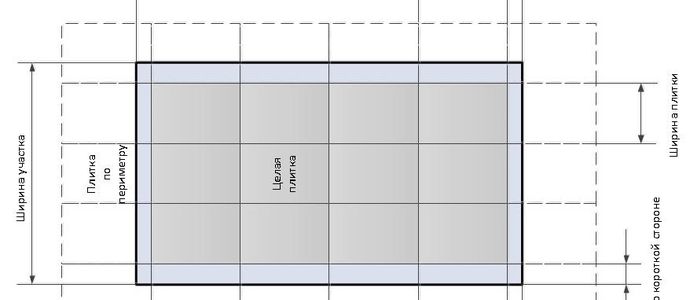
Example of calculating the number of tiles
For example: the height of your wall is 280 cm, the height of the tile is 33 cm. Divide 280 by 33 - we get rounded 9 elements in one vertical row. 150 cm - wall width, 25 cm - tile width, divide 150 by 25 - 6 elements come out in a horizontal row. We multiply 6 by 9, and we get 54, which means that we need so many products for one wall. Thanks to your independent calculations, you will not be mistaken by succumbing to the persuasion of sellers - consultants in a hardware store, and get the number of tiles that you really need.
Important! It is recommended to purchase 10% more tiles than your calculations showed, since the human factor is not excluded - you can simply accidentally break one or two elements, make a mistake in cutting, perhaps an extra tile will be needed after some time for cosmetic repairs.
back to index ↑The process of installing ceramic tiles
Approaching the very process of laying ceramic tiles, collect all the necessary tools with which you will carry it out yourself.
You will need:
- tile cutter;
- drill;
- rubberized hammer;
- level;
- spatulas;
- yardstick;
- primer;
- adhesive composition;
- joint grout;
- seam crosses;
- pencil;
- profile;
- dowels 6*60 or 6*40.

Tile laying tool
After preparing the wall, fix the profile to support the second row of tiles. To fasten the profile itself, use dowels. Using a level, check the symmetry of the profile fastening, align if necessary.
The next step is to prepare the glue. Each package of store glue has detailed instructions for its preparation - follow the rules. Usually it all comes down to adding an adhesive mixture to the water and thoroughly mixing, the ideal option for this purpose is a construction mixer or a drill with special nozzles.After kneading, leave the glue for 5-7 minutes for the so-called "maturing" and mix again.
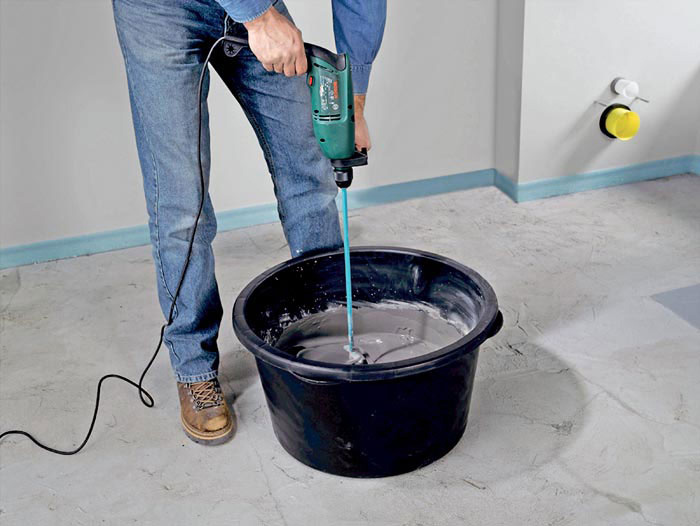
Preparation of tile adhesive
Important! Each glue has its own shelf life in open form after preparation, after which the mixture hardens and is no longer suitable. Do not knead a large amount of glue at once!
If you decide to use a cement-sand composition, you will have to soak the tiles in water for a while. This is done to prevent the tiles from absorbing water from the mortar.
Let's start applying glue to the work surface. It is recommended to do this with a notched trowel, holding it at the same angle, simulating the “combing” of the glue.
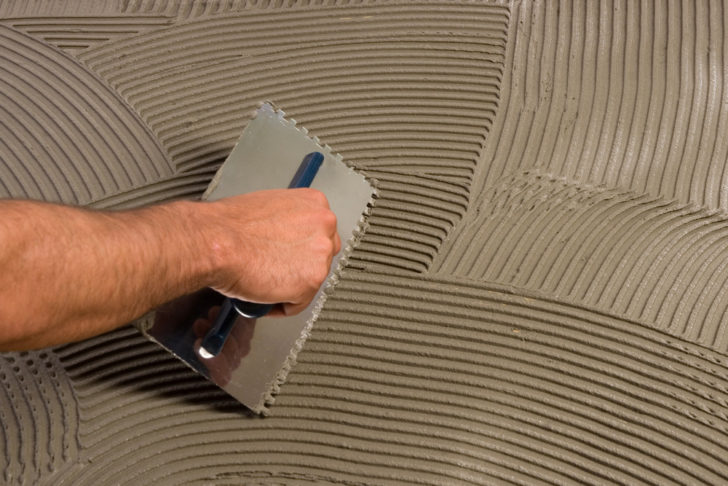
Apply glue with a notched trowel
Note: the larger the tile, the larger in depth should be the teeth formed by the glue. Pros usually start at the top, if you're uncomfortable you can start at the bottom.
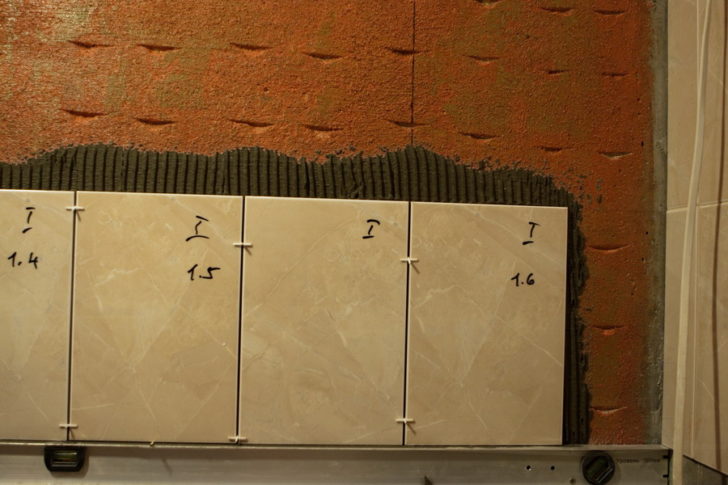
Do not apply adhesive to the surface for more than 3-4 tiles to avoid curing. If symmetry is important to you, start laying with whole tiles, and only then pick up the trimmings. To ensure neat, even seams, use plastic crosses. It is worth removing them before the glue mixture hardens.
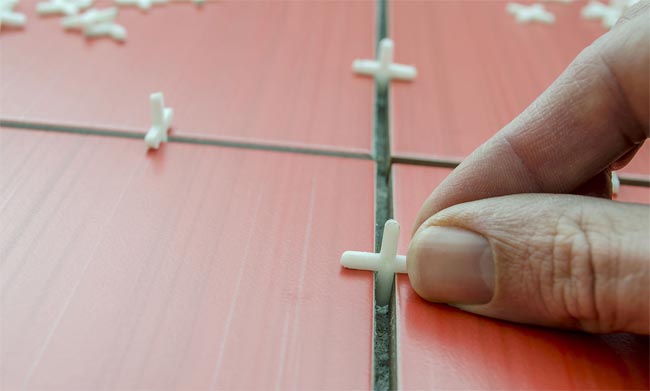
Use stitches for even seams.
Glue the main support row, check with a level. There should not be a gap between its edge and the tiled elements, but if they still exist, do not worry and just correct them with a rubberized hammer. Without changing the scheme, “plant” the next row of tiles on the glue. Each time, make sure that all elements are in the same plane. So you will reach the ceiling, in the process of correcting the shortcomings: drowning (by adding glue) or bulging tiles, removing excess glue.
back to index ↑Grouting tiles
After the glue has completely dried, which is at least 48 hours, use a rubber spatula to fill the joints with grout. Grout performs two functions: decorative (it comes in different colors) and provides tightness. Thus, when grouting, you protect the seams from excess moisture, which is inevitable in the bathroom.
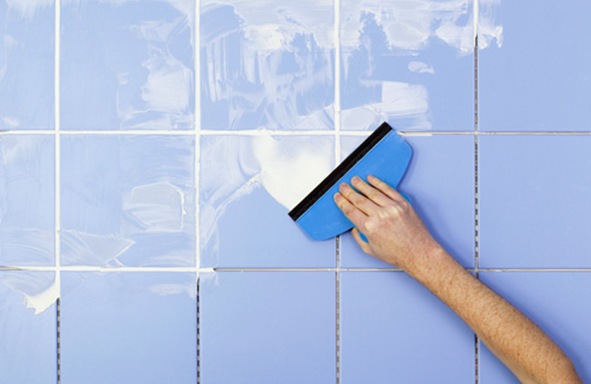
The grout protects the seams from moisture ingress
Depending on what kind of room you are facing, the grout is selected according to the composition. There are latex grouts - they have absolute moisture resistance, excellent plasticity, retain their color for a long time and are not destroyed by detergents. Due to their stability, they can be used to create seams up to 10 cm. Epoxy grouts are very viscous, difficult to work with, their price is high, so latex grouts are most often preferred.
If you want to highlight the tile, we advise you to purchase a grout a tone or two lighter or darker than the tile itself, if you want the tile to seem like a solid canvas, buy grout to match the tile. This should not be difficult, as there are several thousand shades on the market, and you can choose any one based on your preferences.
Grout can be chosen in any color
Important! If you are laying tiles in the bathroom, do not install plumbing before 7-10 days, after this period you can and should treat the grout with a special antifungal compound, this will protect you from mold.
Take a dish sponge or a spray bottle and dampen the seams slightly before grouting, the main thing is not to overdo it, as this can lead to cracking. Type a small amount of grout on a rubber spatula, and holding it at an acute angle to the tile, as if pressing the grout deep into the seam, fill it completely. Remove excess by running a spatula along the tile joint. We do not recommend processing a large surface at once, as there will be difficulties in jointing.
Until the seams have completely hardened, we begin the process of jointing.
- Pressing the round end of the spatula on the seam, draw along it.
- Wet the sponge, draw along the seam
- Press down again with a spatula, forming the final relief.
Applying tile grout
After 1.5 - 2 hours, we proceed to clean the surface. Wipe the tile with a damp cloth, collect all dust and grout residue. Then dry the tiles with a clean cloth. After the grout is completely dry, you can treat the ceramic tiles with glass cleaner to avoid streaks or use a special cleaner, for example, from Cillit. On this, you can consider the process of laying tiles with your own hands completed!
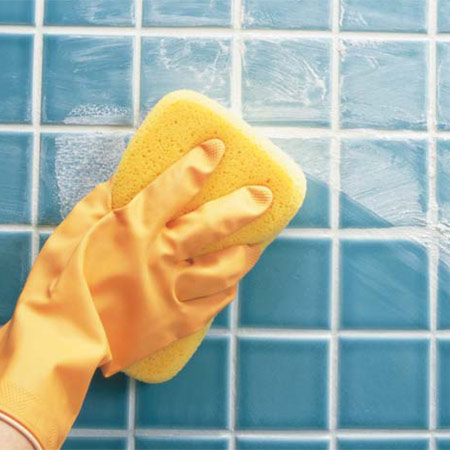
After 2 hours, the tiles can be wiped
How to cut tiles?
An important aspect is the selection of a tool in order to cut tiles at home. For these purposes, you can use both mechanical and electrical tools. The most suitable for cutting durable tiles are glass cutters and tile cutters. If you have to perform a small amount of work and make simple cuts, we recommend using special cutting forceps. Mark the tiled element with a pencil and draw along the marked line with a cutting circle. After the incision is made, bring the tongs to the edge of the lip, break off the excess part by squeezing the tile with tongs.
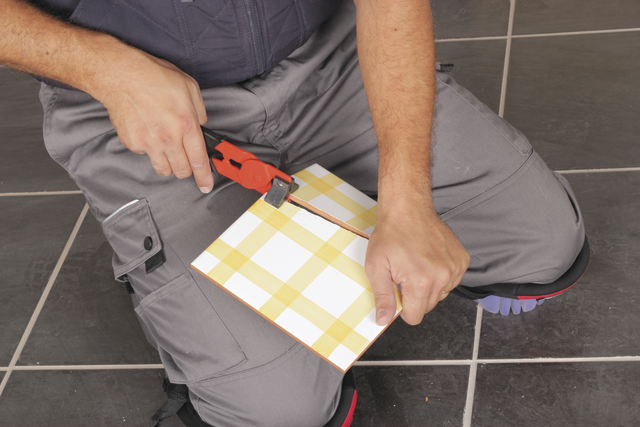
Cutting tiles with tongs
When using a simple glass cutter, a groove is first drawn along the markup, applying the tile with a notch line to the table, pressing, a break is made. In this way, you can cut thin, not very durable tiles.

Mechanical tile cutter
Using a grinder with a diamond wheel, you can cut the tile at a right angle: the edge of the tile is suspended along the notch line, the tile itself is well fixed on the table. At an angle of 45 degrees: first, the tile is sawn at an angle of 90 degrees, then the remains are removed around the corner at an angle. To make a hole in the tile, and this is always necessary, if there are electrical points in the wall, you can also use a grinder. In order to comply with all safety precautions when working with a grinder, put on goggles or a mask, cover your hands and put on gloves.

Cutting tiles with a grinder with a diamond wheel
Without much difficulty, you can cut the desired piece of tile with a manual tile cutter. This tool consists of a sharp cutter, rollers, a carriage with handles. It is completely safe and easy to use, which is why it is very often used by both professionals and amateurs.
- Mark the cut line with a pencil.
- Place the tile on the base of the instrument.
- Fix it with the clamping part.
- Using the handle on the very edge closer to you, set the diamond cutter.
- Press the handle, as a result, the cutter touches the tile and it will be clamped.
- With a clear movement, draw a furrow, heading outward.
- Squeeze the handle and break the element in half.
- So, you got 2 fragments with smooth edges, which is quite important.
You can cut almost any tile in thickness using an electric machine. They have a large desktop area, the cutting depth is about 30 - 45 mm, which is an undoubted advantage. Before you start working with it, test it in idle mode without connecting to the network.

On an electric machine, tiles of any thickness can be cut
There are few main nuances in the work:
- Control your every move, do not forget about safety
- Start and finish cutting with a low feed rate, you can increase it only in the middle, so you will avoid the possibility of splitting the tile
- Press the element firmly against the work surface to minimize the possibility of cracking due to vibrations.
- Consider the thickness of the cutting wheel when setting the size of the cut piece.
Advice! If you are cutting tiles for the first time, buy 3-4 pieces more than planned, practice on them, and eventually acquire the skills to make perfectly even cuts.
back to index ↑Tips for laying tiles in the bathroom
If you have a small bathroom and the furniture in it is located very close to each other, then we advise you to use the horizontal design method, that is, divide the space visually into several strips.
To create a contrast, you can veneer one wall in light colors and the other in dark colors, thereby placing accents and drawing increased attention to some objects.
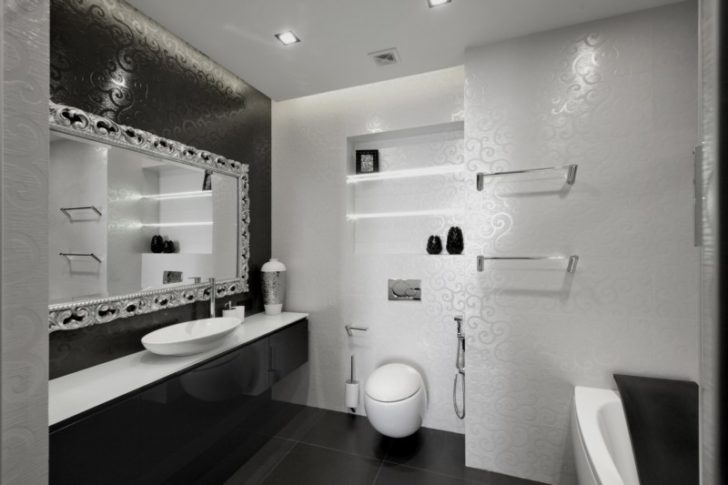
The combination of light and dark tiles in the bathroom
There is also a way to highlight zones with tiles: for example, create a group in the same color “toilet + bidet”, “washbasin + bath”, but this option is acceptable in large spacious rooms.
Zoning in the bathroom with tiles
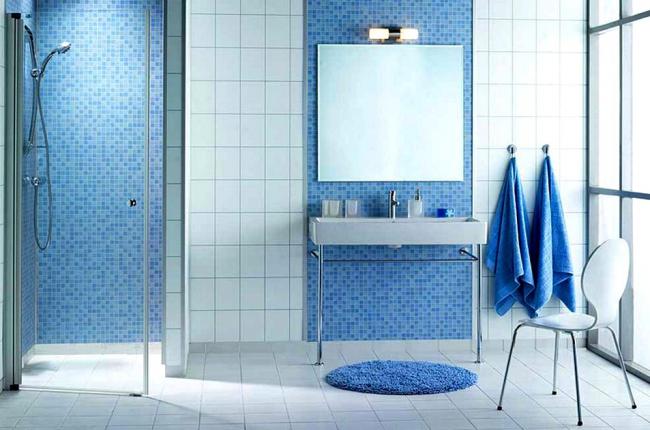
The bathroom is a zone of relaxation and comfort, and not just a room for daily hygiene procedures. The color of the tile will naturally affect the overall impression. You can visually enlarge the space with the help of light colors. Avoid cold white "hospital" color, give preference to shades of ivory, beige, creamy. Use mint or aqua tiles to create a cool and fresh feeling. The bathroom is a place where you can relax after another busy day.
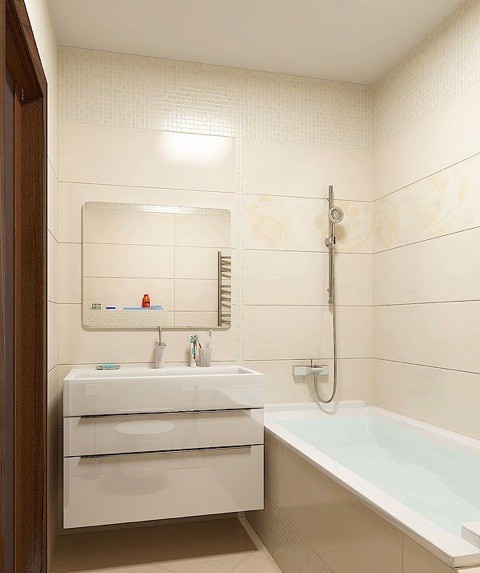
Light tiles visually increase the space of the bathroom
Woody tones, shades like mocha will help to calm down and make this area more comfortable. We do not recommend using black tiles due to the fact that this color depresses the nervous system and suppresses mood. In addition, traces of water splashes, stains and limescale will be best seen on it, and this is completely impractical.
Summing up, we can expect that by adhering to simple rules, having some tools in everyday life, you can, without resorting to the help of specialists, lay ceramic tiles at home on your own!
back to index ↑Video