Many amateur gardeners dream of decorating and transforming their garden. Of course, the cost of the services of a landscape designer, as well as the cost of buying building materials, hits the wallet very hard.
Therefore, it is worth dwelling on simpler and more affordable ways to arrange garden paths, which are in no way inferior to the solutions of professional architects.
Methods for arranging garden paths
One of the many classification options, which in our case will be the most convenient, is based on the method of constructing garden paths.
garden paths
garden path
These are paths that appear naturally when people regularly move around the same place. As a rule, these spontaneously appeared paths connect the most important and popular points on the site along the shortest path. Despite the fact that this is the cheapest option for arranging garden paths, which, by the way, is not at all difficult to ennoble by laying a curb of stones or paving slabs along the edges, the paths have some drawbacks. These include:
- dirt after rain;
- grass overgrowth.

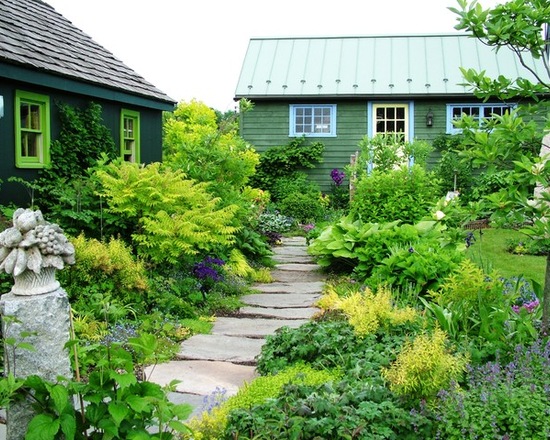
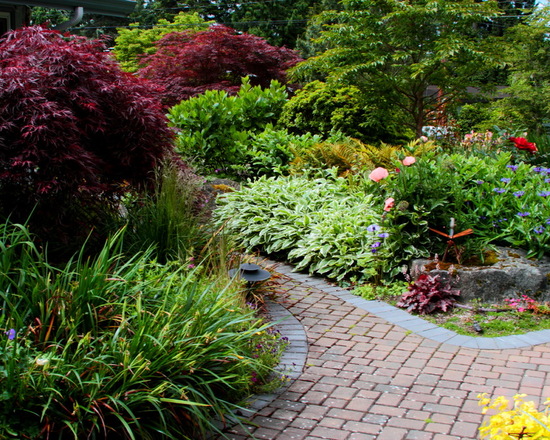
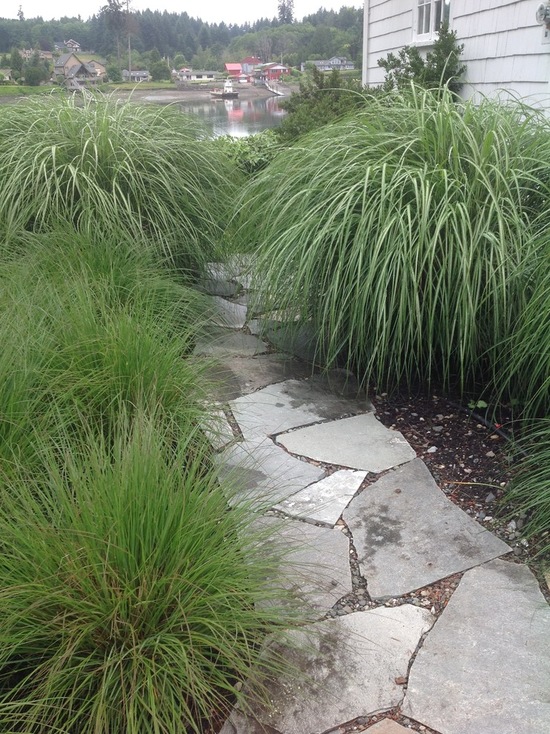
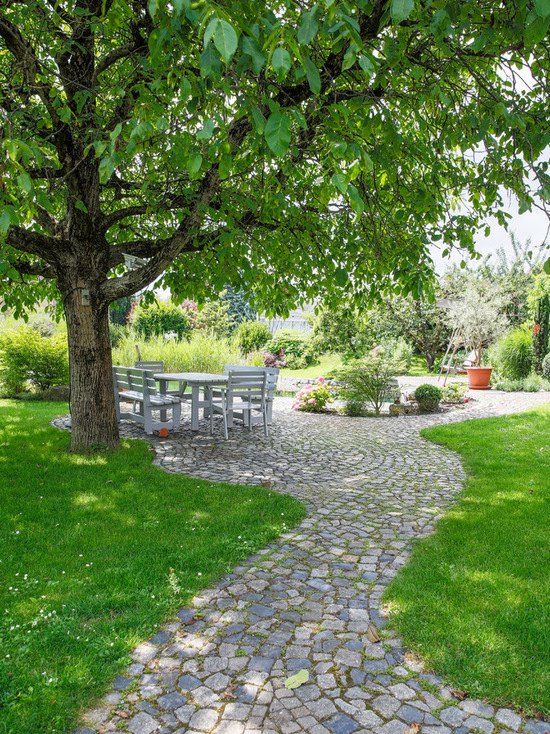
garden path paved with stones
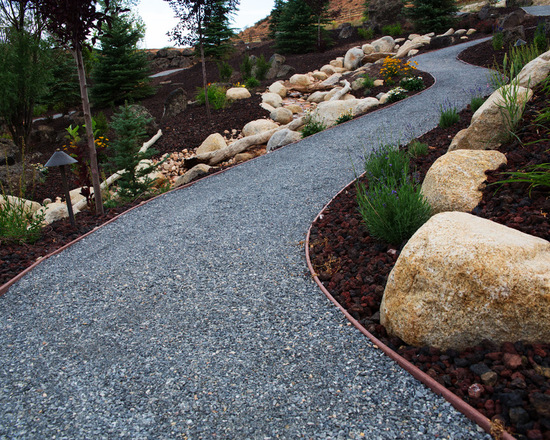
The garden path is most convenient for summer cottages located in dry places: hills and sandstones. It is a path that has a base made of any bulk material: pebbles, crushed stone, marble chips, etc. Gardeners are captivated by the simplicity of arranging such garden paths with their own hands:
- Tear off a trench, the width of which is equal to the width of the path, to a depth of 10 centimeters.
- The bottom and walls of the trench are laid out with geotextiles having a material density of 150 g / m², and the walls, in addition, are reinforced with border tape.
- After the trench is covered with prepared material.
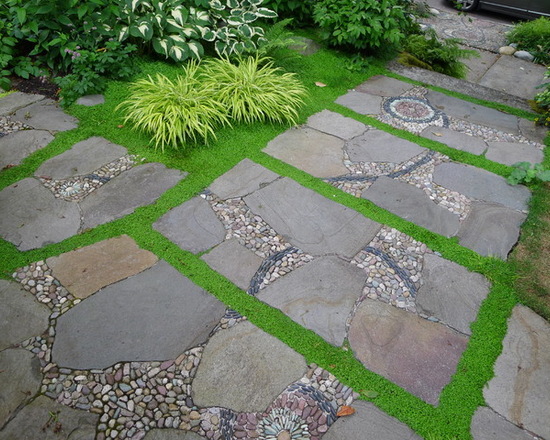
For decoration, among the backfill, you can randomly or in any sequence lay large stones or slabs, drowning them flush in the material used for backfilling.
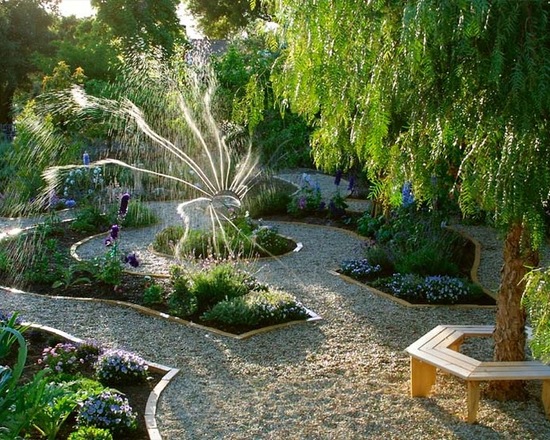
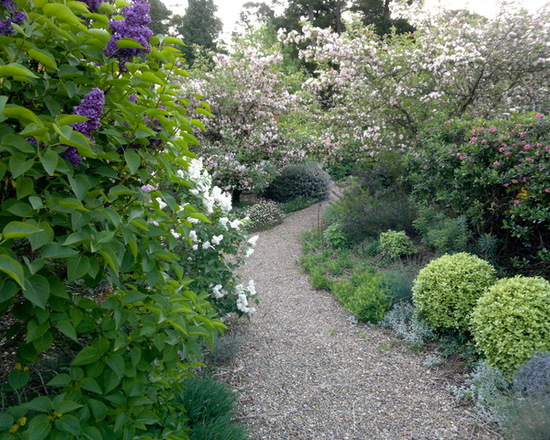
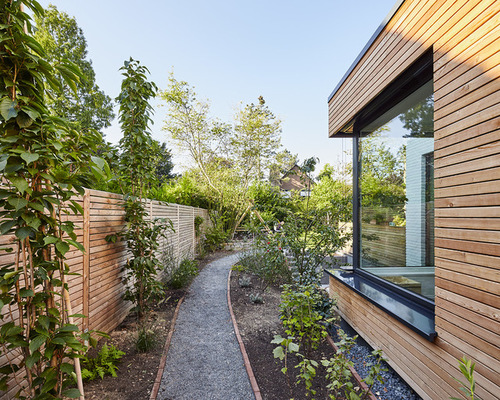
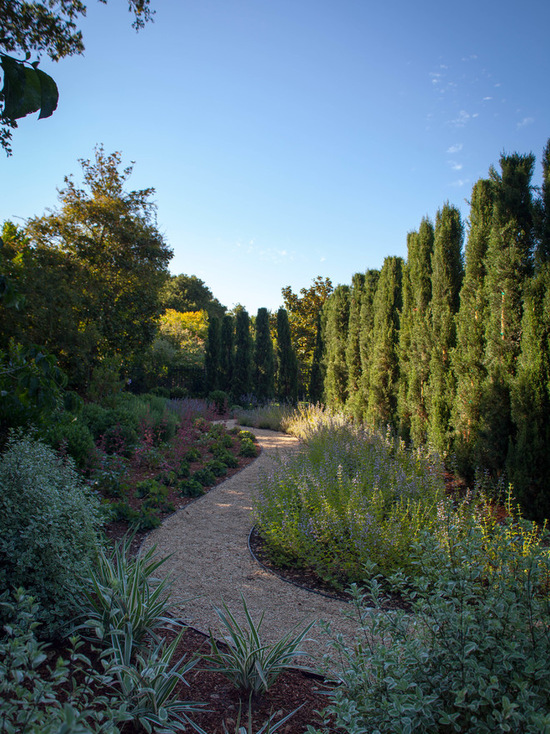
gravel path
garden path made of pebbles and artificial stone fits perfectly into landscape design
Preparation for the construction of gravel garden paths with your own hands is carried out in the same way as preparation for the construction of a garden path. The main difference is that gravel is poured into the trench. With a certain amount of imagination, you can, by choosing material of different colors, zoning the tracks or simply decorating them.
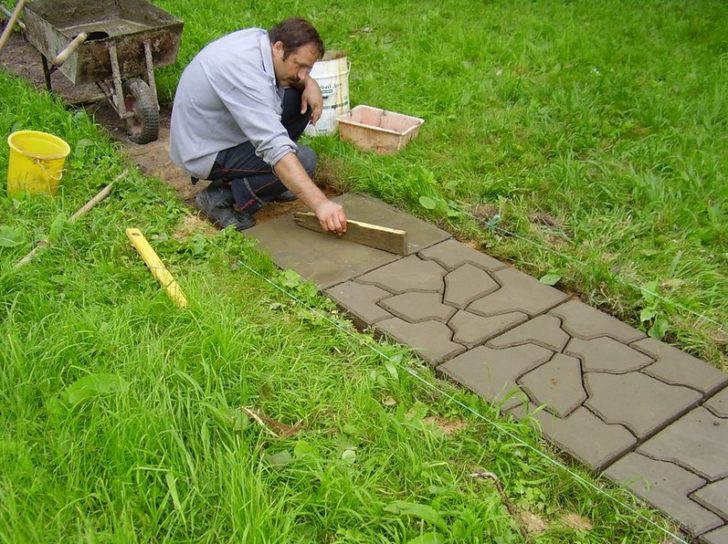
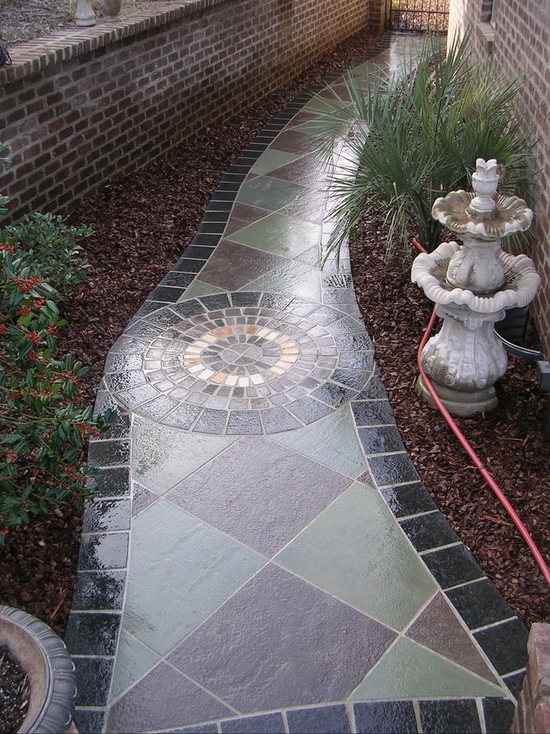
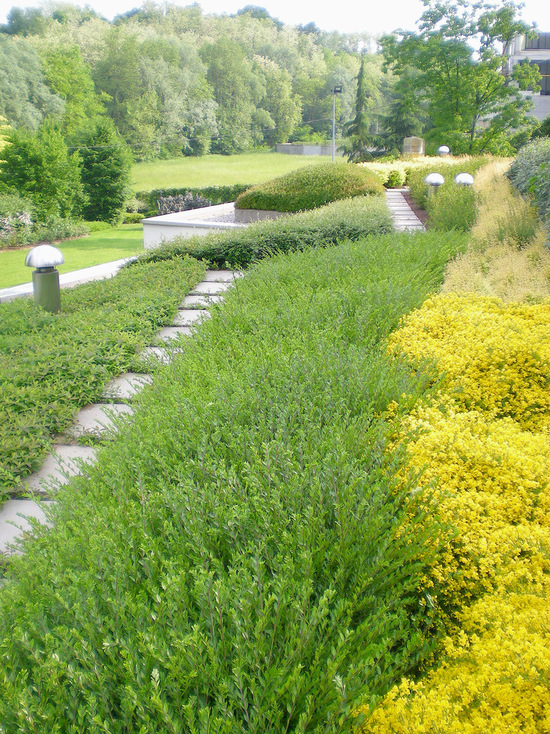
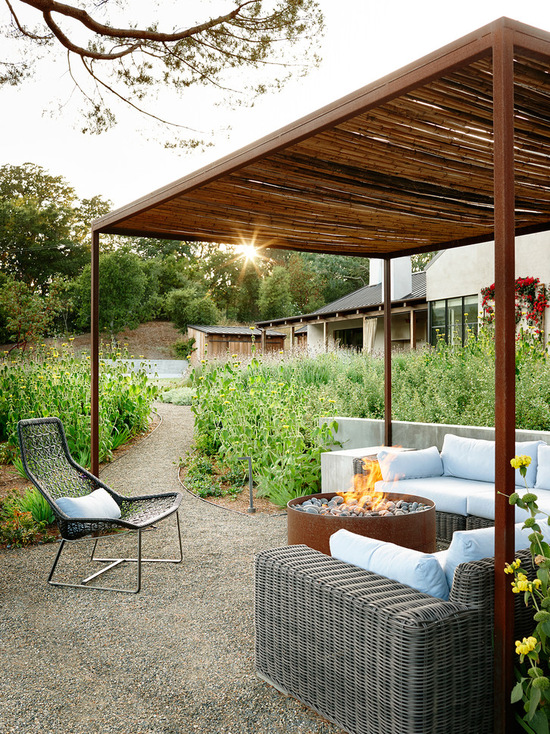
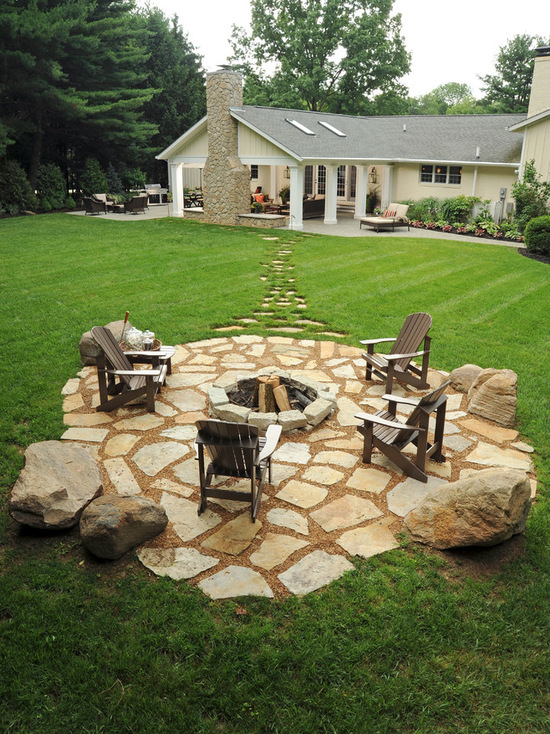
Solid fill tracks
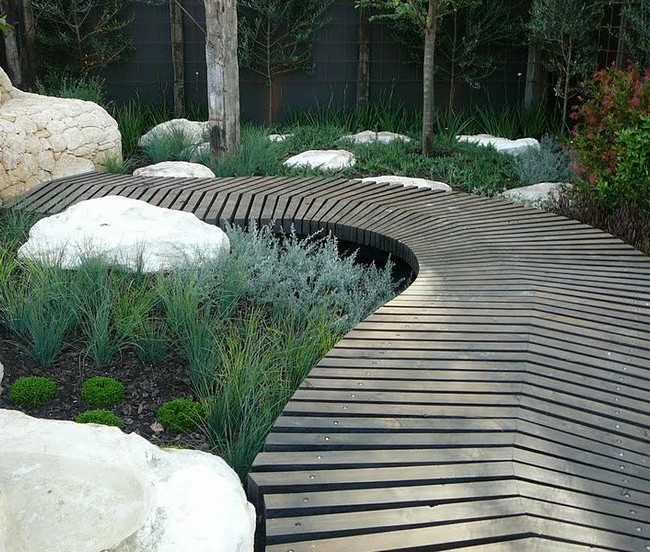
undulating bulk garden path looks great in the general landscape
These are tracks with a relatively hard surface that can withstand significant loads. They are paved over a concrete pad by laying various decorative components: paving slabs, stone, etc. To diversify the decor, use multi-colored elements. To prevent erosion of the track by rainwater, during construction with the help of wooden formwork, their level is raised to a height of 5-7 centimeters above the ground.
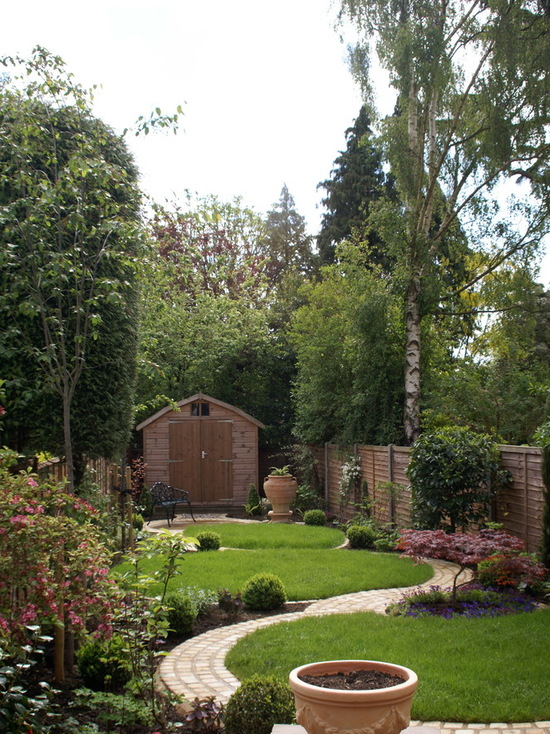
Planning the construction of garden paths with your own hands
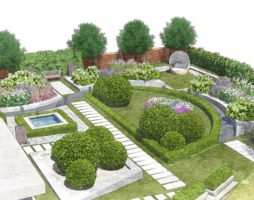
Any construction begins with a plan (project) in which the plan is prescribed, a thorough study of the site and an analysis of the influence of environmental factors on the object being built is carried out.In this case, it is necessary to take into account the density of the soil, its moisture content, the presence of flood waters, the direction of rainwater runoff. Do-it-yourself planning for garden paths is no exception to the rule.
before starting the construction phase, a plan and layout should be drawn up
Based on the analysis carried out, it is necessary to outline the direction of laying future garden paths, determine their length and width, determine the angles of inclination of the roadway for draining rain and melt water, sketch on paper their appearance and decoration method.
When designing tracks, one should not forget about the following requirements for the materials used:
- they must be as resistant as possible to the effects of precipitation, alternating temperatures, moisture, corrosive wear;
- withstand fairly significant loads without deformation, for example, the passage of a motorcycle or bicycle transport.
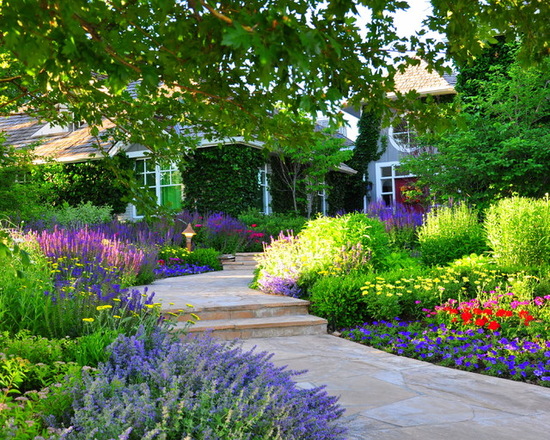
garden paths made of stone are resistant to external factors
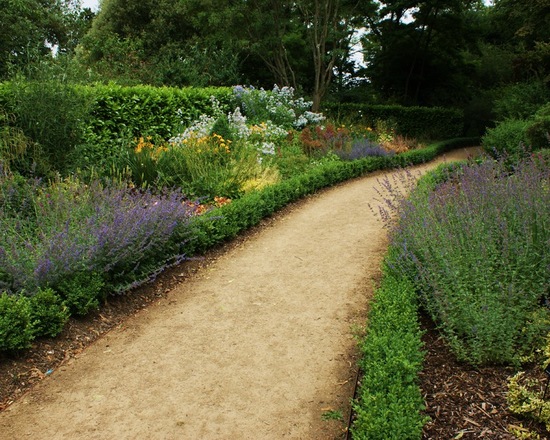
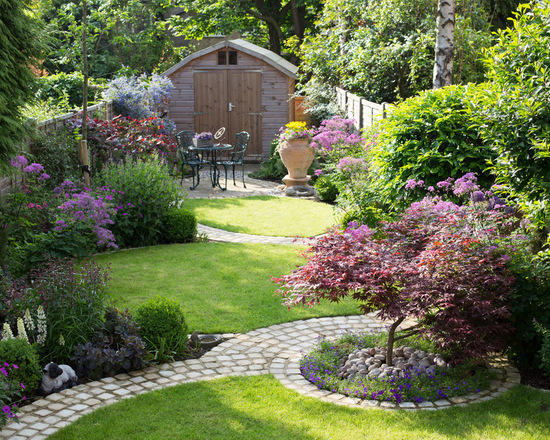
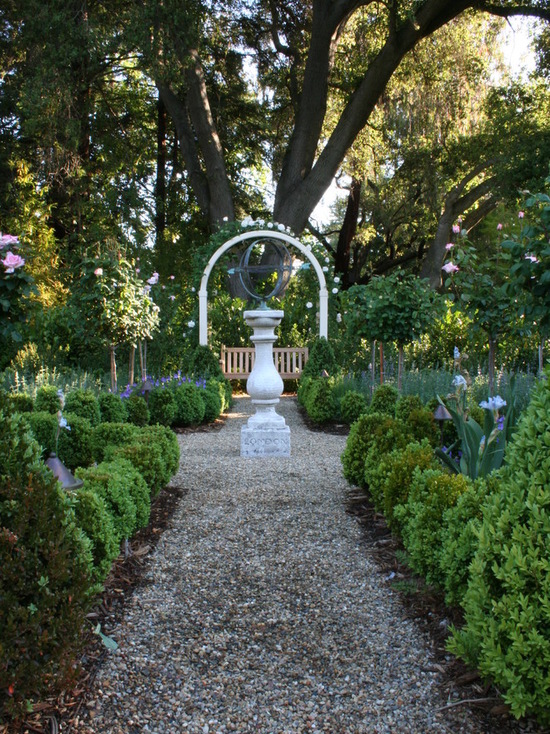
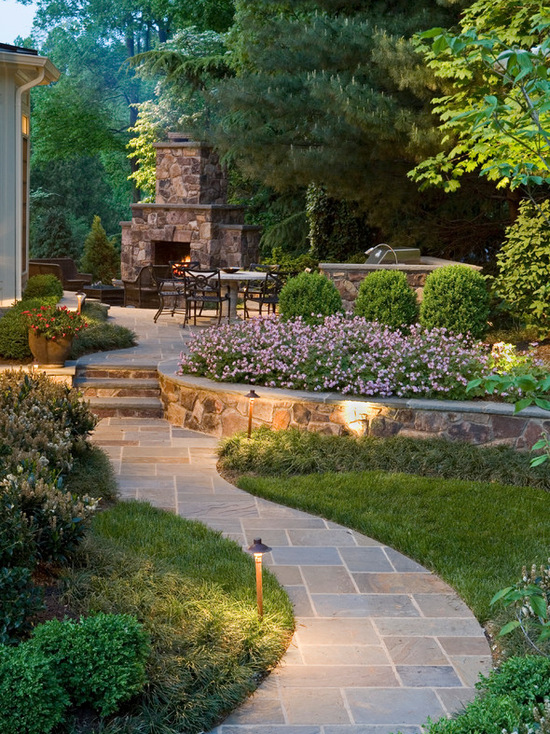
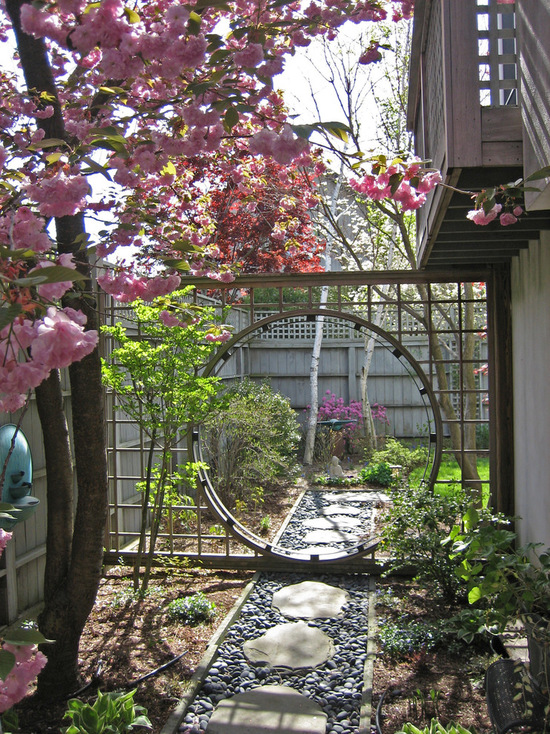
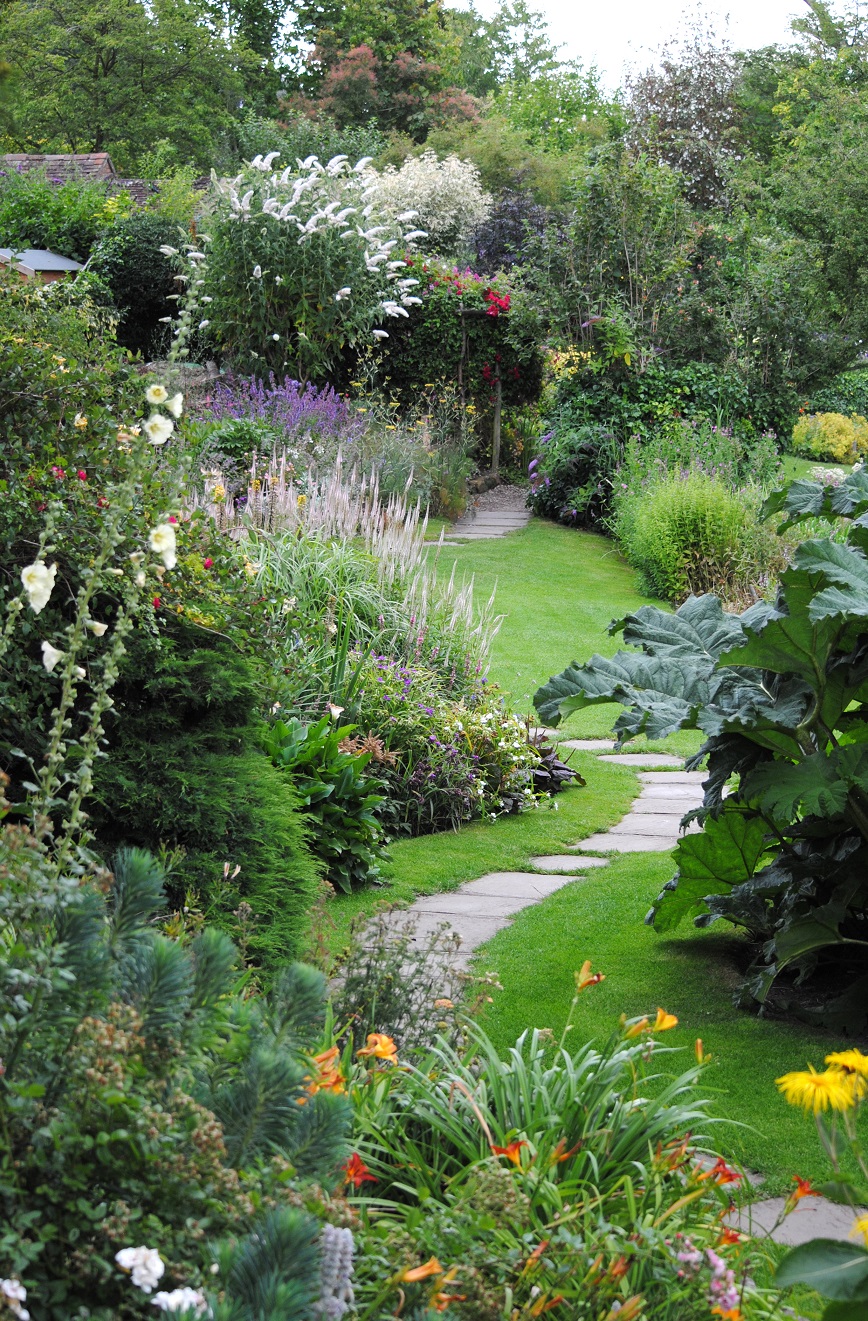
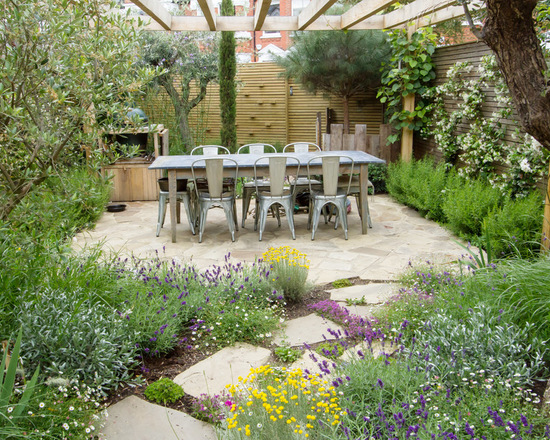
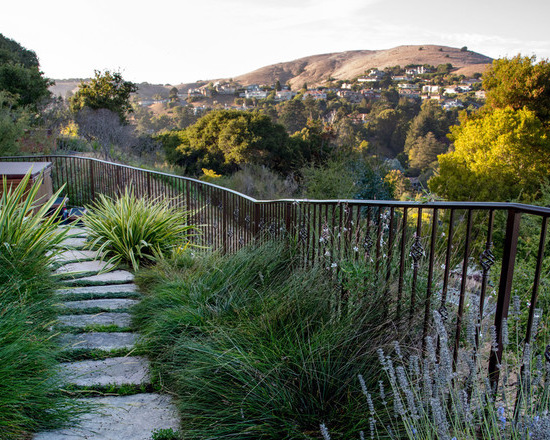
When creating your project, use the following advice from landscape designers: it is better to build not straight, but undulating garden paths. They visually increase the space and make it possible to create niches for plants.
Marking on the ground
All serious construction work begins with the binding of the project to the area, for which it performs the appropriate markup. This issue must be especially carefully approached when using a material with a clear geometric pattern, for example, ready-made paving slabs or bricks. To save the tracks applied on the site, the top layer of soil is removed.
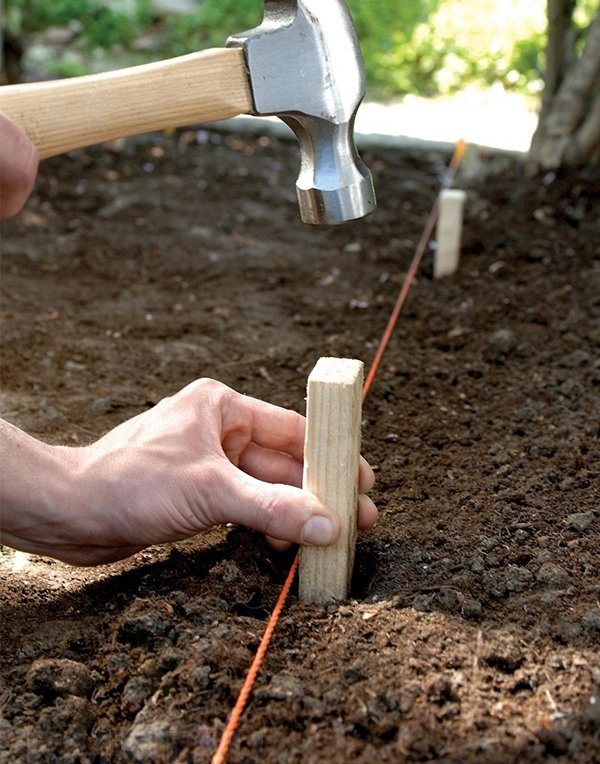
example of marking a garden path using pegs and threads
For marking, pegs are driven into the ground, between which a cord is pulled. In order to visually, on the ground, verify the correctness of the calculations made and the harmony of the resulting path, its borders along the cords are sprinkled with lime. To create a complete picture on the site, it is better to immediately, simultaneously with the paths, mark with conventional signs (tablets, stones, lime) the locations of flower beds, individual plants, garden trees. It is on the ground that the gardener will see everything as it should be in reality and, perhaps, make some changes.
formation of a garden path using ready-made forms along stretched threads
When marking, we must not forget that the trench for the track should be wider than itself, since in order to significantly increase the service life, it will be fenced with stone or concrete curbs.
After completing the markup, you can start excavation work.
DIY garden path
"The simplicity of the work performed on the arrangement of garden paths allows them to be performed even by beginners"
The construction of a garden path with your own hands can be divided into two stages:
- Foundation preparation.
- Pavement laying.
The base of the track is an analogue of the foundation of the building. It is the high-quality performance of this work that will allow the track to maintain its integrity for many years.

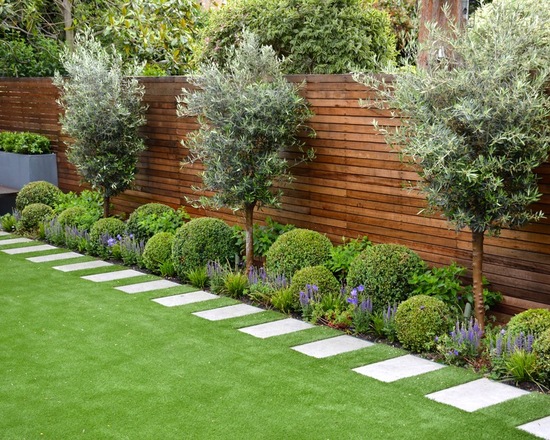
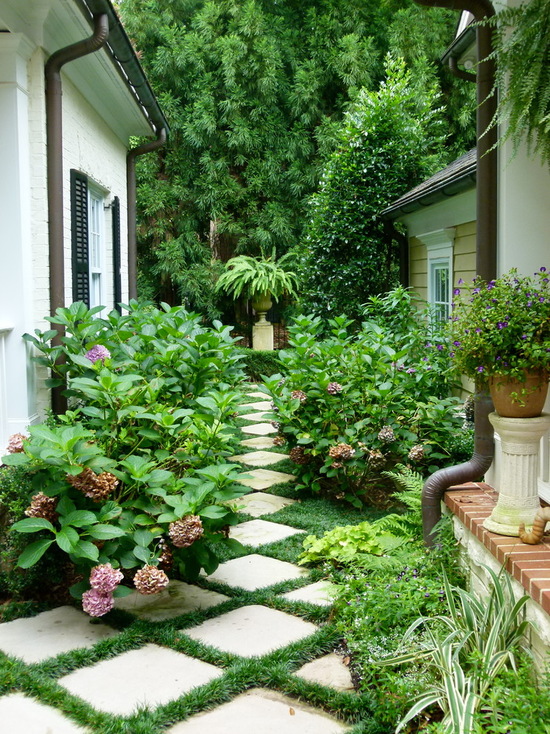
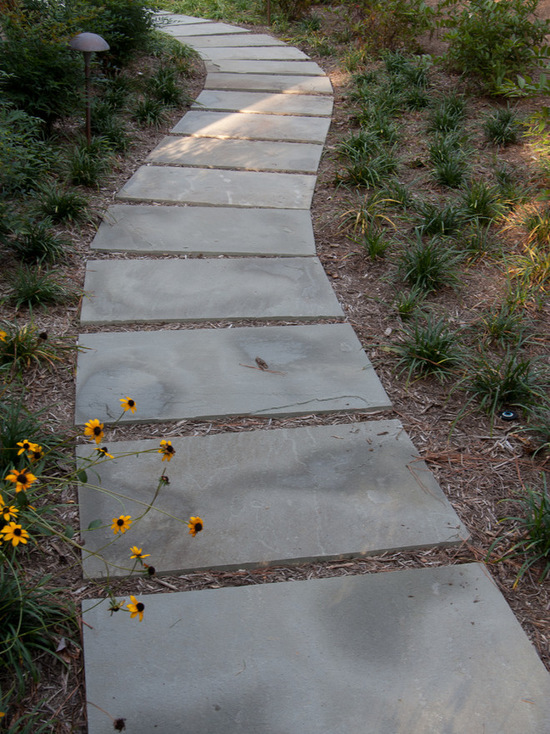
slab path in the design of a site with an artificial reservoir
According to the previously marked width and length, a trench is torn off with a depth of at least 10 centimeters, taking into account the width of the track plus an allowance for the width of two curbs. The depth of separation does not allow calling it a trench, rather it looks like an earthen trough, the bottom of which is covered with rubble to a height of 3 centimeters, which is carefully rammed with the help of special devices. A layer of fine gravel wakes up from above, which is covered with a pillow of sand.
The builder approaches the stage of laying the roadway, already having yellow sandy paths throughout the site. The elements of the coating - and these are tiles, stone, bricks, other materials - are rammed and adjusted to each other with a rubber mallet. A sealant is poured from above - sand, which fills the cracks and gaps. Excess sand from the coating is swept away.
paving slabs - an excellent material for garden paths
The simplicity of the work performed on the arrangement of garden paths allows them to be performed even by beginners. The main thing is to turn on your imagination, show patience, and then the summer cottage will become an object of pilgrimage for neighbors.
Materials used in construction
“A gardener who equips garden paths with his own hands can use any improvised items: boards, saw cuts, river pebbles, stones, plastic bottles”
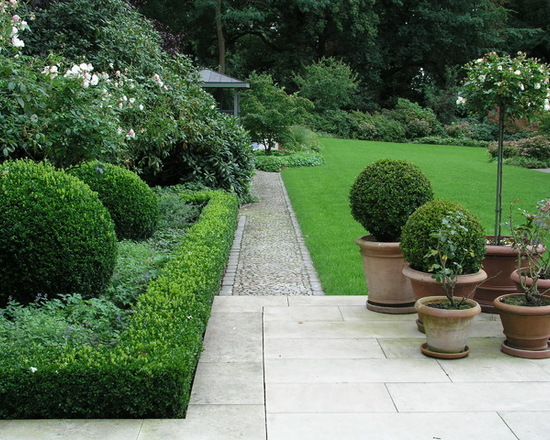
Options for arranging garden paths in the country are a matter of taste and wallet for each author. But, in spite of everything, we must not forget about the mandatory formation of a quality foundation for the future sidewalk, on which you should not save.
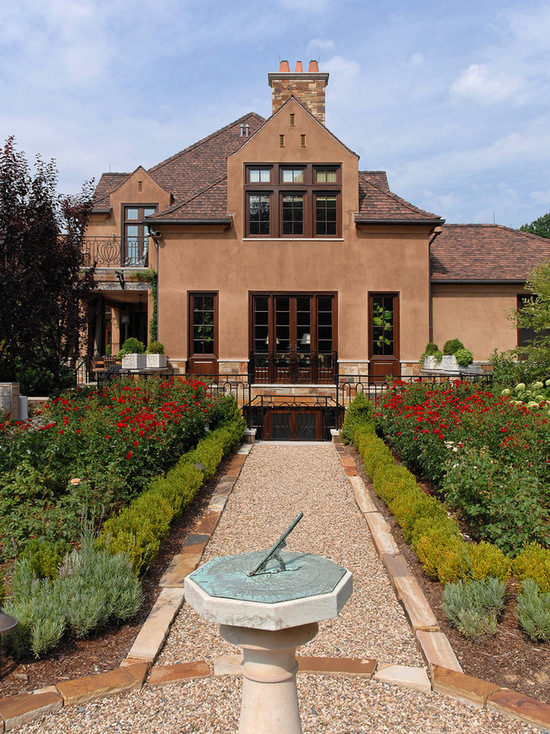
granite garden paths are suitable for houses and landscapes in a simple classic style
The most popular paving materials are:
- natural stone - a clot of solidity and nobility;
- artificial stone - a faceted analogue of natural;
- brick - will give the possibility of multi-colored design;
- the uniqueness of the path will give the use of pebbles or gravel;
- wood is the most accessible, effective, but, alas, short-lived material;
- plastic garden parquet - decking, extremely resistant to adverse factors.
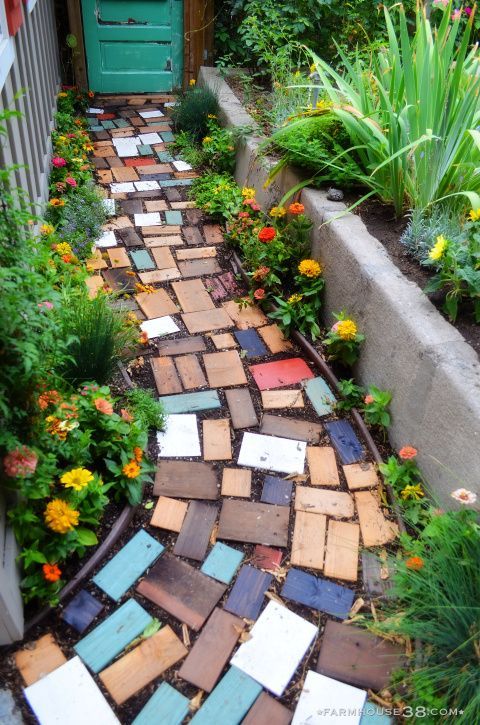
The exclusive appearance and decorativeness of the construction completely depend on the author's imagination, who, by varying the ways of laying, can give it a solid even texture or lay out the pavement in the form of some patterns.
combined garden path made of wood and pebbles
A gardener who equips garden paths with his own hands can use any improvised items: boards, saw cuts, river pebbles, stones, plastic bottles.
Below are options for using improvised materials.
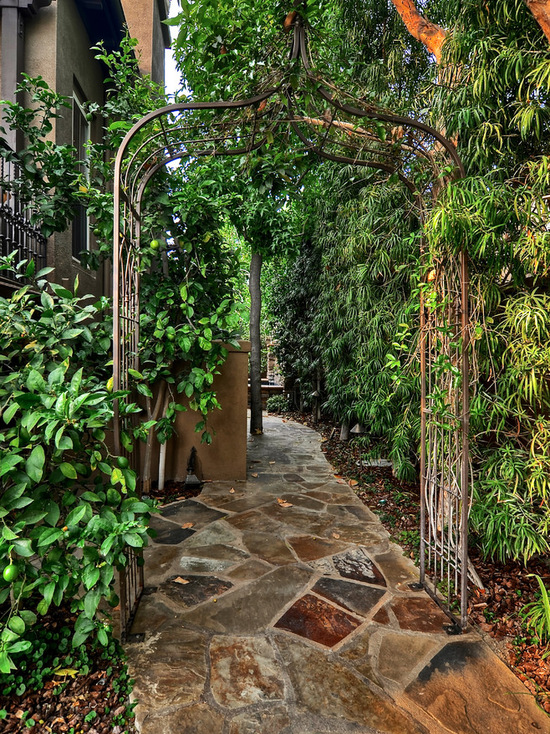
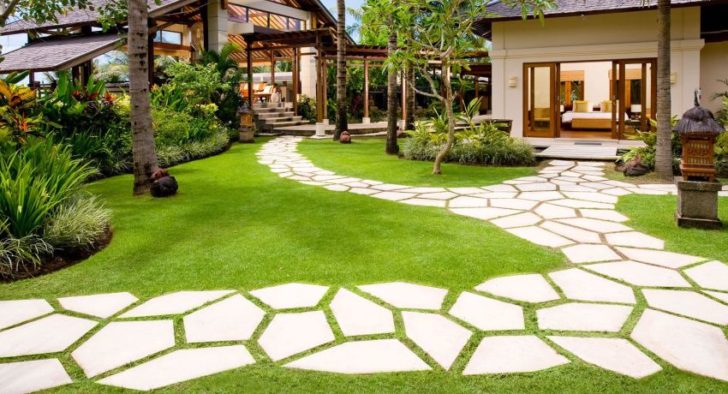
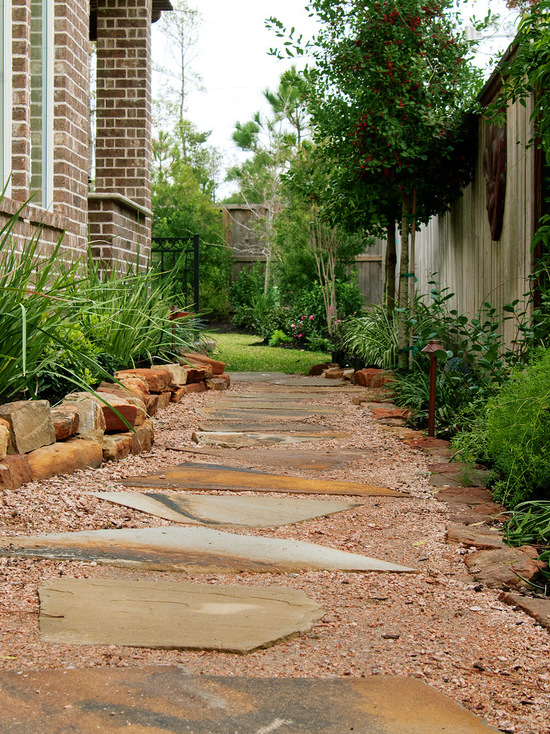
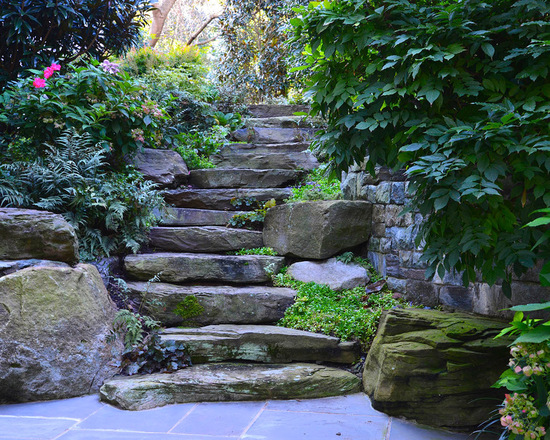
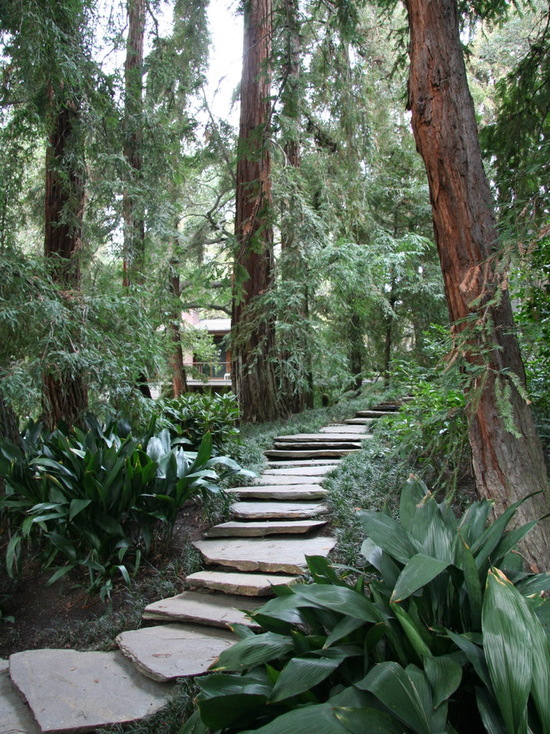
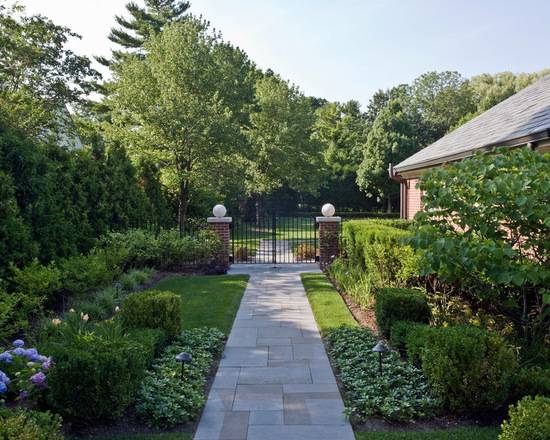
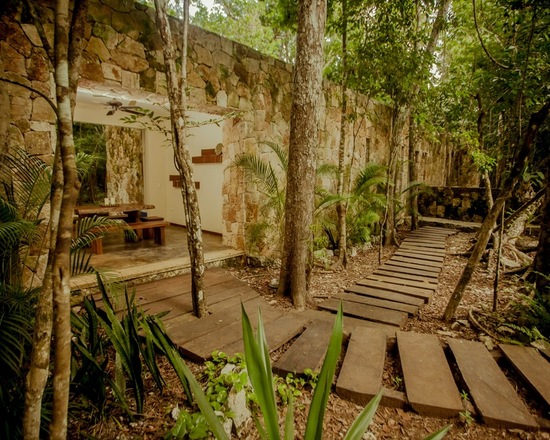
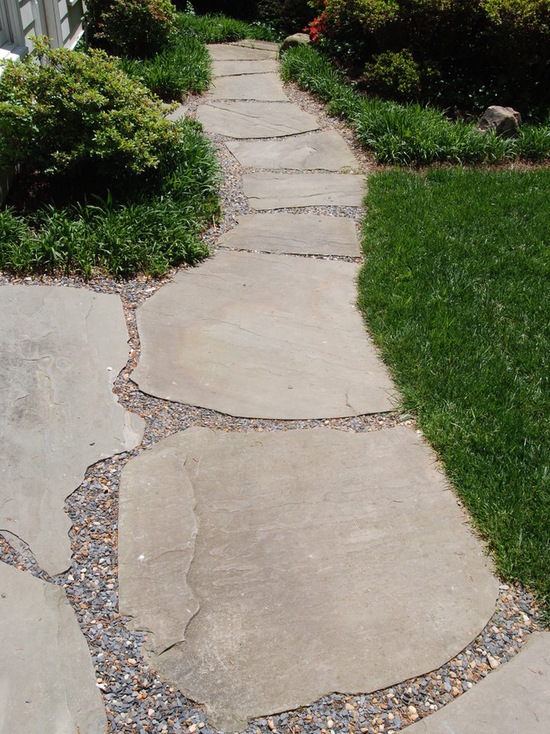
A natural stone
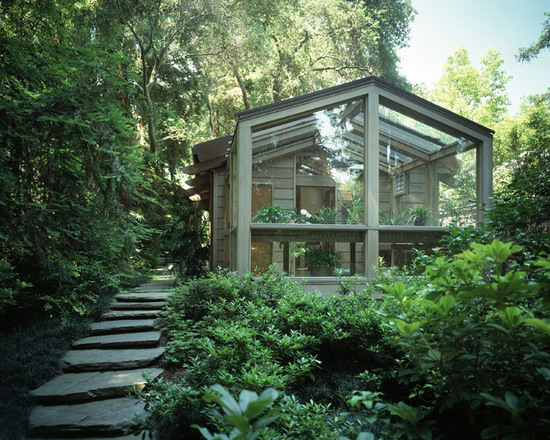
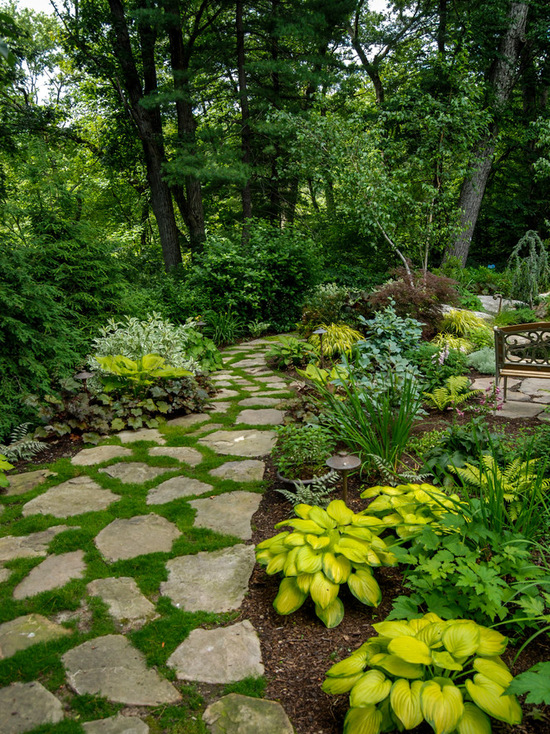
The tracks from it will harmoniously fit into the design on any site, and will look very impressive and presentable. With the observance of laying technologies, hand-paved garden paths can honestly serve several generations.
small stone path in garden landscape design
Stones are collected at construction sites: for example, a lot of suitable material remains after the construction of alpine slides. Possessing chaotically broken, uneven edges, stones are the best material for building a natural path that winds picturesquely among garden shrubs and trees.
The most difficult thing is to find, collect and deliver the required amount of building material to the site. After delivery, you need to carry out a rough layout of the stones, which will allow you to estimate their number and create the necessary mosaic pattern. Further, with the help of an angle grinder, the stones are processed for a more thorough fit to each other, as well as grinding the upper side of the stone to a flat state.
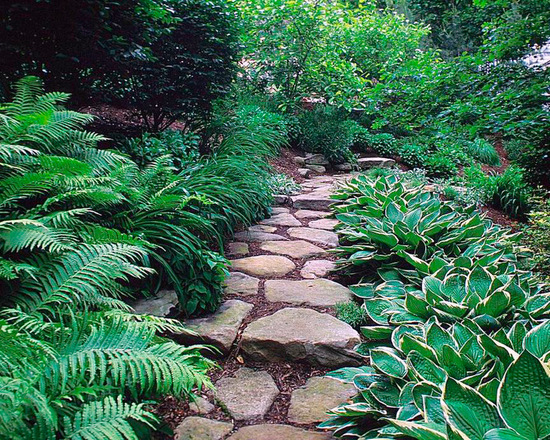
stone garden paths look presentable
Having created a pillow of sand and carefully compacted it, with the help of a rubber mallet, stones are laid. Having laid out the entire path, they begin to grout the joints with a cement-sand mortar.
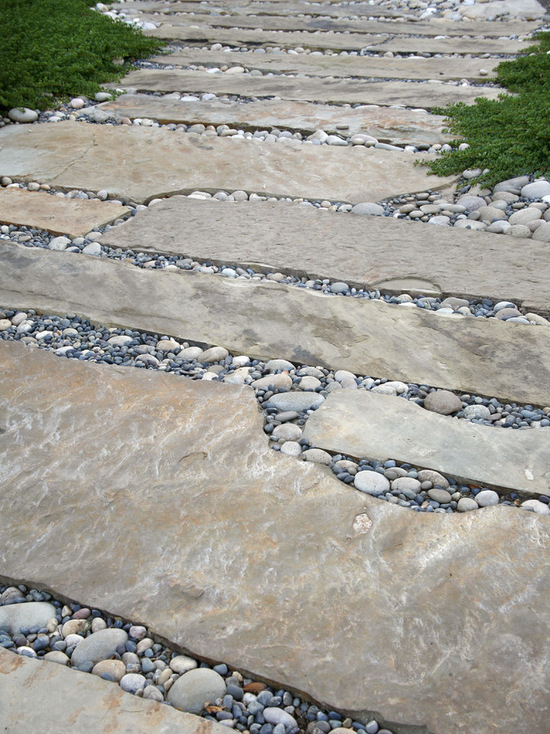
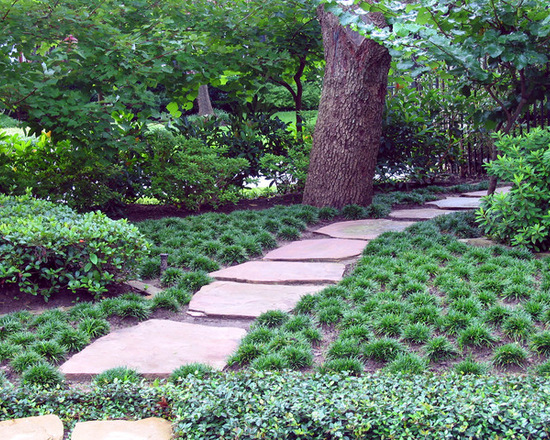
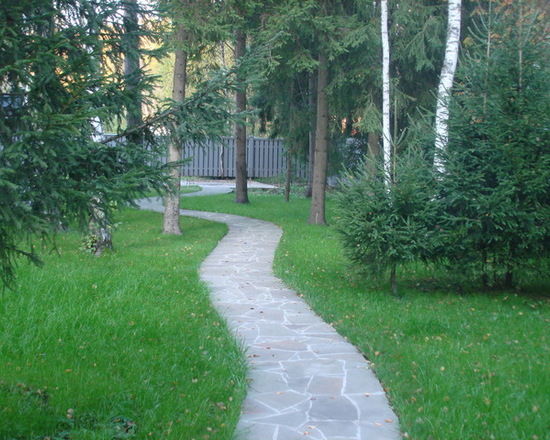
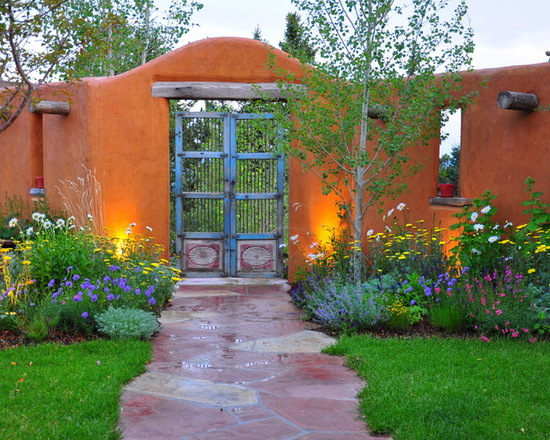
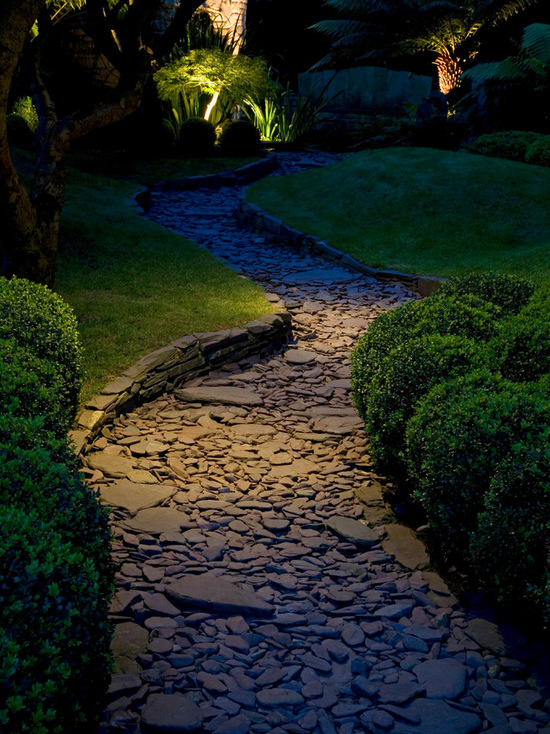
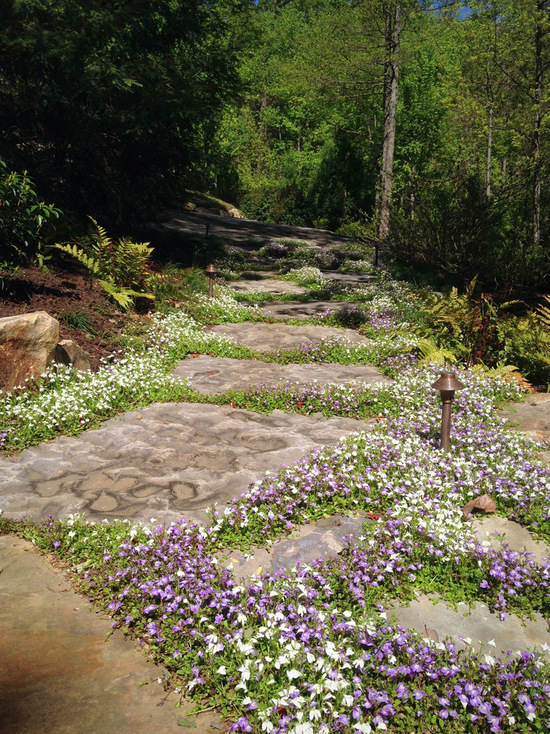
sandstone path
For the construction of such garden paths, stones are either laid dry, which is similar in technology to laying stone paths, or cement pouring is used.
For laying by cement pouring, sand is poured into a previously dug earthen trough, after which it is rammed. Moreover, the middle part of the embankment should be above the edges, which will subsequently allow water to drain from the center to the edges of the track.
sandstone garden path
Then proceed to the processing of sandstone. It, like an ordinary stone, comes in a variety of shapes and sizes, therefore, before processing, each stone must be tried on in place and, after processing with a grinder, to minimize the size of the gap between the elements.Under each stone, a solution of the mixture with cement is poured onto a sand cushion in such a way that the cement protrudes slightly beyond the boundaries of the cushion. The laid stone is pressed tightly to the surface. After laying several sandstones in this way, the masonry is washed to remove cement residues. Seams are filled with sand or soil.
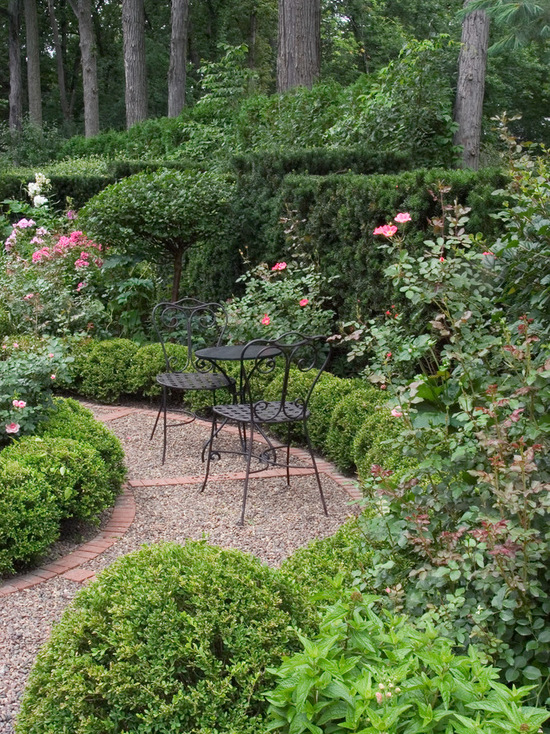
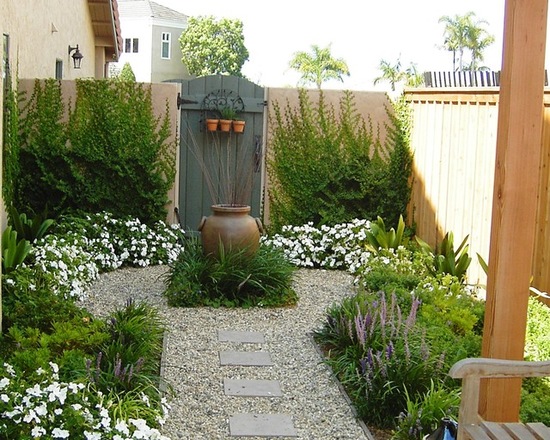
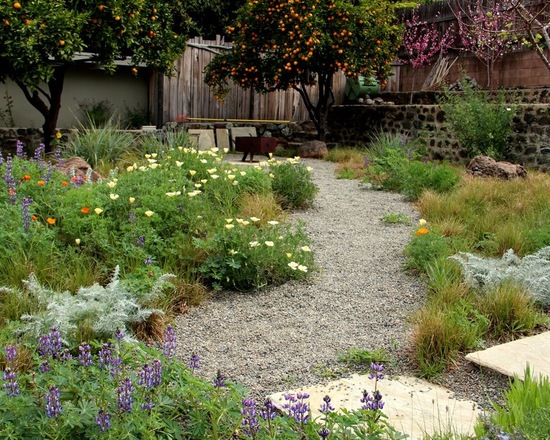
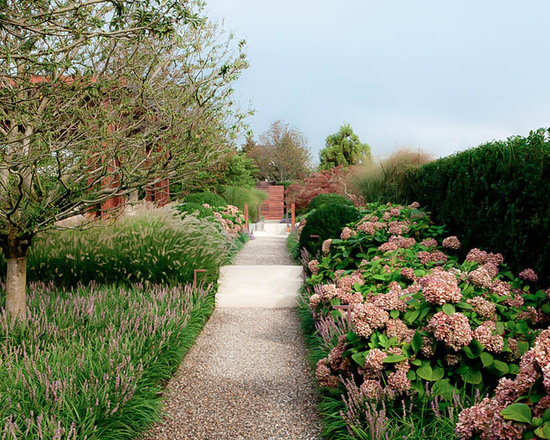
gravel path
These are pretty neat garden paths that harmoniously fit into almost any design, which are easy to do with your own hands. Gravel is a natural material with good flowability. It consists of small pebbles with a diameter of up to 5 millimeters. Because of its rounded shape, gravel is permeable to moisture and is relatively cheap.
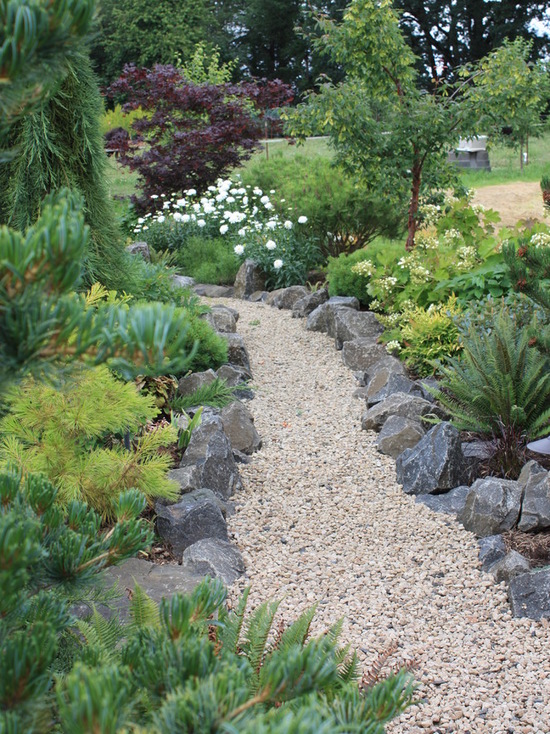
gravel garden paths can be arranged independently
Gravel pavement technology:
- Carrying out marking on the site with the help of pegs and a cord.
- Preparation of an "earthen trough" with a depth of 14 - 17 centimeters.
- Gravel preparation - removal of foreign objects, the largest stones, selection by color.
- Backfilling gravel into a trench and leveling it with a rake, as well as gloved hands.
- Careful compaction of the laid gravel.
- Laying a curb stone just above the gravel level, fixing it with cement mortar.
Sand paths are made in the same way.
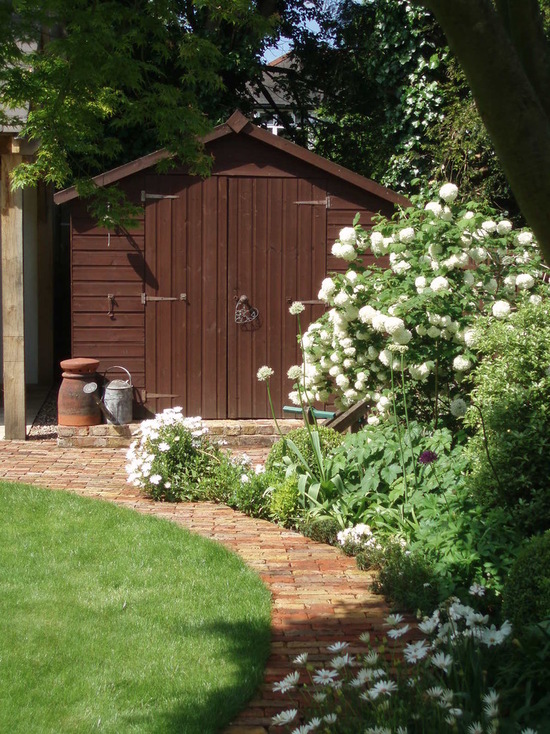
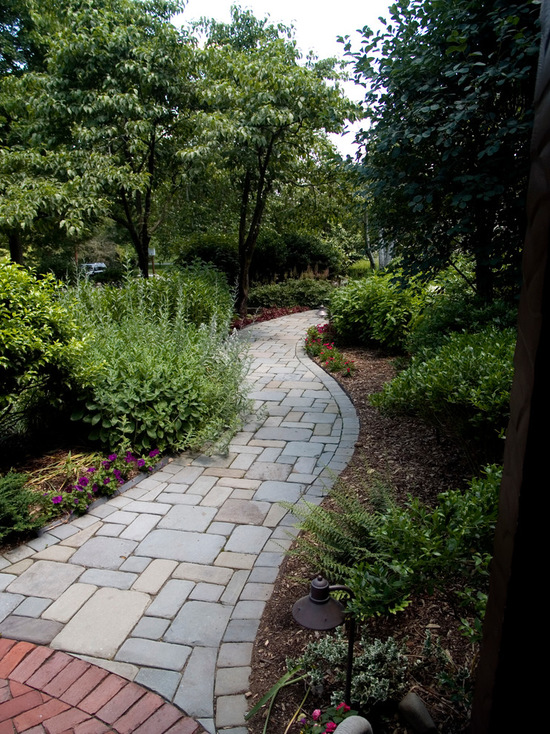
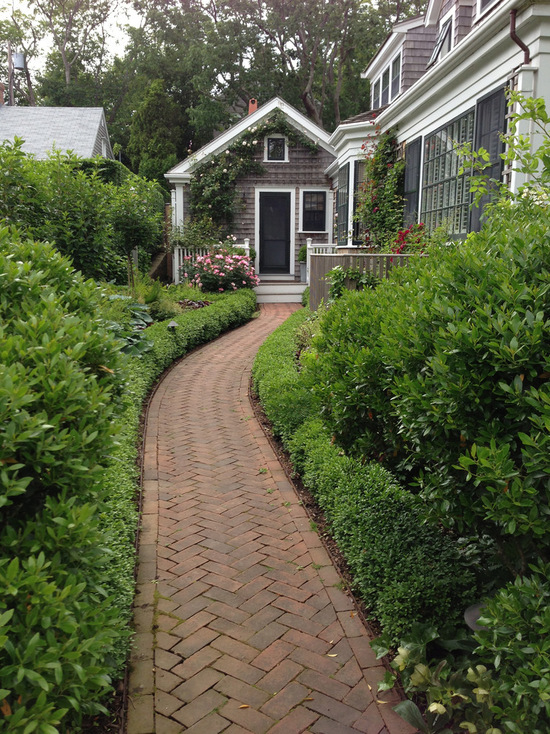
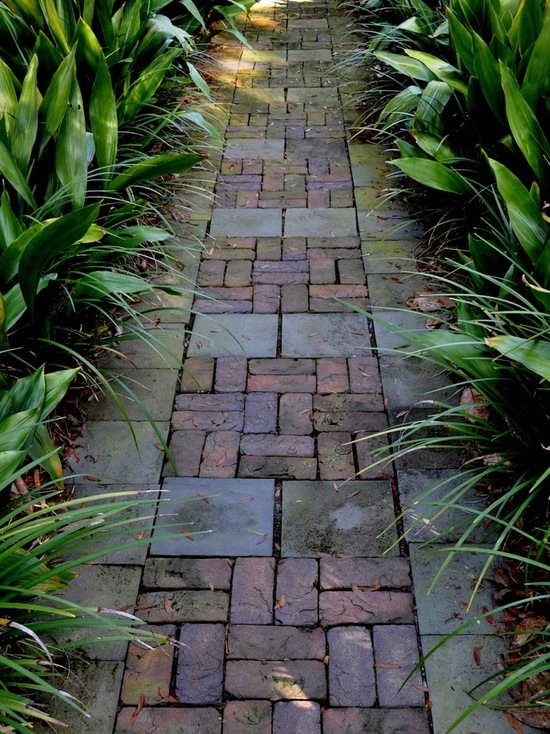
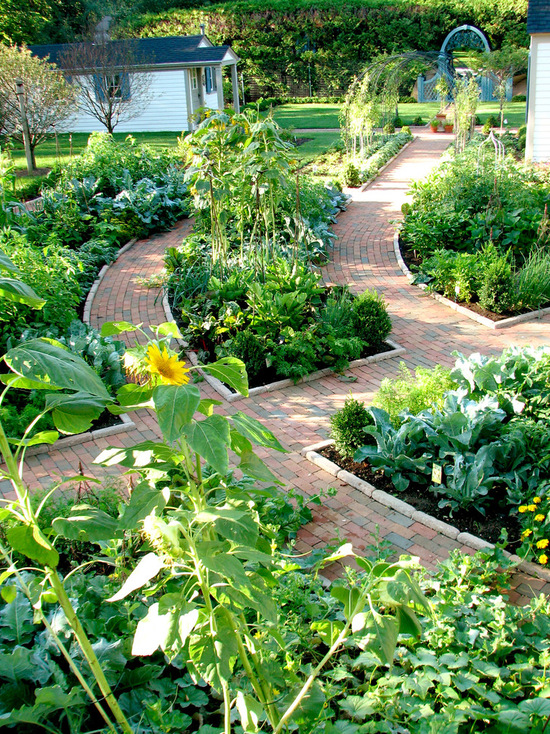
Brick garden paths
Brick, despite its hardness, is a very fragile material, so each copy needs to be checked for strength before laying.
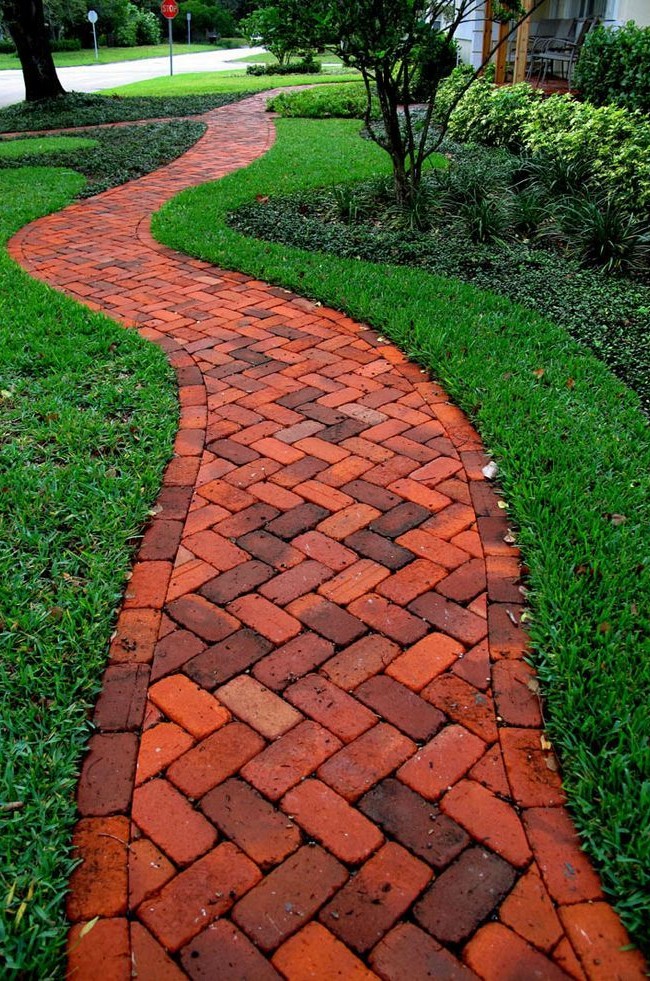
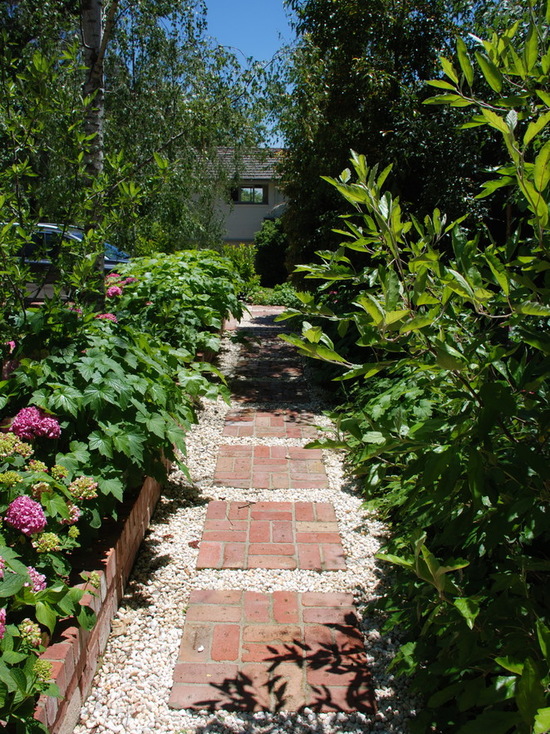
red brick garden path
Similarly, with the help of pegs and a cord, the site is marked. Next, the soil is removed to a depth of 25 centimeters. The bottom of the "earthen trough" wakes up with drainage. Along the edges of the path, boards are laid sideways to prevent the spillage of rubble, which is poured over the drainage, after which a brick is laid on top.
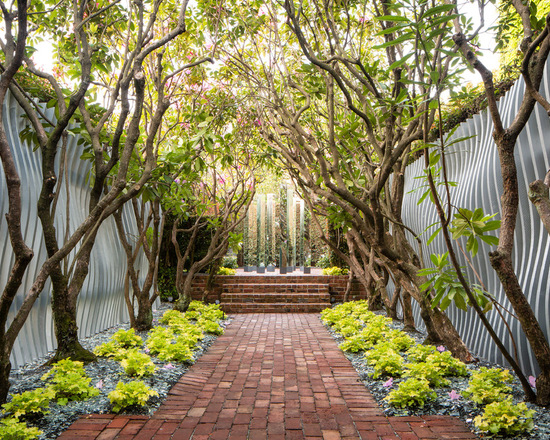
brick is hard but not durable material
Using different colors of bricks, you can build interesting decorative compositions. When arranging brick garden paths, a huge number of decoration options are available: from a simple combination of colors to the use of broken bricks and brick chips along with other materials..
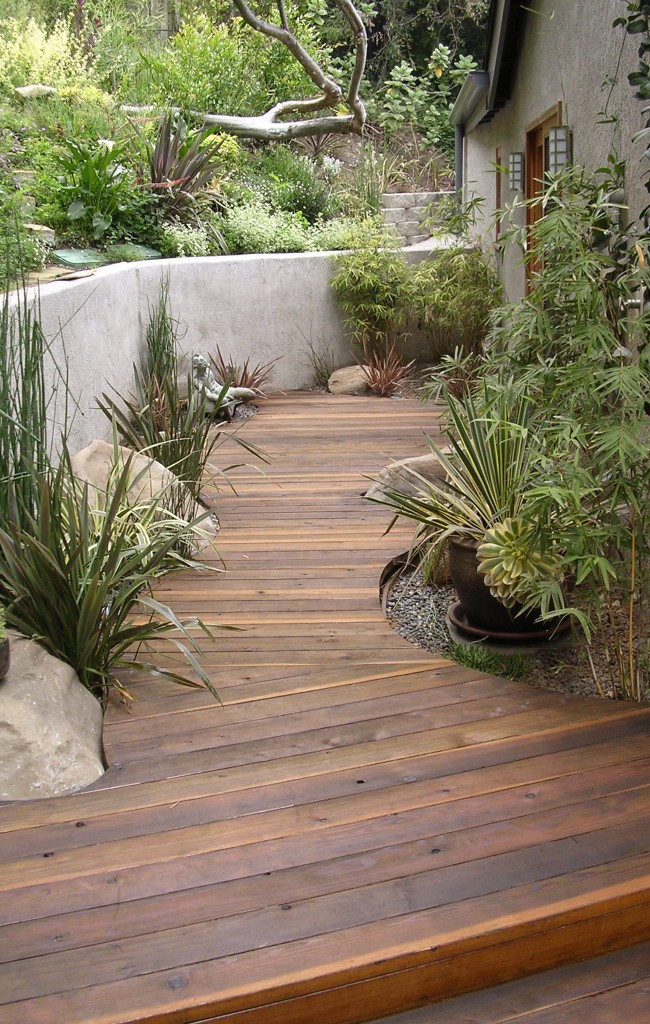
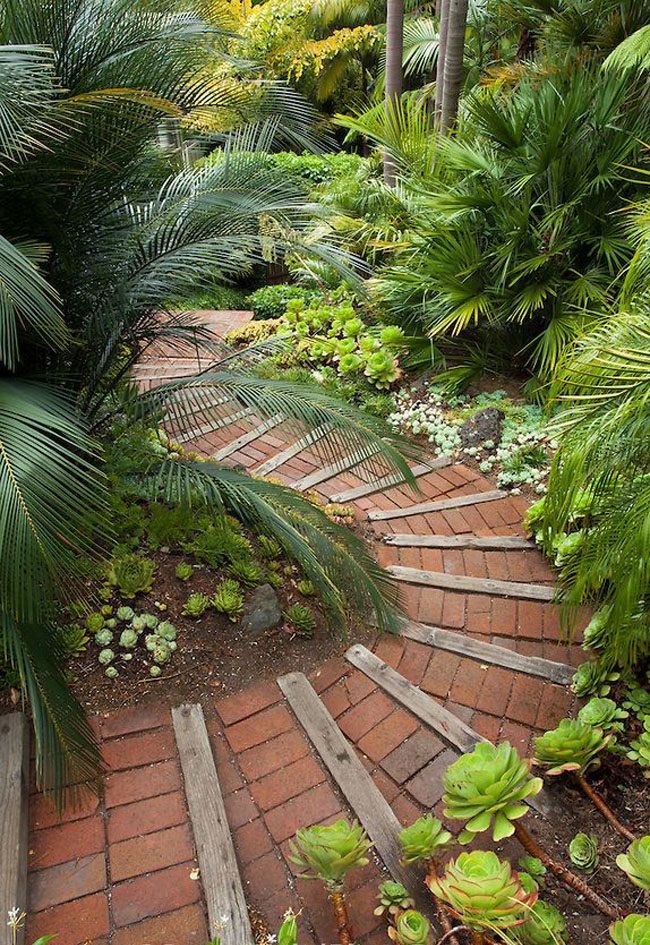
wooden walkways
Sidewalks made of wood look very good. This is the most budget option, as it allows you to use wooden products left over from building a house. However, their service life is significantly inferior to other materials. To prolong the life of wooden paths, it is necessary to carry out a series of manipulations with the wood in order to repel insects and make the tree more moisture resistant. For example, treat them with protective impregnations, bituminous mastic, and finally, used engine oil.
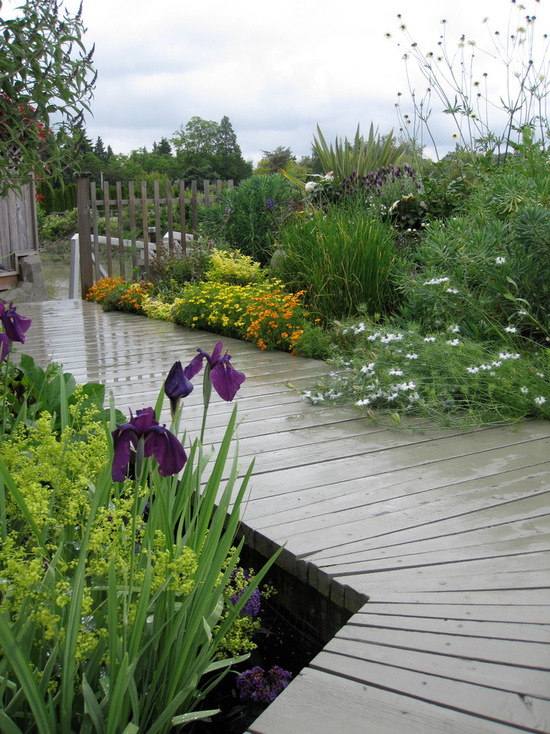
wooden garden paths
The easiest way to build wooden garden paths with your own hands is to install walkways from boards nailed to the bars. For beauty and to extend the service life, the walkways can be painted.
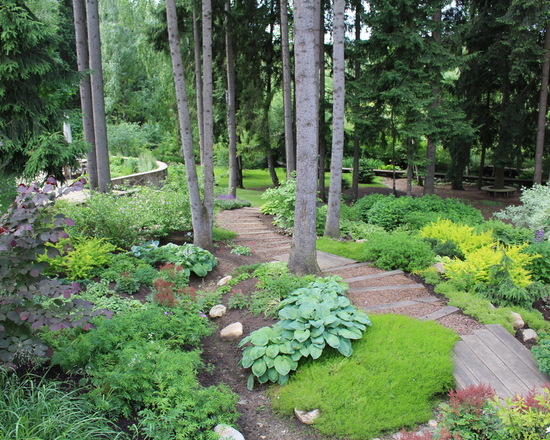
Round log path
Round logs are wooden cylinders that are obtained by cross-cutting logs. The saw cut is carried out very carefully, since the saw cut surface must be perfectly flat. If necessary, the upper part is additionally polished. To reduce the gaps between the round logs in the manufacture of the sidewalk, logs of different diameters are used. The height of the round timber should be about 20-26 centimeters.
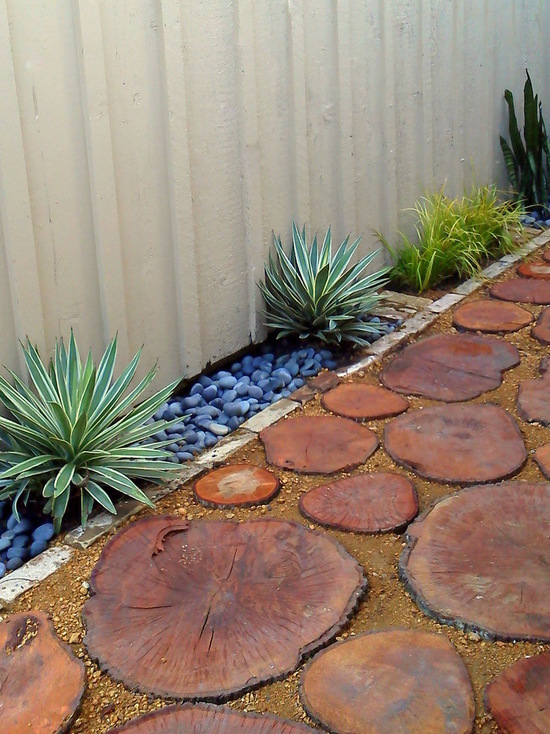
a garden path made of round timber brings a twist to the overall concept of landscape design
Option number 1
Before installation in a pit previously dug and covered with rammed gravel, the wood is treated with an antiseptic that protects against microorganisms and ground moisture, for which it is dipped into a container with the preparation for several minutes. The rest of the surface is treated with a brush.
After processing, the workpieces are thoroughly dried.After drying, the lower part of the stumps is dipped for a few seconds in “Kuzbass varnish” or heated bitumen, creating additional waterproofing of the wood.
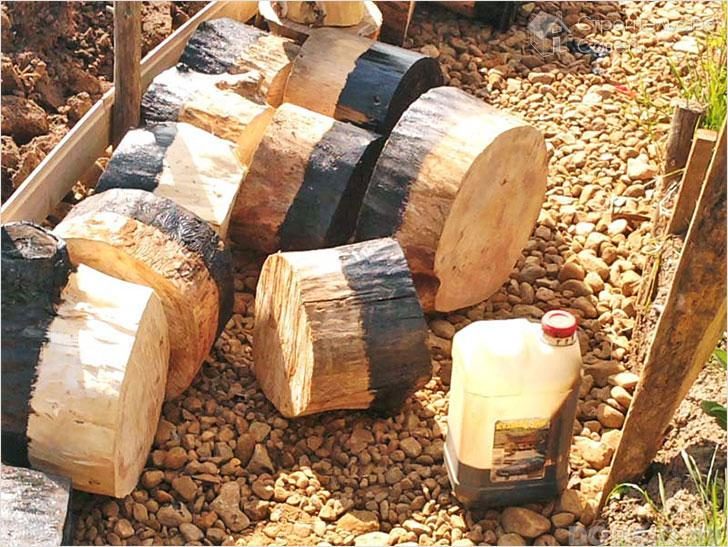
before laying, the round timber is treated with an antiseptic
After completing all the preparatory procedures, proceed to the arrangement of garden paths:
- at the beginning of the path, a little sand is poured near the transverse wall of the trench;
- tightly install the first row of round timber, pre-selected in size, so that the upper edge of the stumps rises about half above the ground level;
- sand is poured into the remaining cracks to the ground level;
- similarly put the next row of round timber;
- the procedure is repeated until they reach the end of the pit, where the sand boundary is rammed.
Option number 2
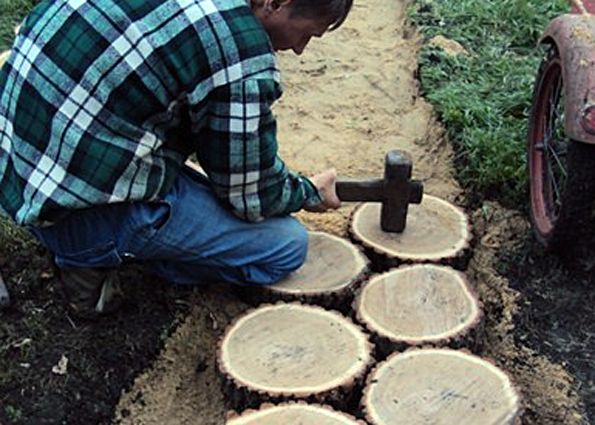
installation of round timber
During the construction of the path, crushed stone or gravel is poured instead of sand, while round timber is used only as a curb. All stages of work are exactly the same as when building garden paths with a stump work surface with your own hands.
The technology is as follows:
- the bottom of the pit is covered with sand, which is carefully rammed;
- logs are tightly installed along the edges of the trench and sprinkled with sand, which is tamped at the base;
- the entire surface of the track is covered with geotextile, the edges of which are laid on round timber to a height of up to 10 centimeters;
- medium-sized gravel or crushed stone is poured onto the geotextile, which is evenly distributed over the entire path at ground level. The material is, on the one hand, a road surface, and on the other, a support for a curb made of round timber;
- the upper cut of the round timber, if desired, is covered with paint.
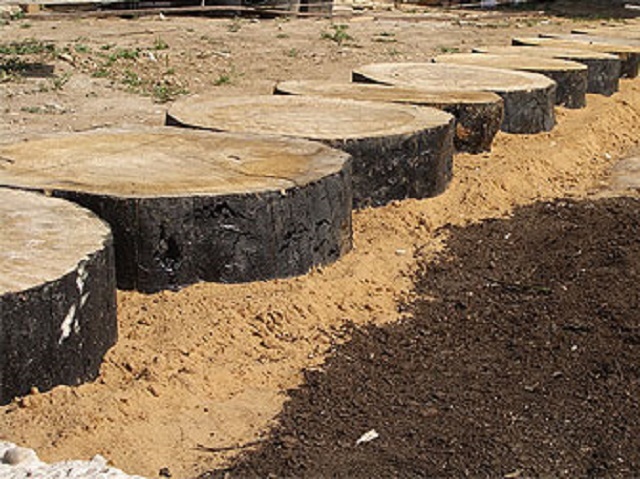
after laying the round timber, the area can be covered with gravel or crushed stone
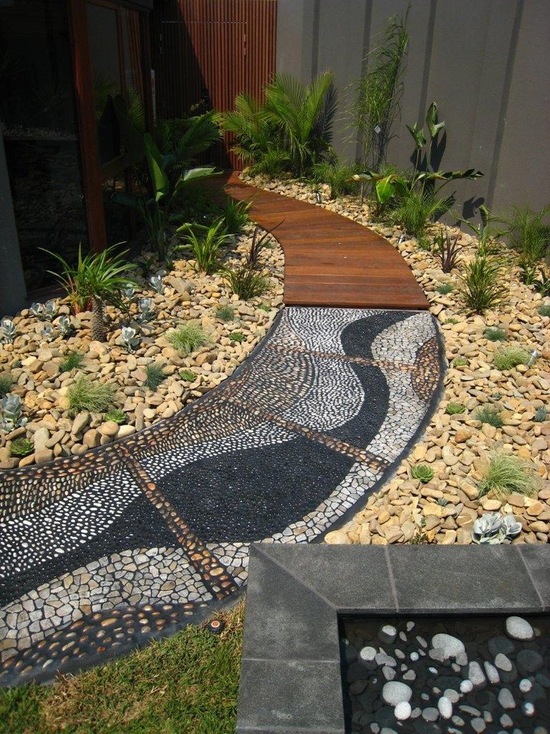
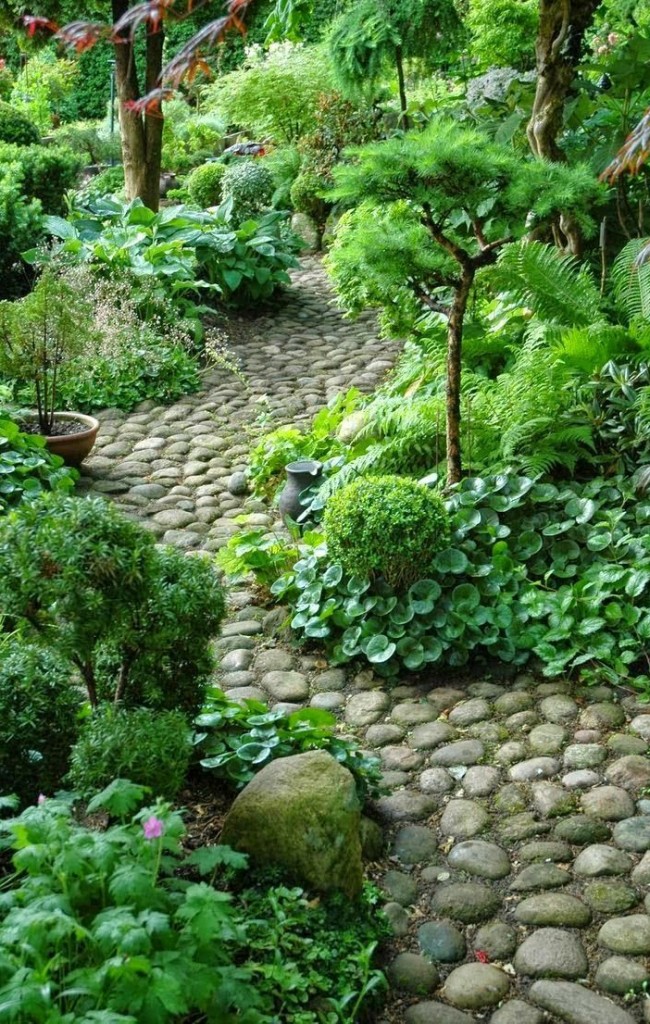
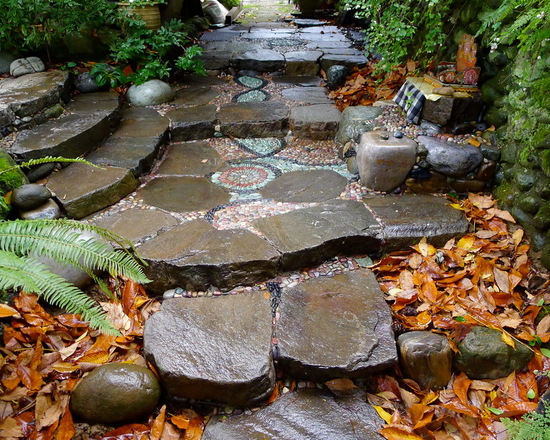
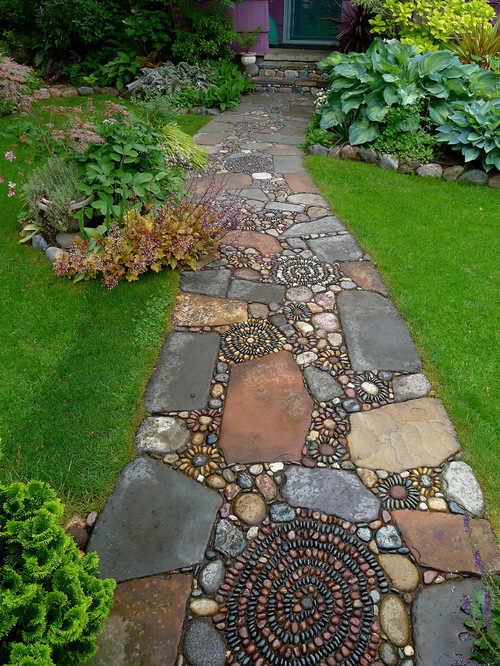
Pavement made of round river stone
Very beautiful paths are obtained when using Altai river stone for garden paths. This decorative element has surprisingly beautiful shades, from light gray to gray-blue, has a rounded shape, smooth to the touch.
For the manufacture of the sidewalk you will need:
- the required number of different-sized stones;
- clean sand;
- rubber mallet - mallet;
- cement;
- sponge;
- level;
- water.
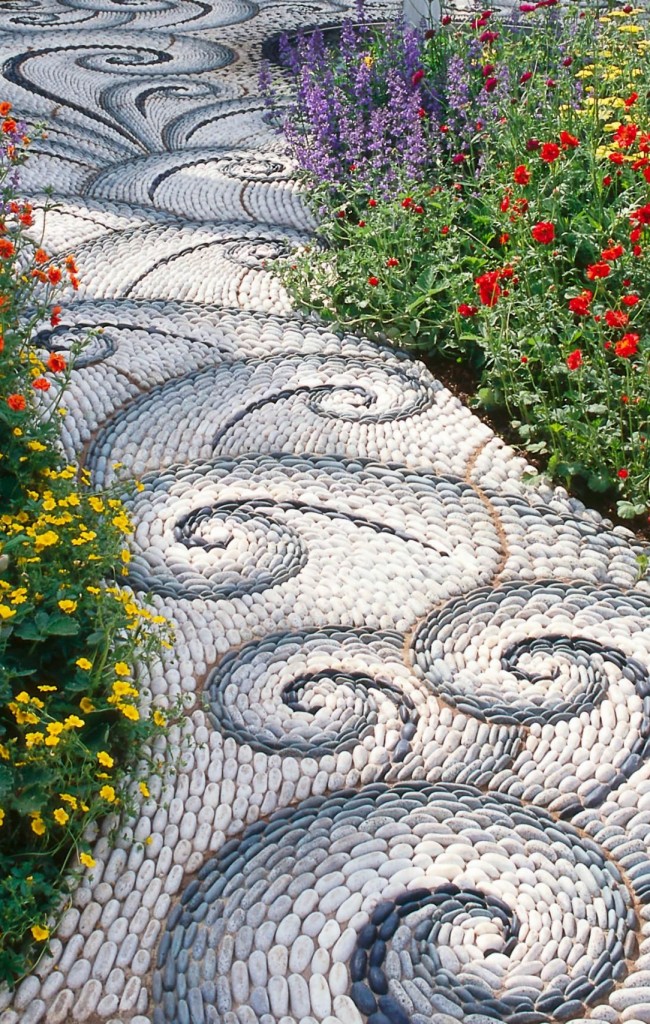
river stone allows you to show creativity and create an original garden path
The technology for carrying out the preparatory work is similar to preparing for the construction of brick garden paths with your own hands, only in this case it is necessary to sort the stones, weeding out the defective ones. If the flaw is not too conspicuous, then when laying the stone, you can put the conditioned side up.
After that, the stones are laid out on a drawing prepared along the width of the sidewalk.
Option number 1
- Having created a base of crushed stone at the bottom of the pit, a drawing is applied to it from a sketch with lime. It must be remembered that the mosaic of stones can easily crumble, so it must be supported by the sides from all sides.
- After mixing sand with cement in a ratio of 3: 1, water is added and a thick mixture is obtained, which is laid out on a lime pattern in the form of a side with a width equal to the size of the stone. These strips are made not very long so that they do not have time to dry out, so it will be easier to level the pebbles in them.
- An oval-shaped stone is laid on its side and pressed into the path from the solution. For alignment, you can use a rubber mallet.
- After a whole strip has been laid out, it is necessary to check its evenness with a building level, correcting the protruding parts with a hammer.
- Thus, row after row, referring to the sketch, lay out the entire track. Here it is possible to combine oval stones set on edge with flat round stones, and even with stones set vertically - but only if this does not violate the created composition.
- When laying, you can play with the shades of the stones, alternating their color in different stripes or making smooth color transitions.
- Having finished laying out a part of the mosaic, the result is watered using a fine sprayer. Water washes away excess cement from the surface of the stones and strengthens the mortar.
- Thus, slowly, they gradually lay out the entire area of \u200b\u200bthe garden path, achieving its dense filling with stones.
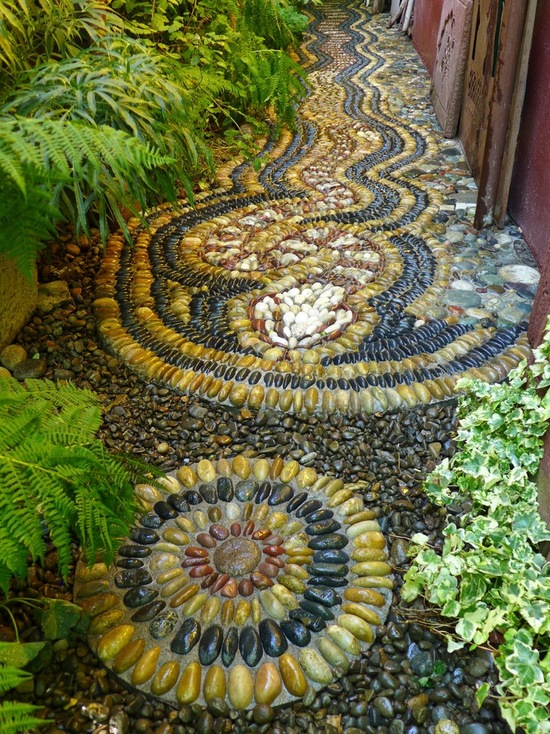
garden path made of pebbles and river stone
Option number 2
This is a simpler option, which dispenses with the use of cement mortar, and the stones are laid directly in moistened sand. The reverse side of simplicity is the risk of destroying the composition, so it needs to be laid out in small parts.
For this, borders are used, to which temporary partitions - analogues of wooden formwork, which can be removed by finishing part of the composition.
The technology for arranging garden paths with your own hands looks like this:
- Alignment and alignment of borders and temporary partitions on a base with compacted gravel.
- Backfilling of the resulting sectors with wet sand, its tamping and leveling at a height of 2-3 centimeters below the formwork. This difference in height is needed in order for the top surface of the stones to be flush with the curbs.
- Laying stones in the path and leveling them with a rubber mallet and a level placed on the curbs. Periodic additional moistening of the sand.
- Re-checking the evenness of the laying of stones before the sand dries, after which the mosaic is backfilled with dry sand or a mixture of sand and cement, followed by sweeping out the excess.
- Moisturizing the mosaic with a sprayer.
- Repeat the procedure with dry sand and moisture after a few hours, when the sand dries, compacts and fills the space between the stones.
- Wiping with a wet sponge all the stones after the next drying.
- Wetting the entire mosaic daily for a week with water to form the necessary rigidity of the track.
- In addition, in order to avoid erosion of the sand structure, it is advisable to cover the entire area of the track with thin foam rubber that allows moisture to pass through, but does not allow the sand to be washed away.
- At the end of the work, it is necessary to remove the formwork from the boards and strengthen the structure with stones or bricks, forming curbs.
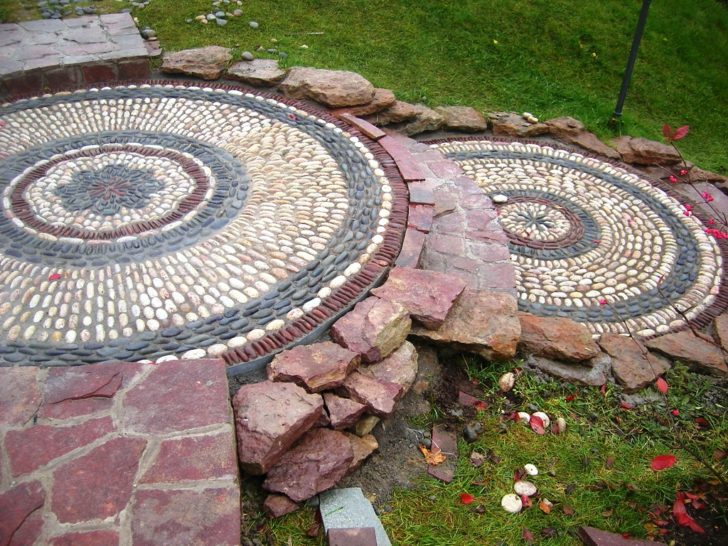
with the help of a river stone, you can create a garden path with any richness
concrete walkway
When arranging concrete garden paths with your own hands, it is necessary to carry out a thorough marking using the technology described above, and excavate the soil according to the marking, forming a foundation pit under the base of the sidewalk.
Borders or formwork made of boards are installed along the boundaries of the pit, which are leveled with a level and fixed outside with pegs or reinforcement.
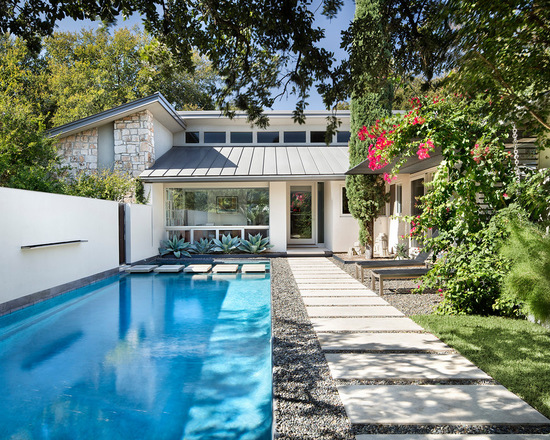
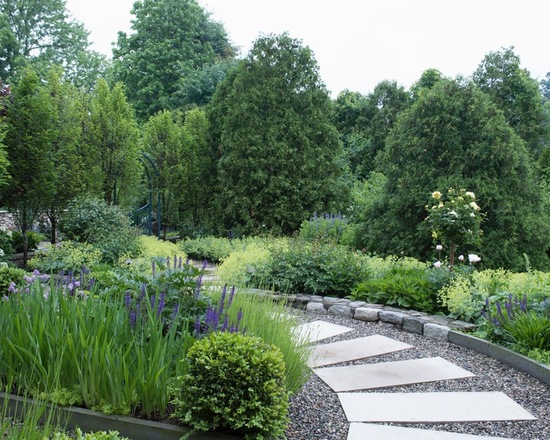
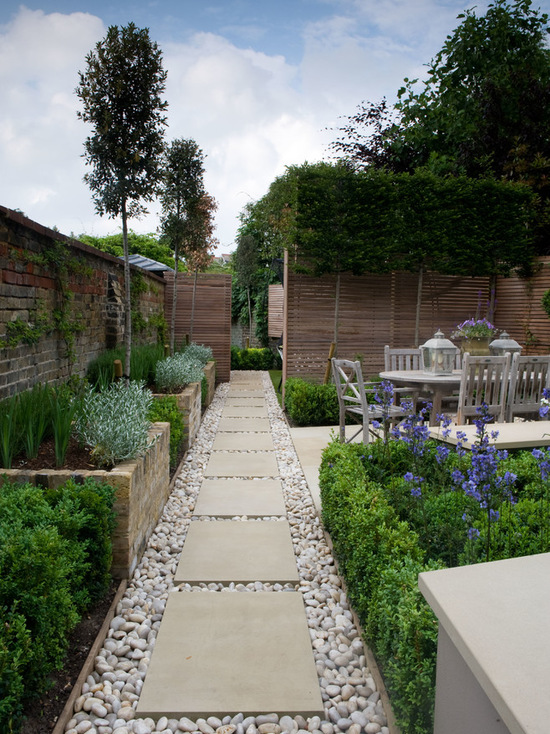
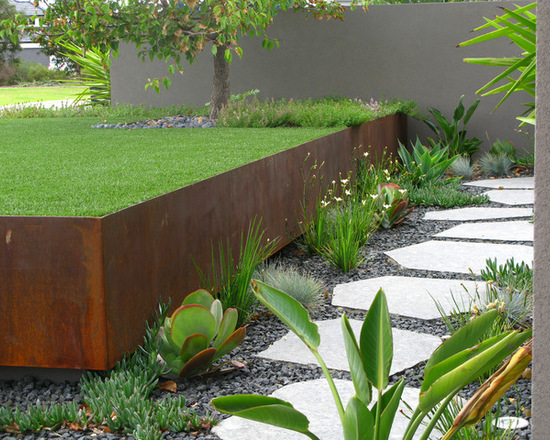
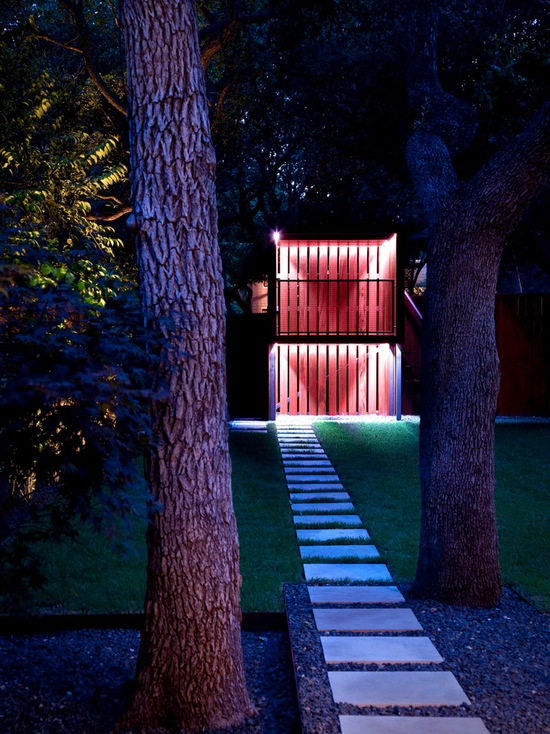
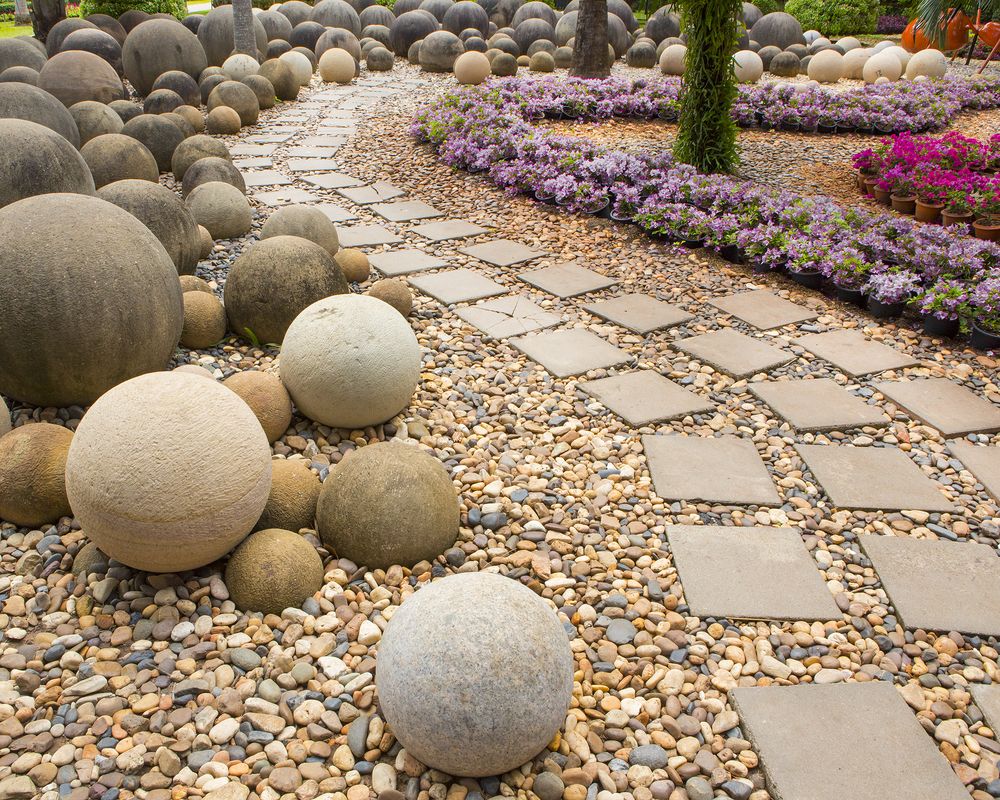
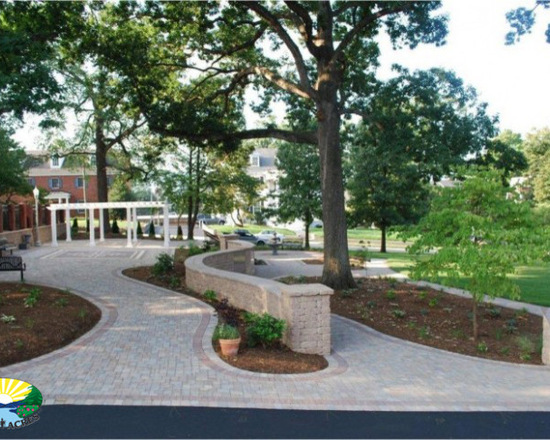
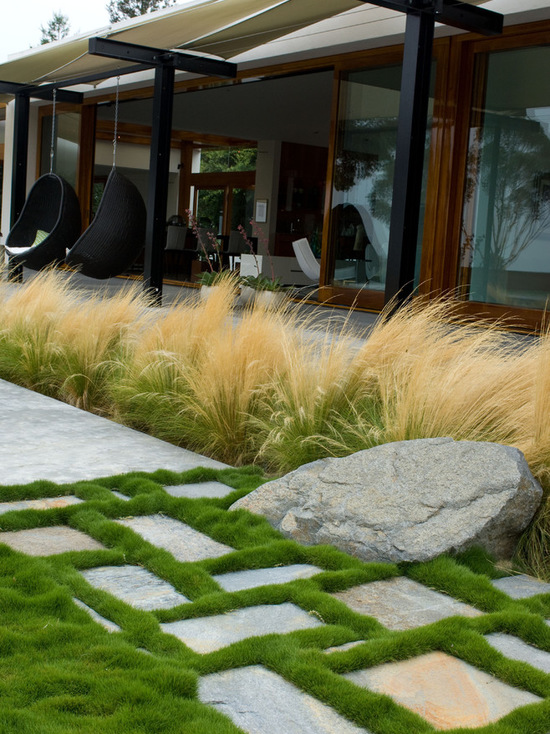
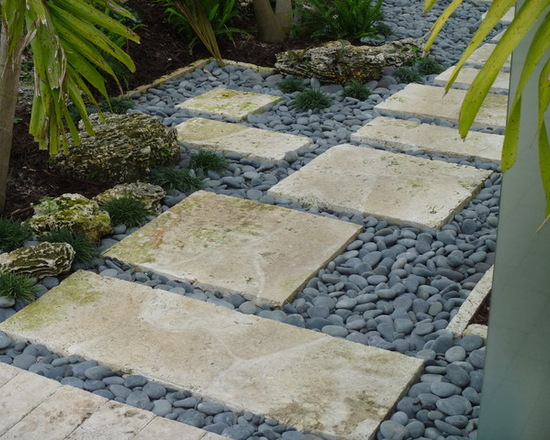
for landscapes in a modern style, combined gravel and square slab paths are great
The bottom of the trench is covered with sand, which, after moistening, is carefully rammed. The thickness of the resulting pillow should be at least 7 centimeters. Crushed stone is poured over the sand cushion, which is also subjected to compaction. A reinforcing grid is superimposed on top: it is thanks to it that the track will turn out to be very strong, able to withstand heavy loads.
Next, you can choose one of the construction options, depending on which track is needed.
poured concrete walkway stenciled
Option number 1
If you need a flat, smooth surface, then prepare a liquid concrete solution, which is poured into the formwork over the reinforcing mesh.
- Concrete is equal to the rule, using the sides of wooden formwork as beacons.
- If concrete is poured onto a path where curbs are already installed, then the rule will need to be made independently so that it does not exceed the distance between the curbs in size.
- The concrete poured on the path is iron-clad. To do this, the wet surface that has not had time to dry is sprinkled with a thin layer of dry cement, which is immediately rubbed with grout. If desired, you can purchase special hardening topping mixes.
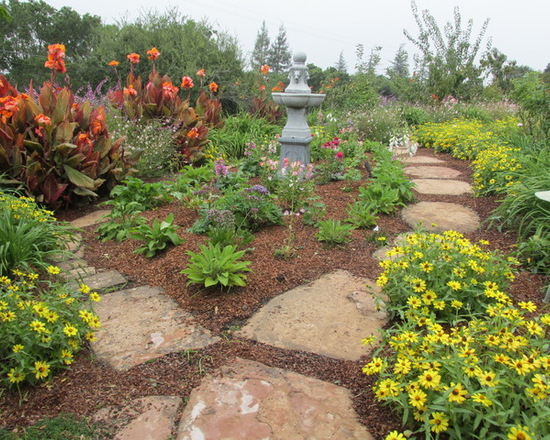
path made of small stones and slabs
Option number 2
When imitating masonry using an appropriate form, the concrete mixture is poured into the formwork in two layers.
- The first layer is laid at half the height of the formwork and is also leveled with the rule. For this, a coarse mortar is used, obtained by mixing cement and gravel. It is necessary to achieve a flat surface, for which it is necessary to install control beacons of the required height over the entire area and, while pouring, equalize the mixture over them.
- After the concrete of the first layer has set, a mold is placed on its surface and filled with a liquid solution, without the use of gravel. Alignment is performed on the surface of the form. The form filled with concrete completely hardens within 3 - 5 days.
- After the form, gently shaking and pulling up, remove. Lay next to the previous frozen blanks and completely repeat the pouring process.

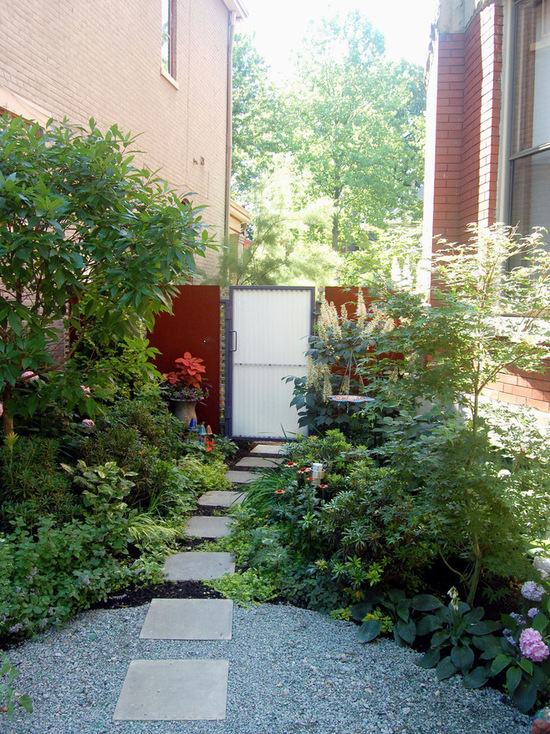
garden path made of single-placed concrete slabs
If the builder has only one form, the arrangement of garden paths with his own hands can take months or even years, so when starting such work, you need to take care of the presence of several forms that allow you to lay and form several "stones" at once.
In a similar way, you can originally decorate the floors in gazebos and smoking rooms, as well as areas in front of the house and garage.
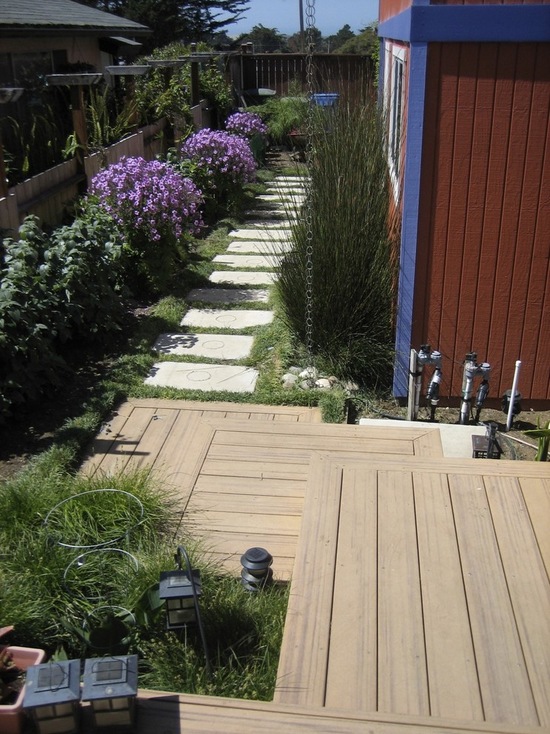
Plastic garden paths
Allow gardeners to quickly, compared with the construction of solid stone or tile borders, install paths using specially sold blanks for this purpose. They consist of modules, most often the same in size and color. They are assembled approximately like a Lego constructor and are considered a temporary version of the tracks. But, as they say, there is nothing more permanent than temporary.
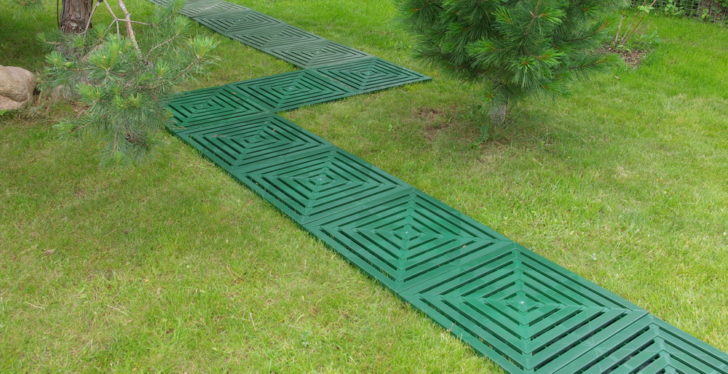
plastic - the most economical option for arranging garden paths
At a fairly affordable cost, do-it-yourself plastic garden paths have a number of advantages:
- for a long time retain their shape and presentable appearance;
- resistant to wear;
- equipped with technological holes that prevent the accumulation of water and freely pass it into the soil, which is guaranteed to eliminate the formation of puddles and prevent unpleasant odors from forming;
- not subject to decay;
- technological when cleaning, cleaning, do not need systematic maintenance, resistant to chemical attack, corrosion;
- simple, intuitive installation according to the principle of the designer;
- do not need preparatory work, as they fit equally well on any base - sand, turf, clay;
- can be quickly dismantled when redevelopment of the site;
- in winter they can be washed, dried and stored in a utility room until the new season.
Tracks made of plastic bottles and bottle caps
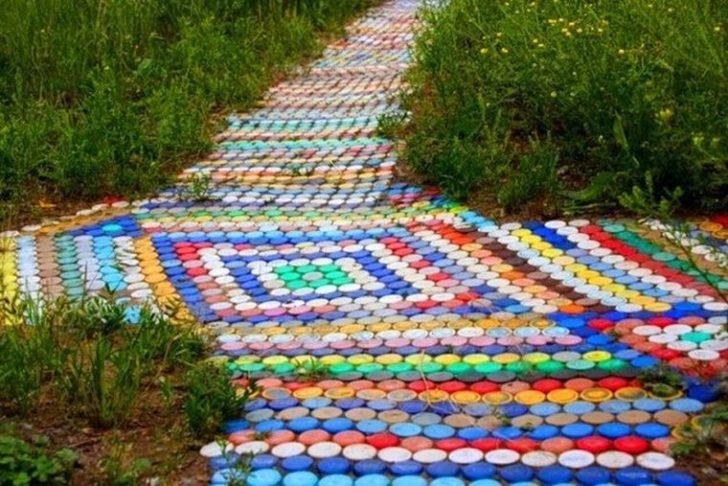
plastic garden path
One of the most original and interesting ways to build garden paths and paths with your own hands is to lay out the surface with plastic bottle caps. Multi-colored covers make it possible to make patterns, mosaics and even whole paintings.
The only negative of this improvised material is its collection, because for even a small track of covers you will need a huge amount.
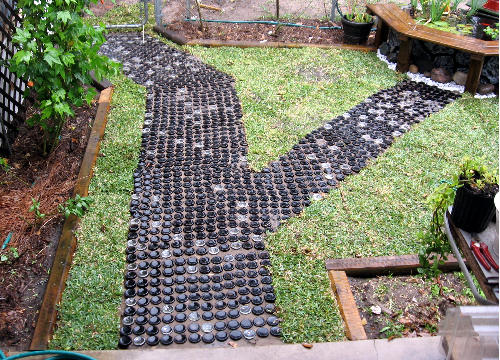
path of bottles
Another interesting design method is laying out garden paths with bottoms from plastic bottles. The manufacturer took care of the ribbing of the bottoms, which gives them the necessary rigidity. This can be seen by trying to specifically deform the bottom of a plastic bottle. The bottom is strong enough and can withstand the weight of a person. To increase the strength characteristics, they must be laid on a sand cushion, pressing into the sand until it stops.A variety of colors will allow you to create various mosaic panels, and a larger size compared to covers will make the process of collecting raw materials easier.
Helpful Hints
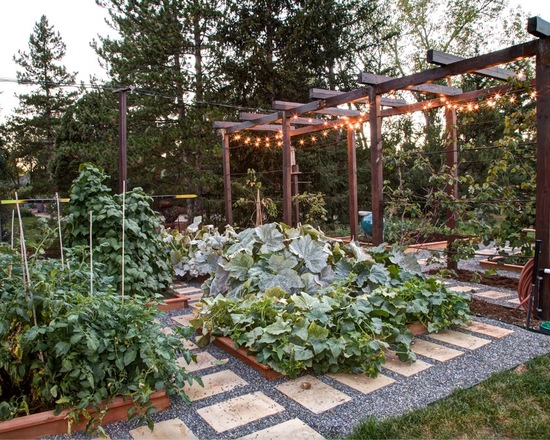
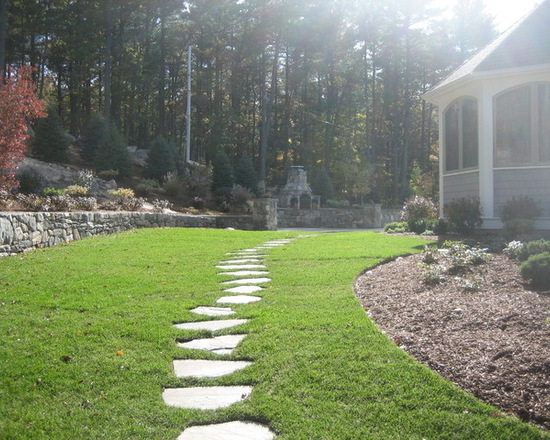
- The so-called walking trails look very funny, the surface of which is formed from different elements, for example, concrete squares or large-diameter wood rounds. You can stack them in a row, one after the other, getting a chain that is very fun to navigate. You can arrange these parts in a checkerboard pattern - this will allow you to remember the children's game of hopscotch. Moving along such paths will intrigue households and guests.
- No need to be afraid to combine and mix styles and methods! It is necessary to confidently combine different materials. For example, a tree will be beautifully combined with river pebbles or large pellets like sea ones. This method will visually smooth out the various transitions in the design of the paths.
- When planning work, special attention should be paid to the weather forecast. Almost all materials and technologies used during the construction phase are afraid of rain. The most dangerous is the ingress of water into the earthen trough. Precipitation during work can negate all the efforts and money spent, so in no case should you get down to business in anticipation of bad weather. However, at the stage of completion of the work, rain is very desirable, as it will help to compact the top layer, wash the dirt from the stones and polish them.
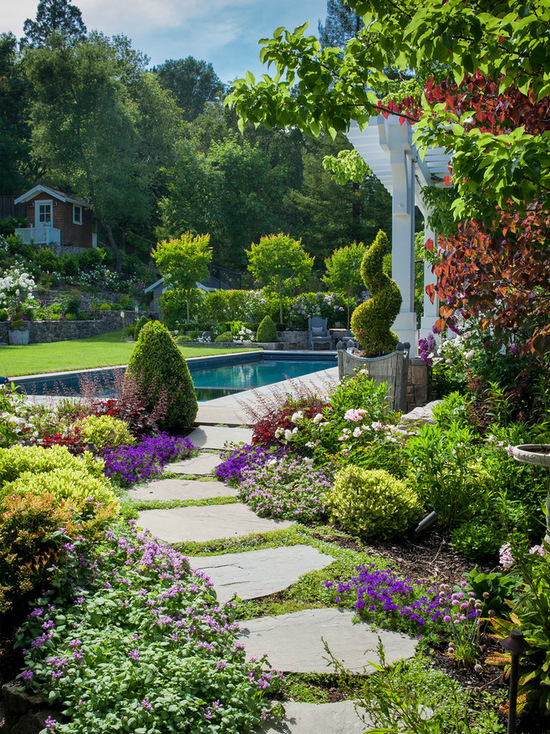
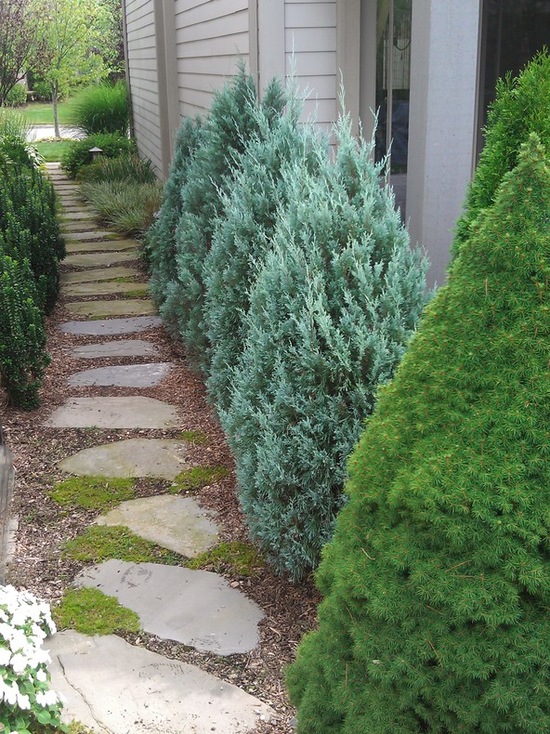
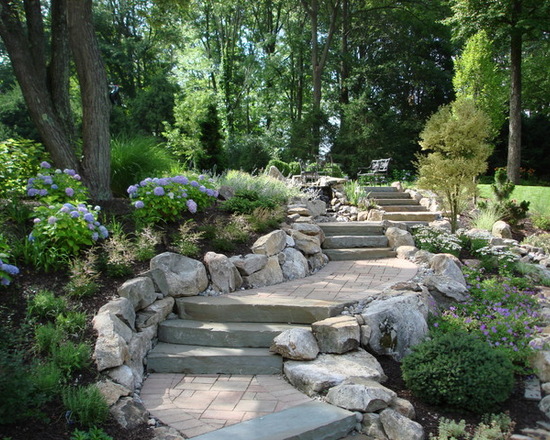
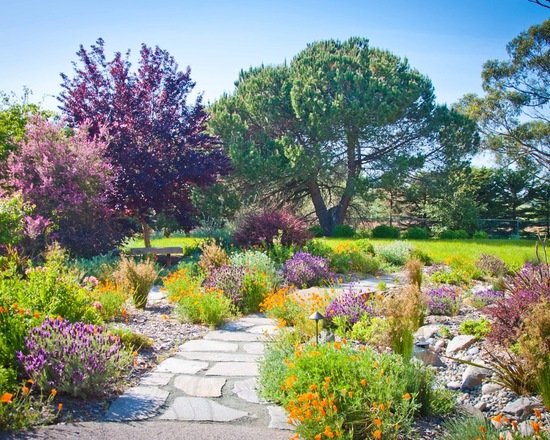
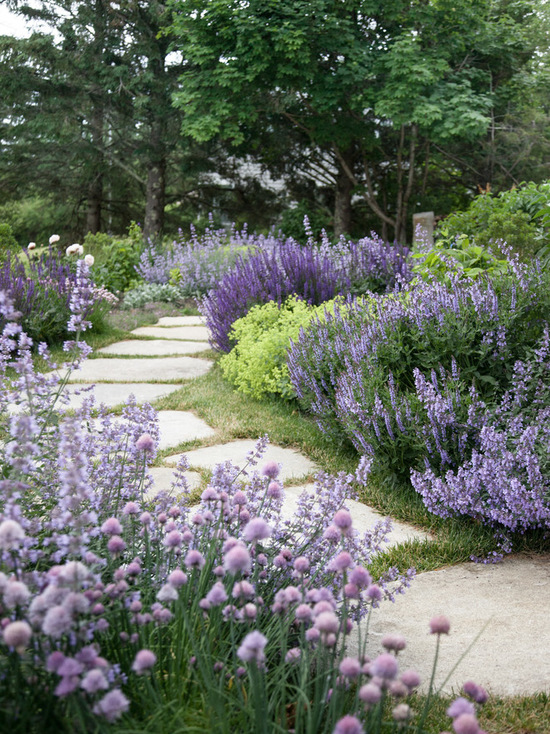
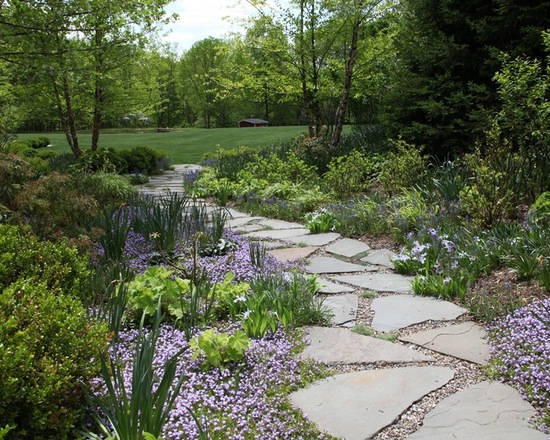
- The use of natural stone is ideal for a curved, winding garden path. Arranging the individual elements in an arbitrary order, you can safely lay any, even the sharpest turns, not to mention smooth bends. When making garden paths with your own hands, whimsically winding around the garden, it is very desirable to opt for this noble, classic material of natural beauty that will last for decades.
natural stone garden path
Conclusion
The article presents and discusses only the main, most popular technologies and materials that allow you to build garden paths with your own hands. Human imagination is limitless and multifaceted: every year, thousands of nuggets of gardening designers create real masterpieces on their sites, making sidewalks, paths, alleys from completely unexpected materials, for example, from glass bottles. They create and surprisingly beautifully combine various elements.
Country paths are not only convenience and cleanliness, but also harmony and beauty, multiplied by the imagination and intelligence of their creator!
Photo gallery: garden paths


Video: DIY garden path