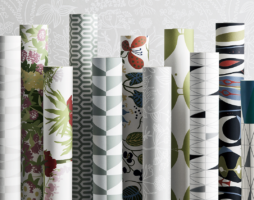
Sometimes there is neither the strength nor the means to update the interior globally. Have you ever thought that fresh trends can be brought into the atmosphere without spending a fortune and a lot of time? Look at ideas for home decor.
- Do-it-yourself needlework for the home
- Master class on needlework for the home with your own hands using decoupage technique
- DIY home beauty
- Marble crafts: do-it-yourself needlework master class for the home
- Textile crafts
- Photo decor
- Interesting ideas for home decor
- Conclusion
- Photo gallery - needlework for the home
- Video
Surely, you will be able to realize much of what is proposed, and completely free of charge, purely from improvised materials. So how will we reanimate the atmosphere in our native walls?
Do-it-yourself needlework for the home
Decoupage
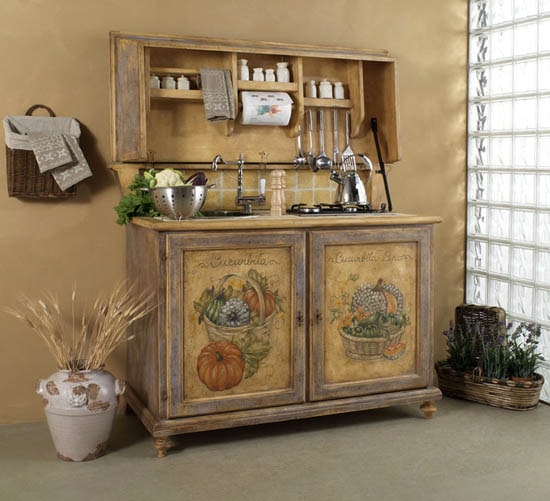
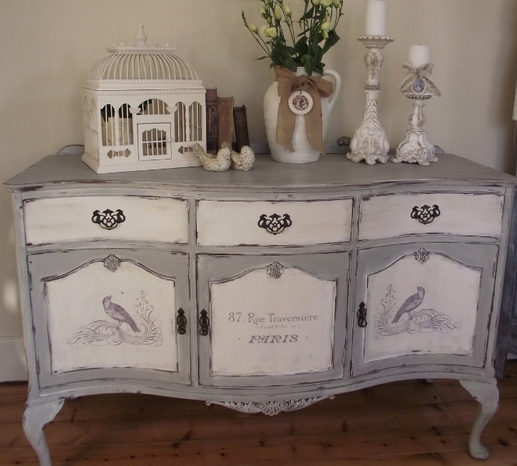
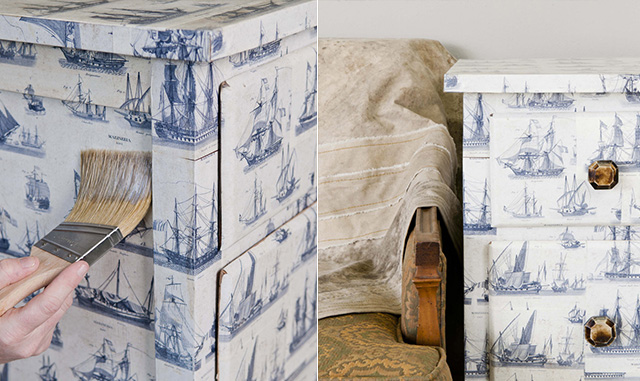
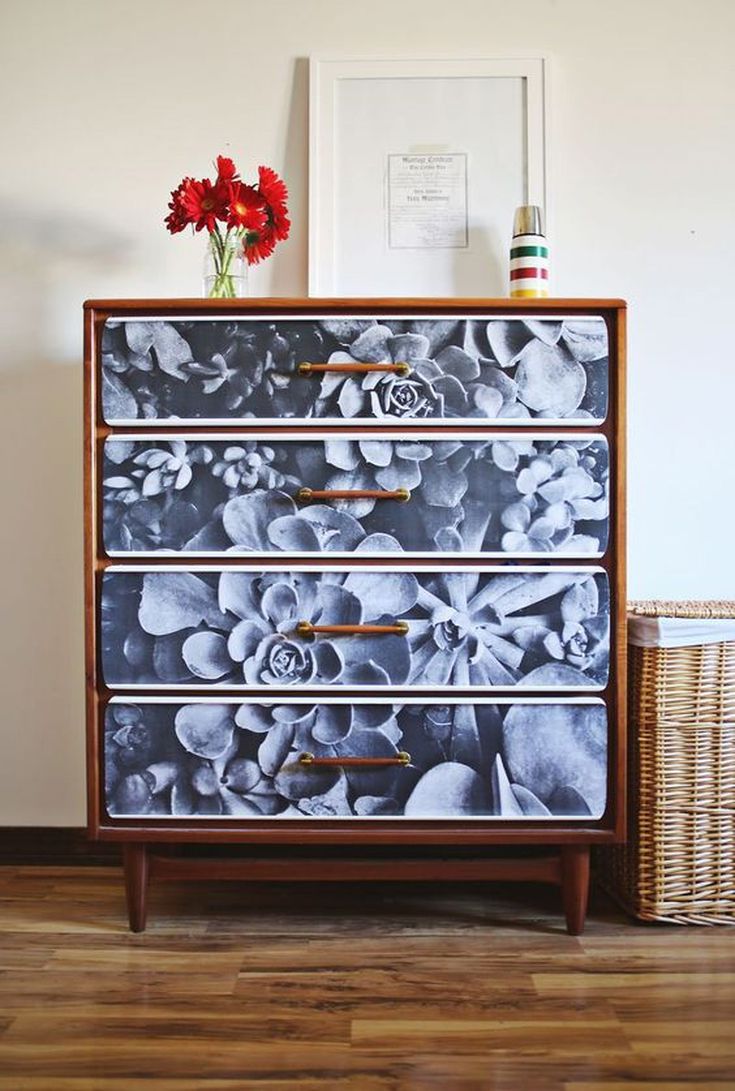
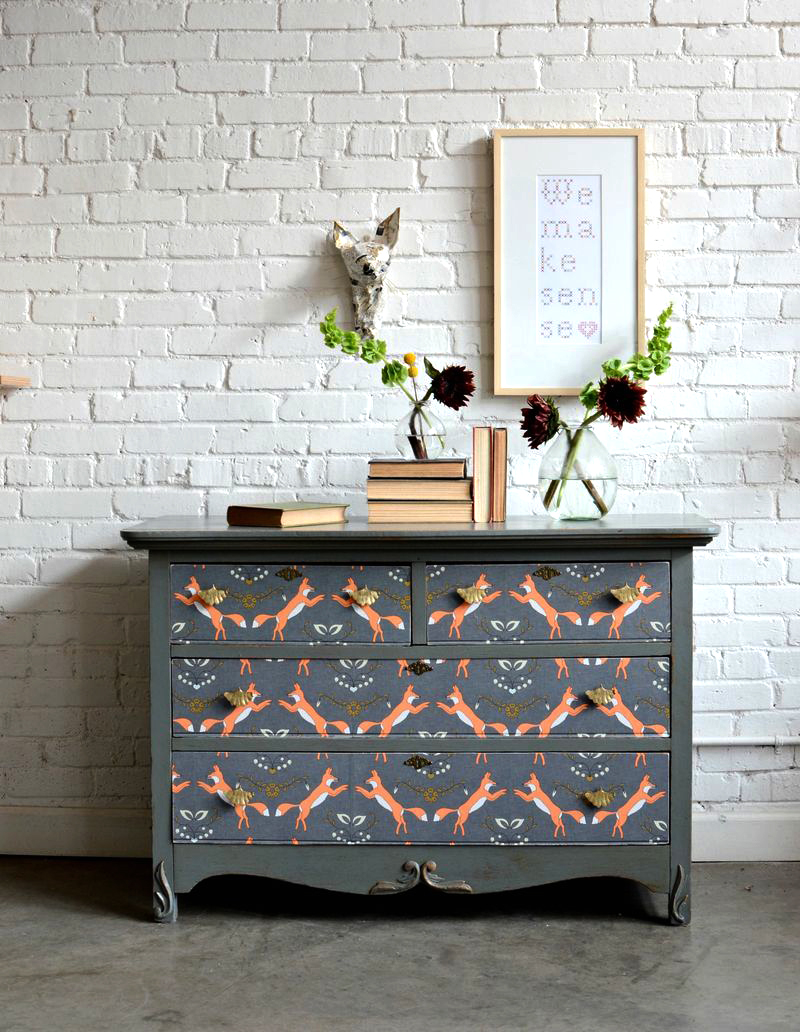
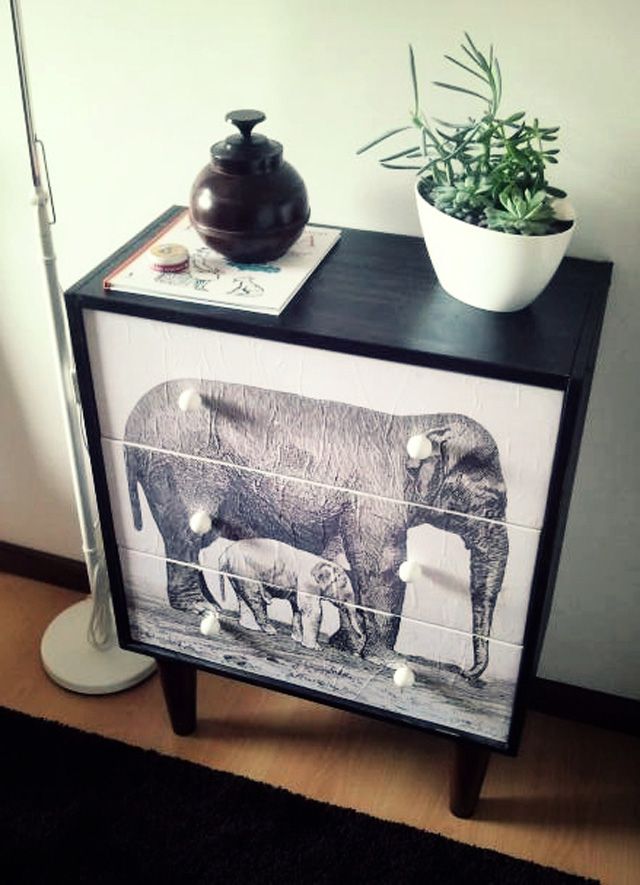
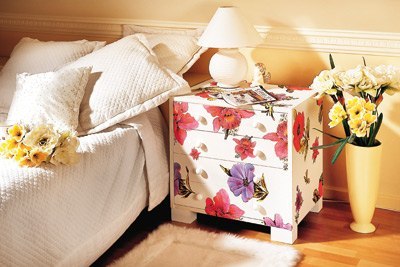
The biggest problem in home renovation is old furniture. The dilemma of throwing away or restoring is usually resolved in the direction of the latter. So, which way to get down to business? It is most rational to use a variety of decoupage techniques. Experts in such needlework for the home give master classes for beginners in video tutorials. This will help chests of drawers, sideboards and not only them to get a new exterior.
In what interior styles is the technique relevant?
The most suitable decoupage decor:
- for vintage;
- shabby chic;
- country;
- provence;
- Victorian classic.
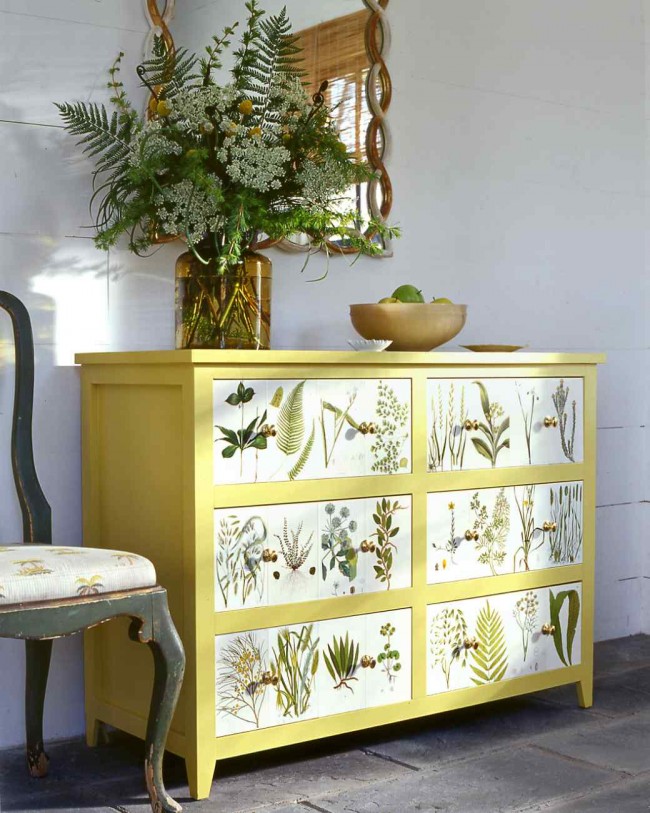
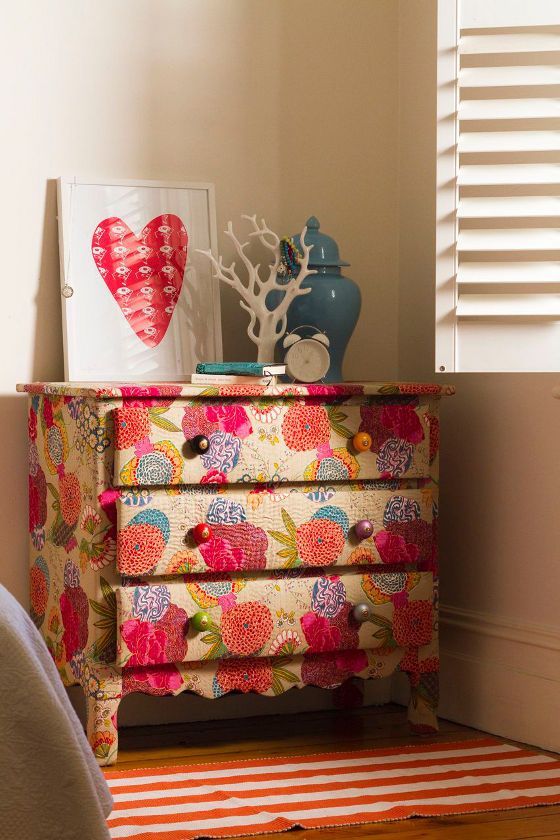
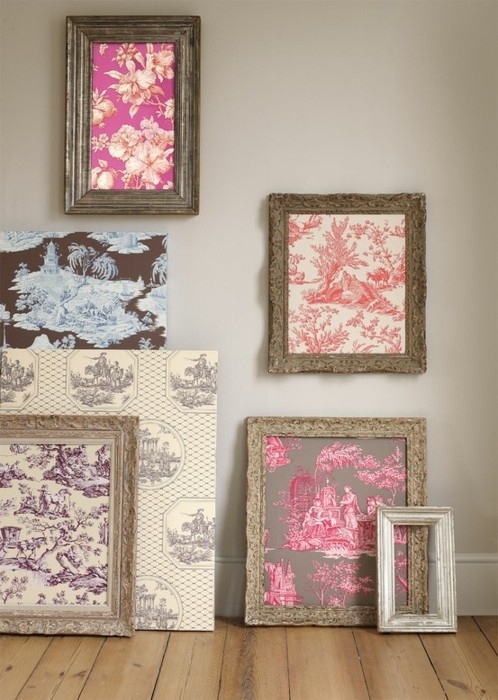
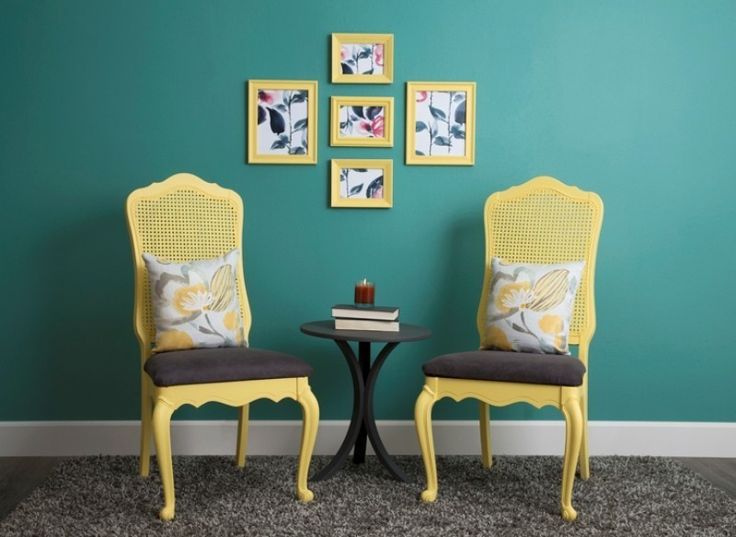
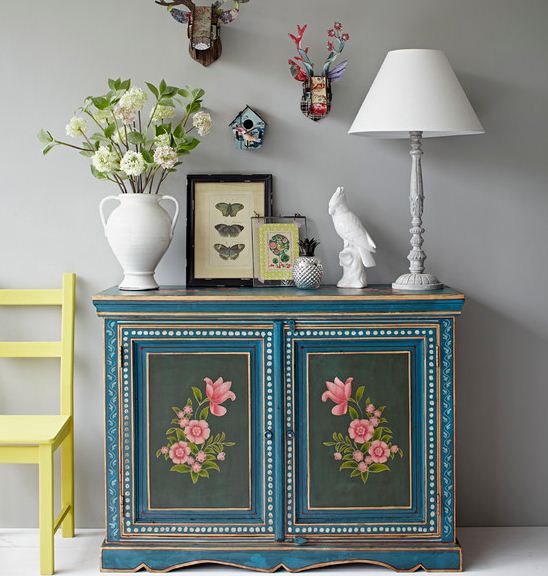
Decoupage decor in the interior
Vintage
This stylistic decision is the realm of old things with an age limit of at least 30 years. This fact must be taken into account when choosing decoupage napkins for needlework for the home according to the photo. When decorating items, try to convey as much as possible the popular motifs of the time to which the decor is attached.
Decoupage in vintage style
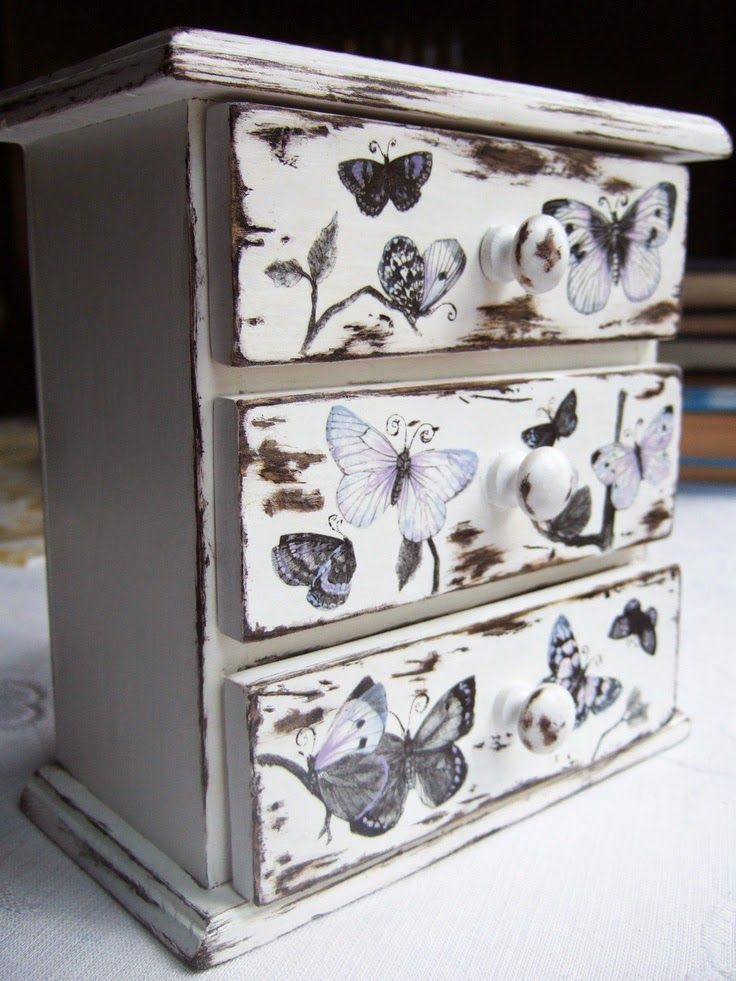
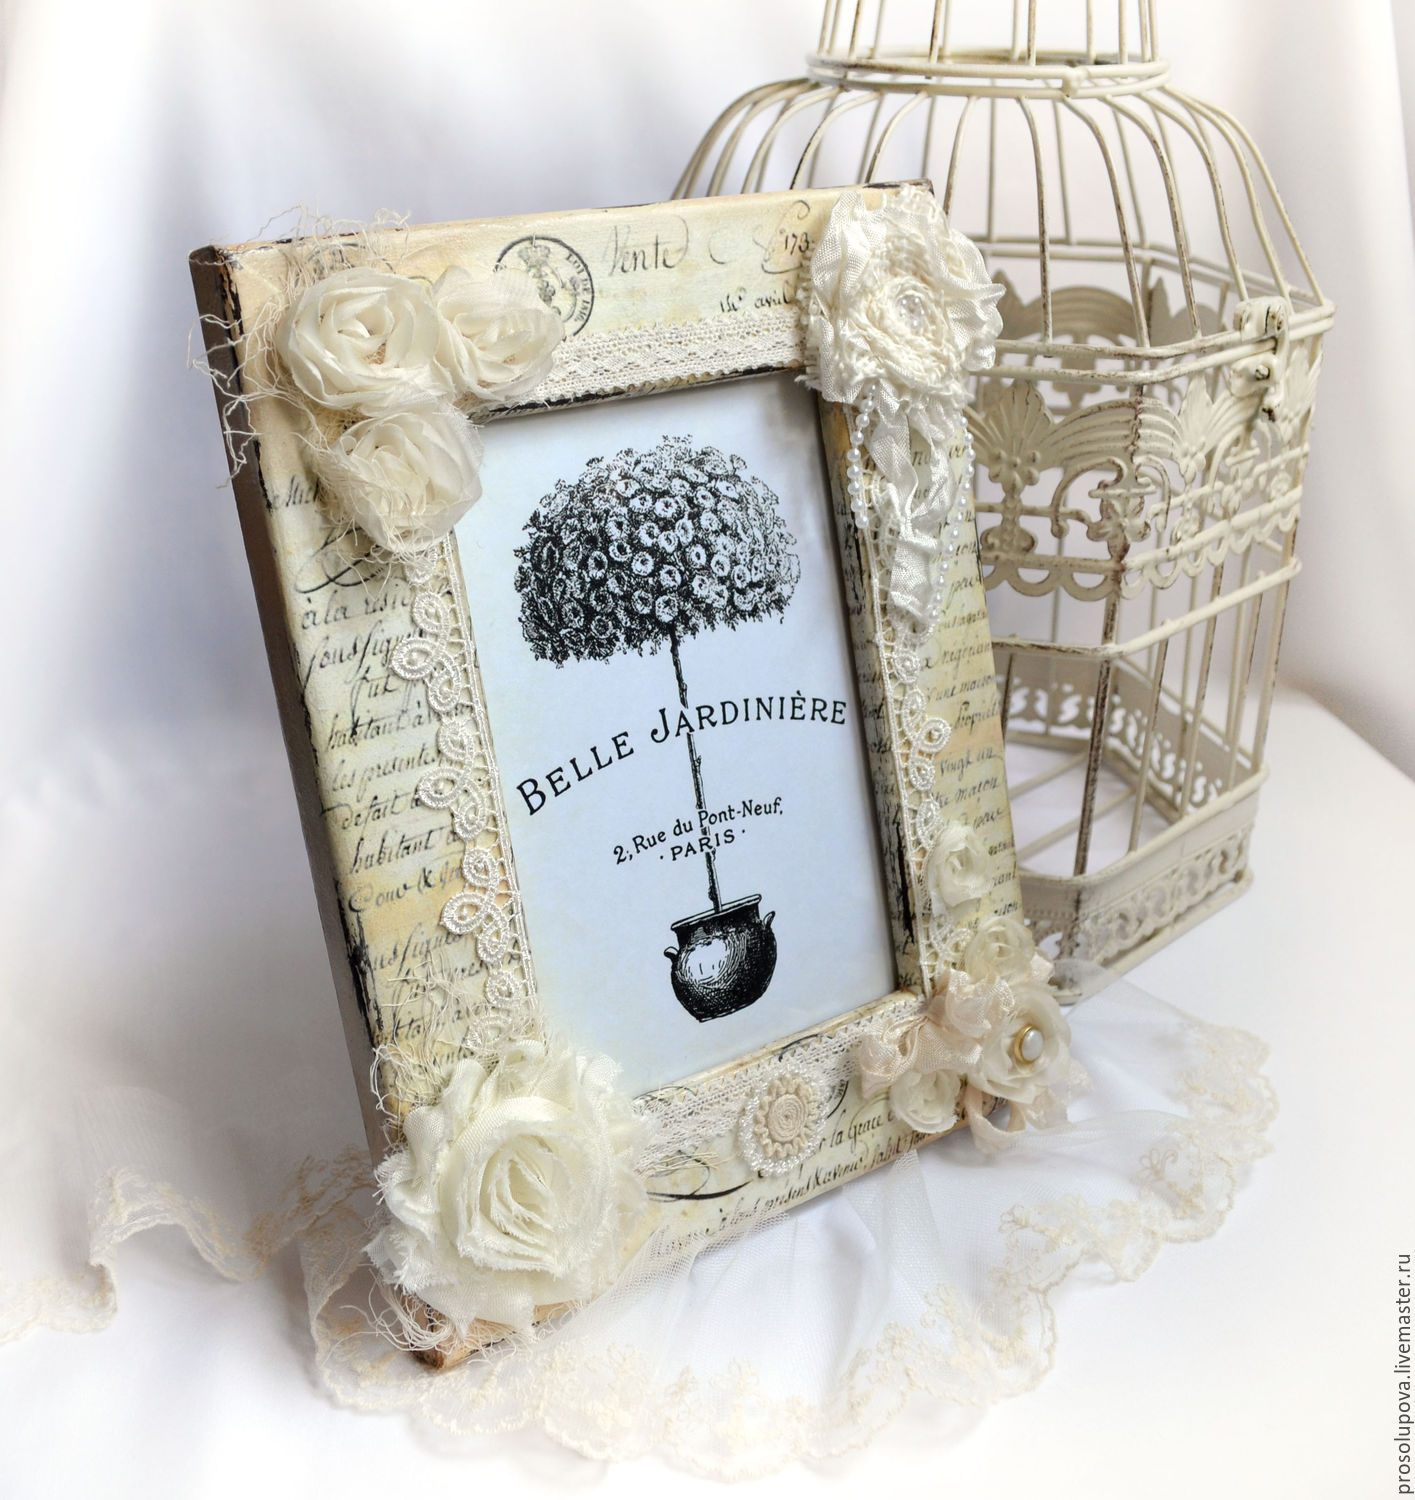
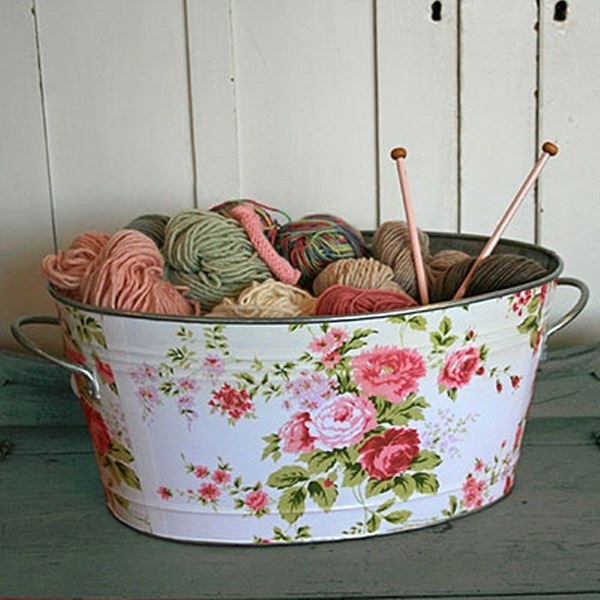
Shabby chic
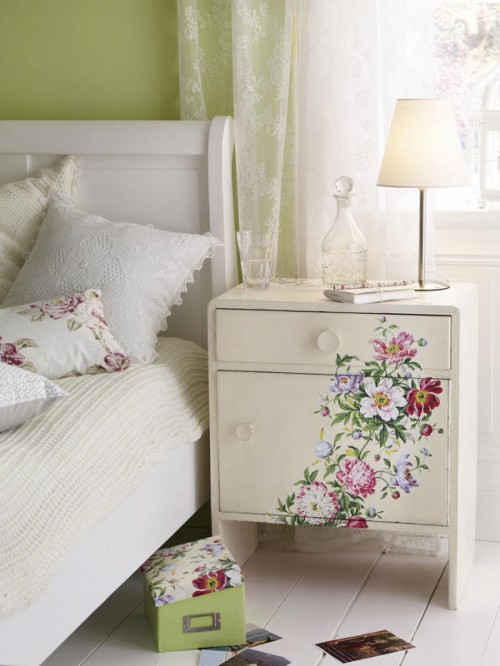
The interior has a lot of aged items with a clear romantic touch, so decoupage fits here with particular ease and in all its manifestations. It is worth looking for examples of needlework for the home in the photo in order to choose the best option for decorating your own home. By and large, the emphasis can be placed on small floral prints, pastoral landscapes. Be sure to stick to a light, one might even say, faded or slightly faded palette.

Shabby chic home decor
Preferred shades:
- cream;
- pink;
- ivory;
- powders;
- lavender.
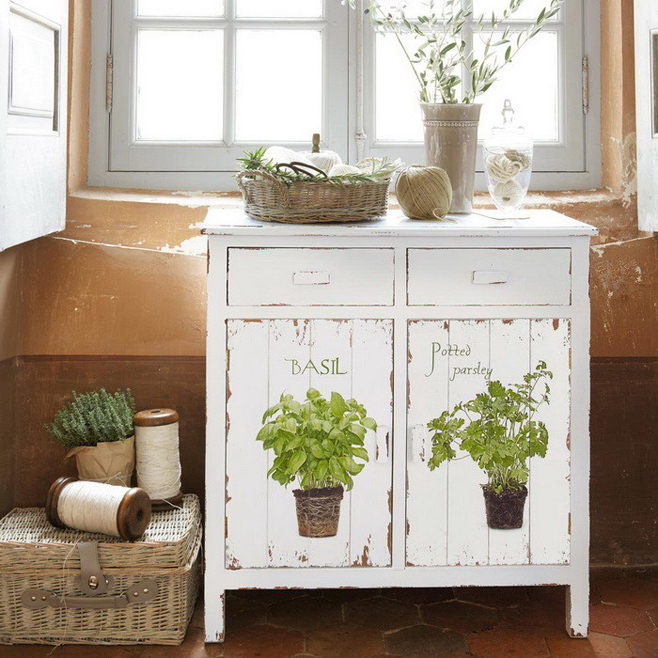
Country
These interiors perfectly accept the theme of rural life. These can be drawings of utensils, animals, vegetable or fruit still lifes, field landscapes. Handicrafts made for the home with their own hands, depicting floral ornaments, will be successful.
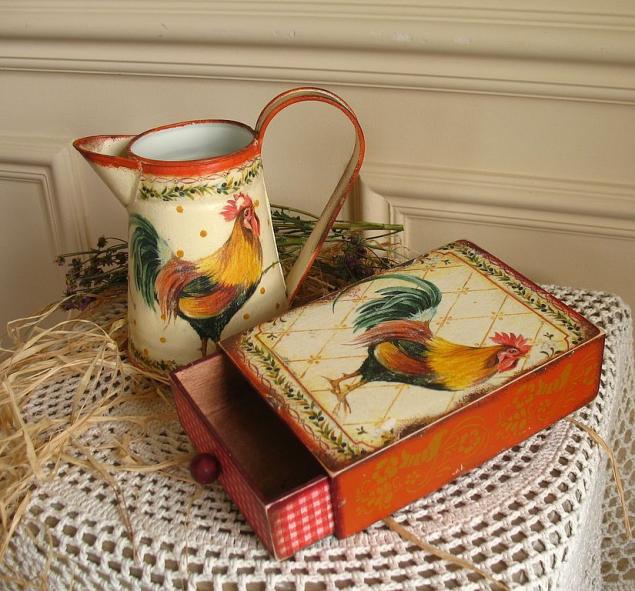
Needlework for the home in country style
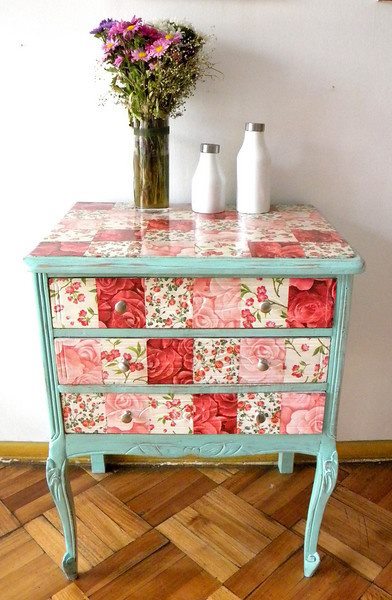
Provence
In the design of a house with the Provence style, images of plants, especially lavender and garden roses, food still lifes, portraits (preferably children), animal motifs will be relevant.
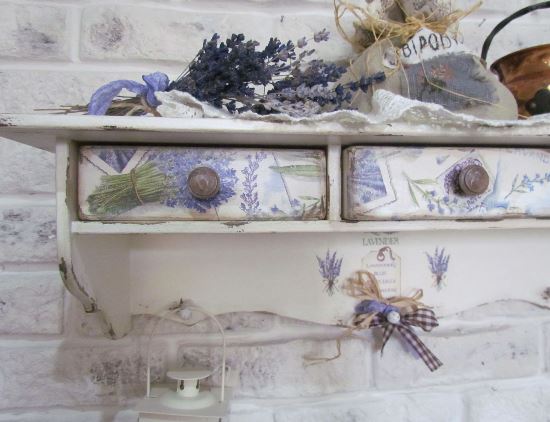
Provence style home decor
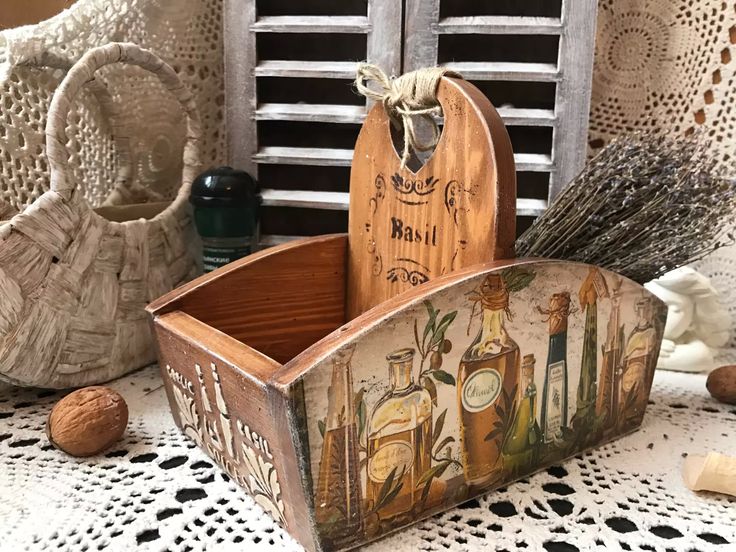
Victorian classic
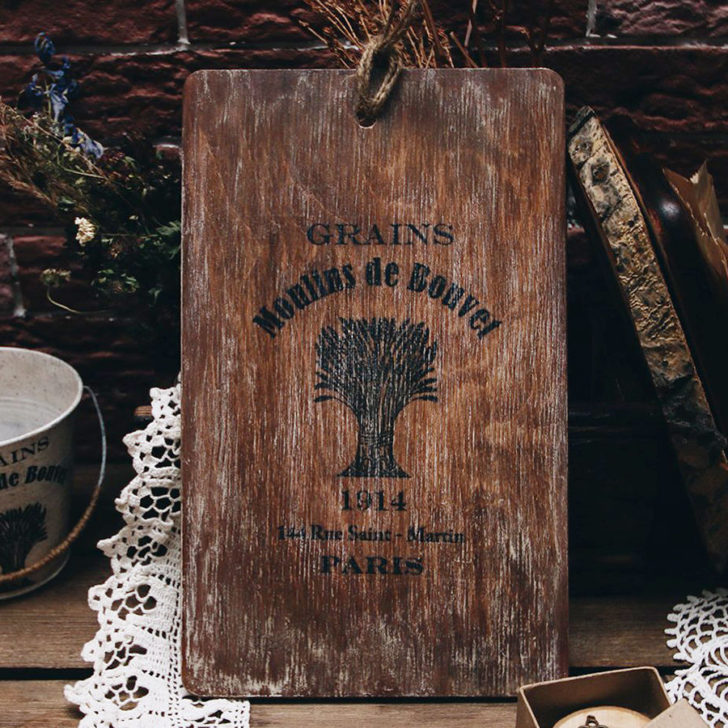
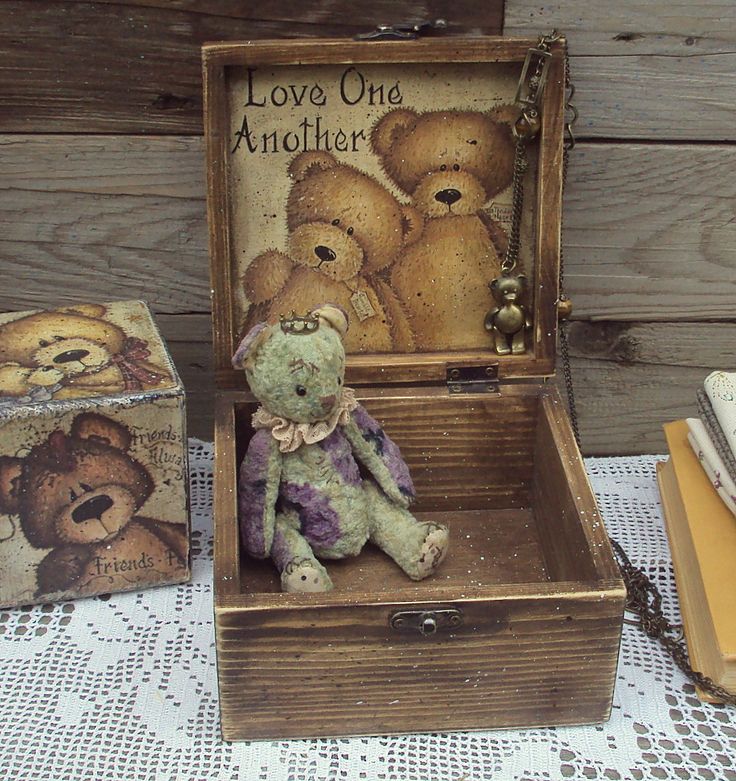
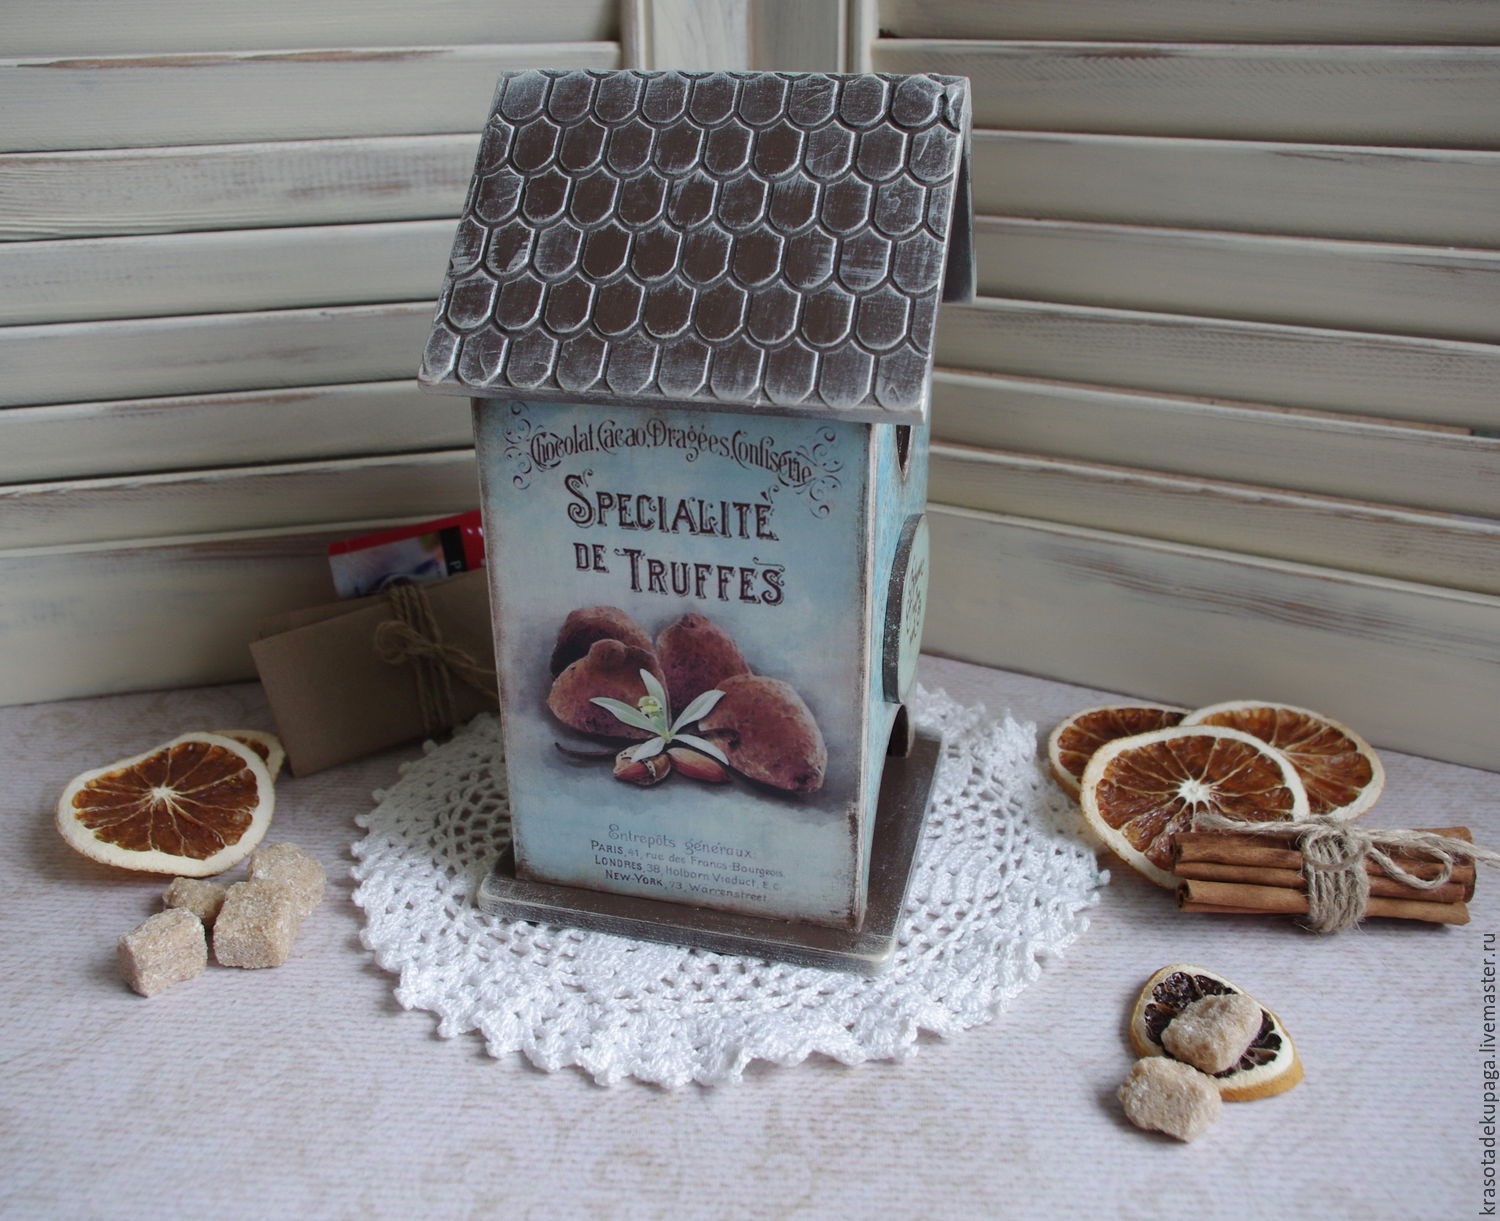
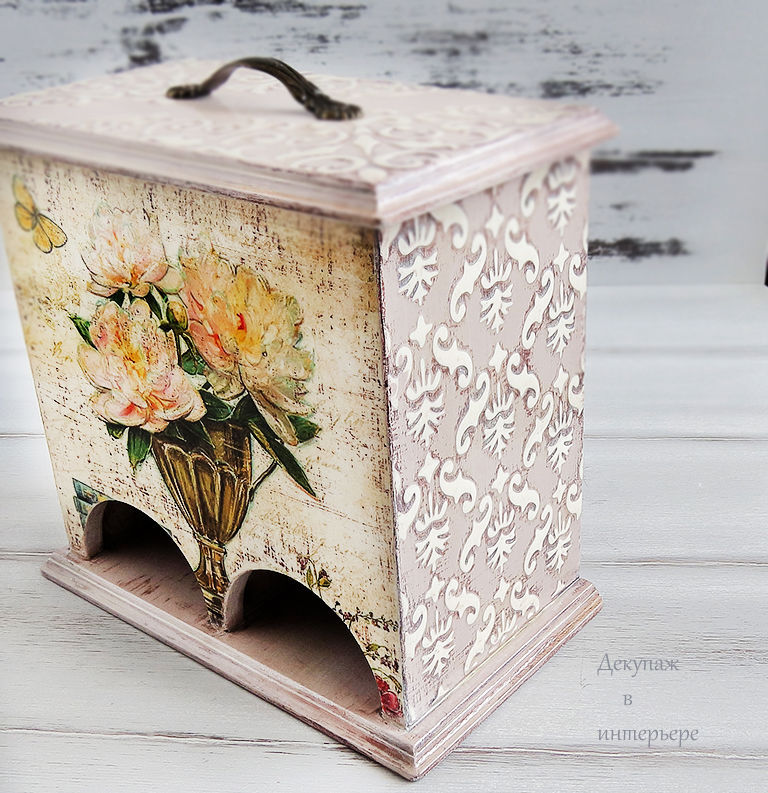
Decoupage uses drawings containing plant plots or depicting life scenes from the Victorian era.
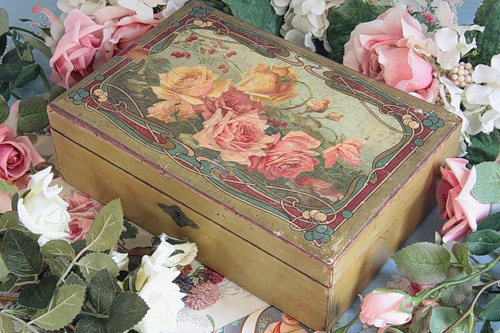
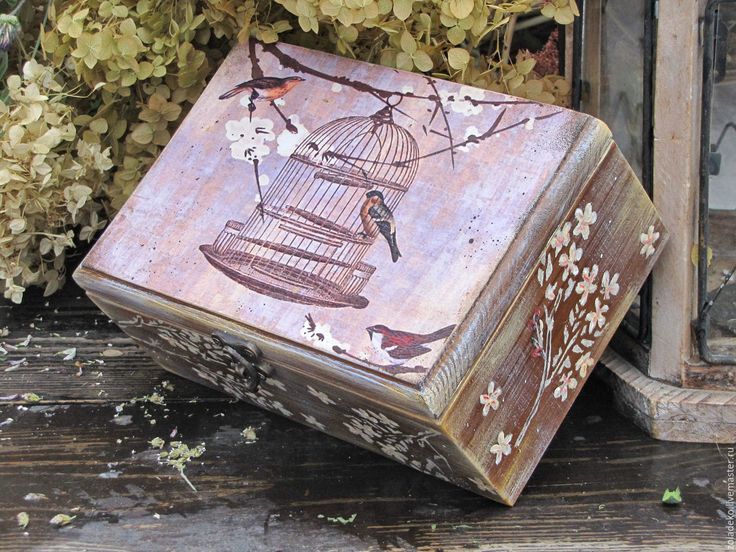
Decoupage boxes in Victorian style
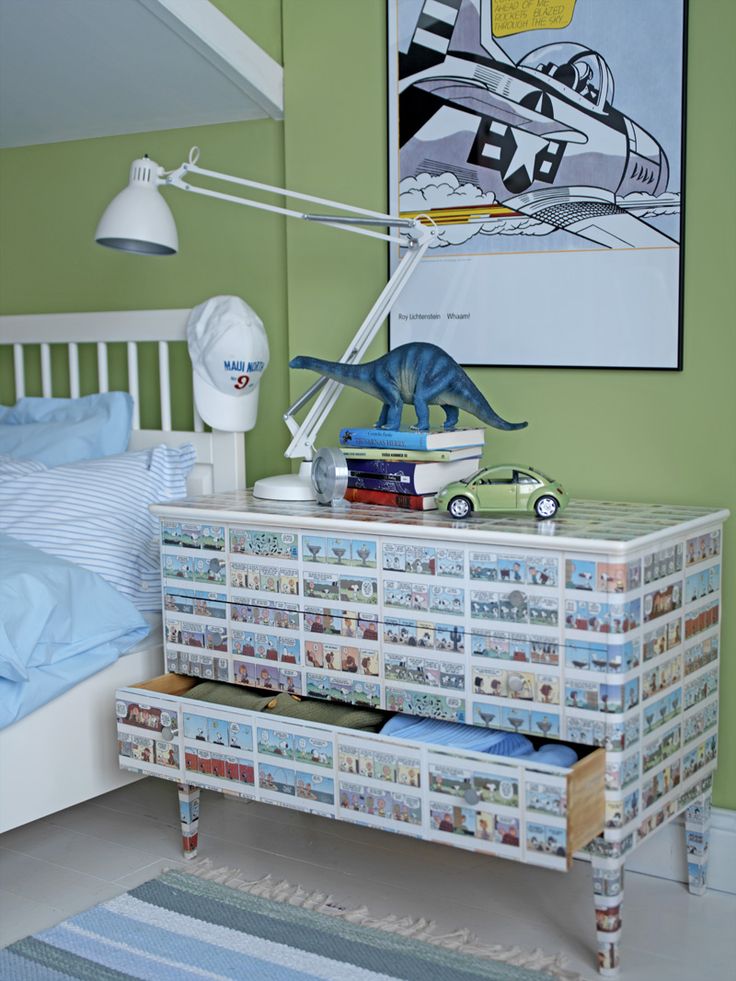
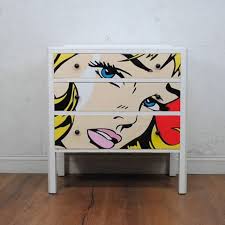
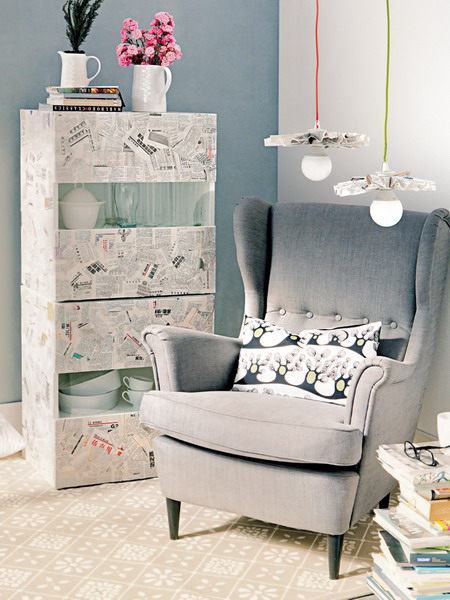
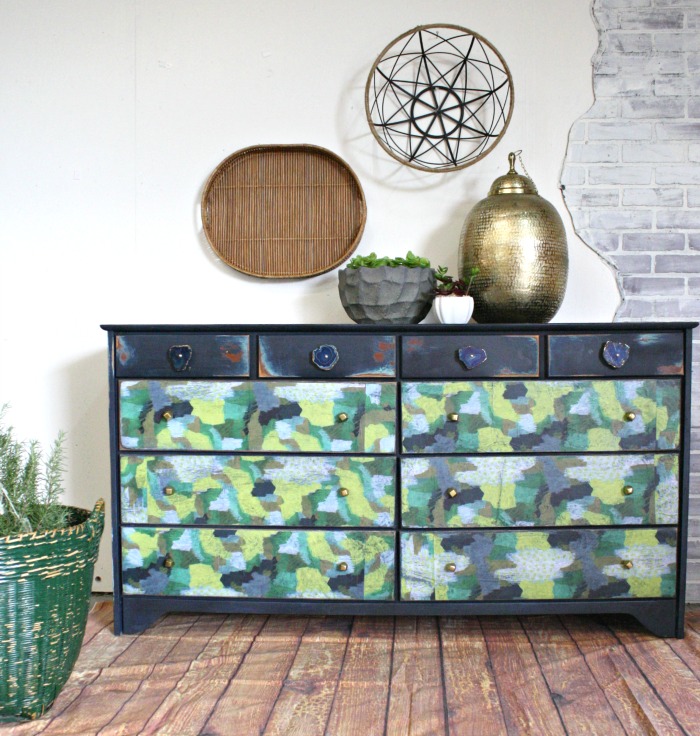
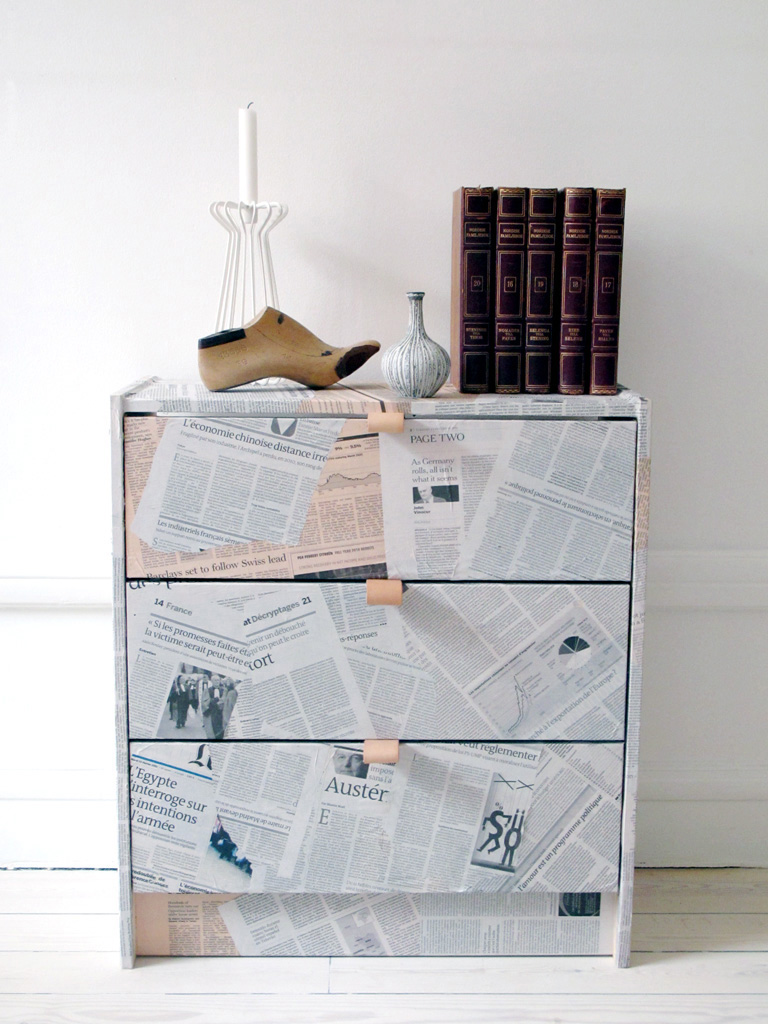
In addition to the areas considered, such handicrafts for the home with their own hands can be applicable in modern interior solutions. In pop art, for example, it is present in the form of comics. The projection of the Eiffel Tower, Big Ben, the Golden Gate in minimalist settings will look no less stylish.
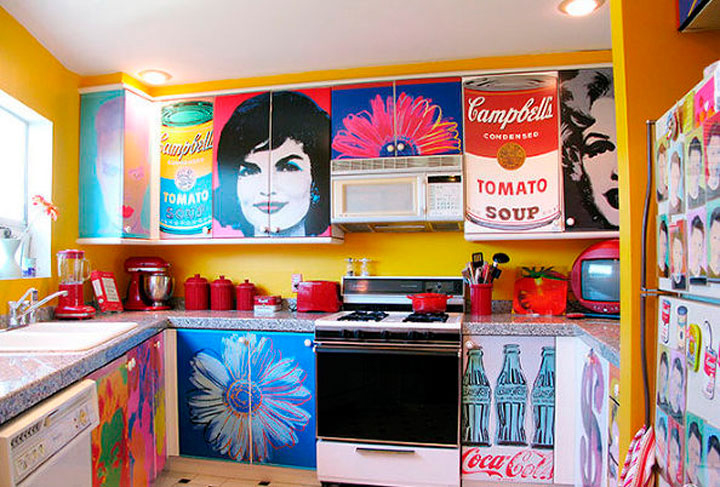
Bright decoupage in the style of pop art
Decoupage aging techniques
Craquelure
The easiest type of needlework for the home for beginners. The thing is covered with a network of small cracks and acquires a well-worn exterior in two steps. The initially applied layer of craquelure is painted with paint of any color. The surface immediately cracks and takes on the desired form.
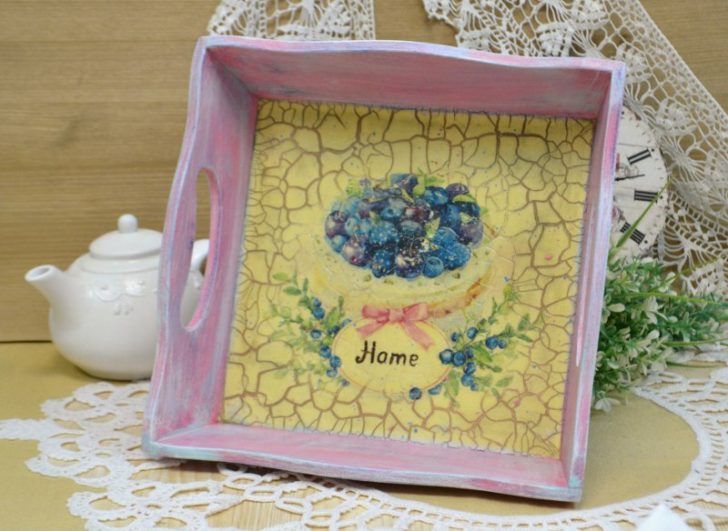
Craquelure gives things an aged look
Patination
When conducting master classes on needlework for the home, experts recommend using acrylic paints in patination. Metallic paints can be added if necessary. The restored product is covered with a layer of varnish.
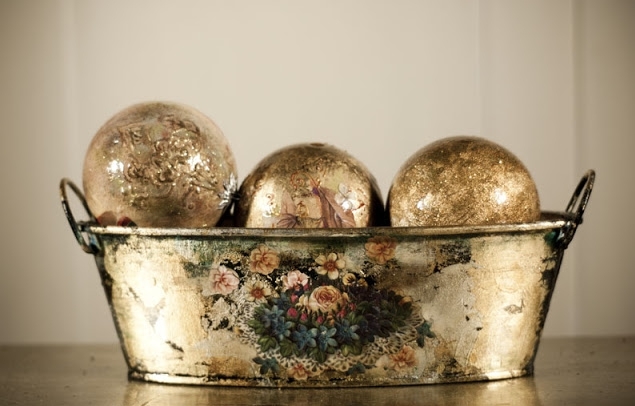
The use of patination in decoupage
You can patinate metal, plastic and wooden surfaces.
Candle and soap in decoupage
One of the most interesting decor ideas. The object being decorated in places where cracks and scuffs could naturally appear is rubbed with paraffin or ordinary soap. Usually this is done with corners, edges, in the area of \u200b\u200bholes. After processing, the thing is painted, followed by sanding the selected areas.
Paraffin will help to give the decor element an aged look.
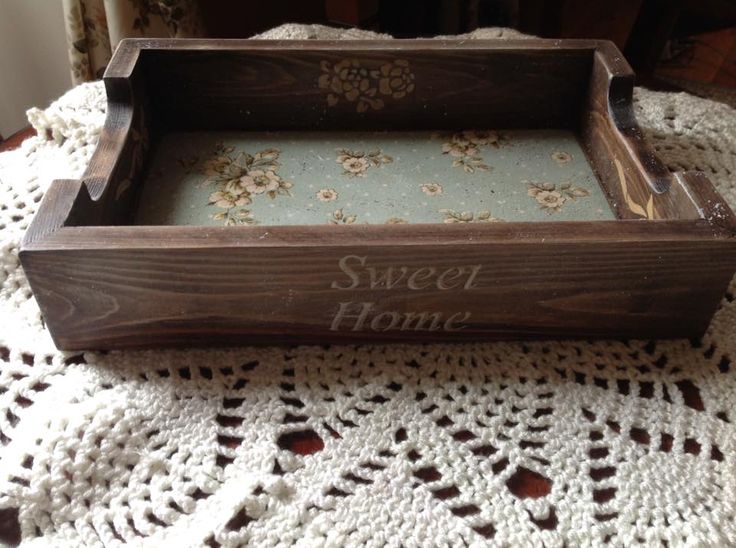
Staining
In this way, wooden objects are processed in decoupage. For work, it is not necessary to buy special formulations. You can use strong tea or coffee. It is also a great option for home crafts for beginners. To get the result, it is enough to cover the object with drinks in several layers, let it dry and fix it with a finishing varnish layer.
Staining process wooden objects
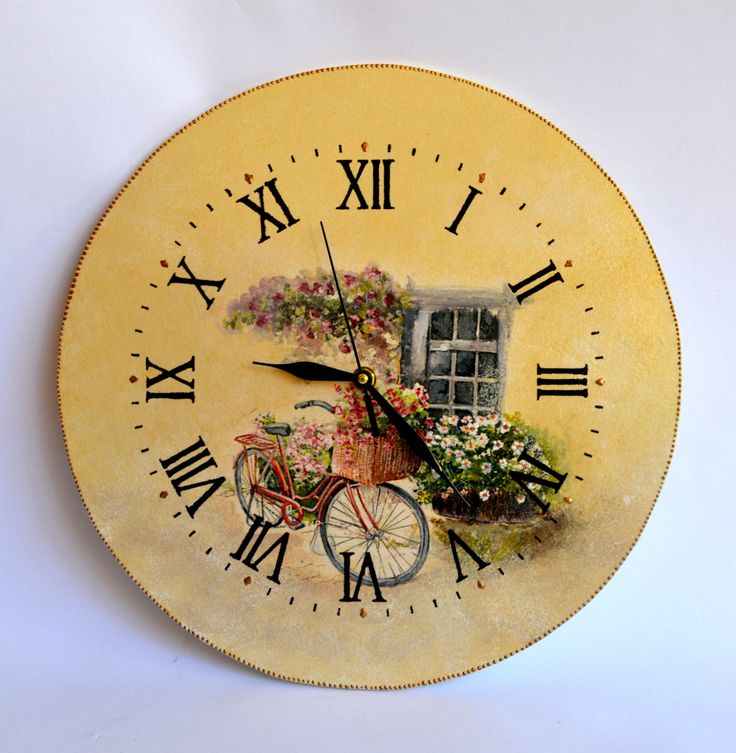
paint splatter
Performed in contrasting shades. The paint is sprayed on with a toothbrush or comb. With the help of this technique of needlework for the home, they make caskets, dishes, watches and other accessories with their own hands.
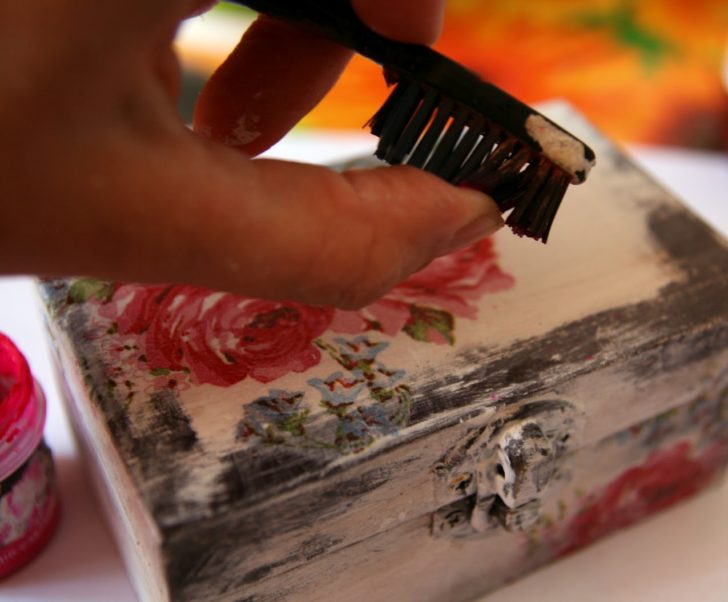
Spraying process in decoupage
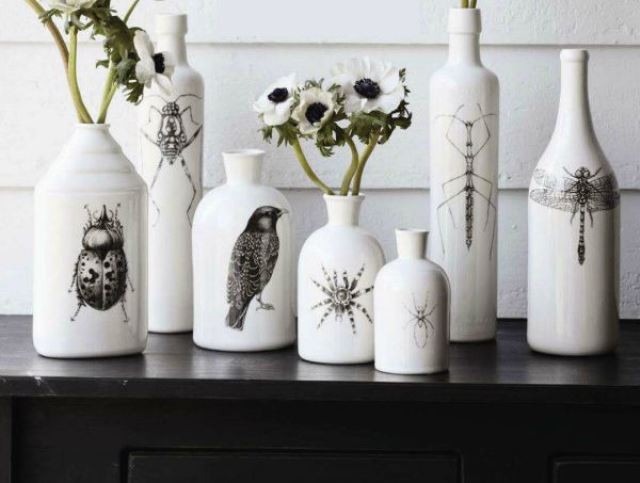
What is used at work?
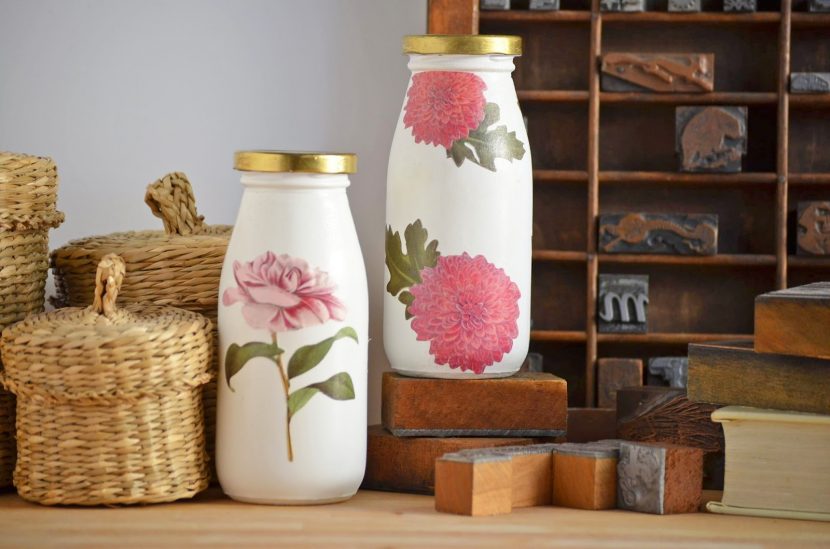
"Home decor ideas allow you to decouple everything from furniture to bottles"
First of all, you need to prepare blanks. Home decor ideas allow you to decouple everything from furniture to bottles. Next, you need to find suitable napkins or the so-called rice cards, which will become the basis of the composition.
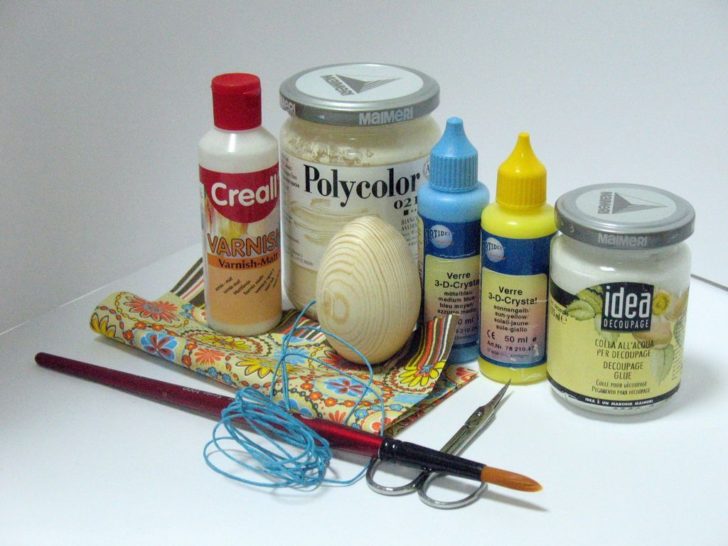
Tools and materials for decoupage
Since the pattern will have to be cut or cut to the shape of the surface to be decorated, you need to stock up on good scissors with thin blades. Often, in handicrafts for the home, their manicure options are used. If a wooden surface is to be treated, a primer will be required. Surfaces are degreased with acetone. To fix the drawings from the napkins, you will need decoupage glue. In principle, it is quite possible to replace it with not too thick PVA, which is always available. You will also have to spend money on wide brushes. They will be needed for applying paints, craquelure, patina and topcoat.
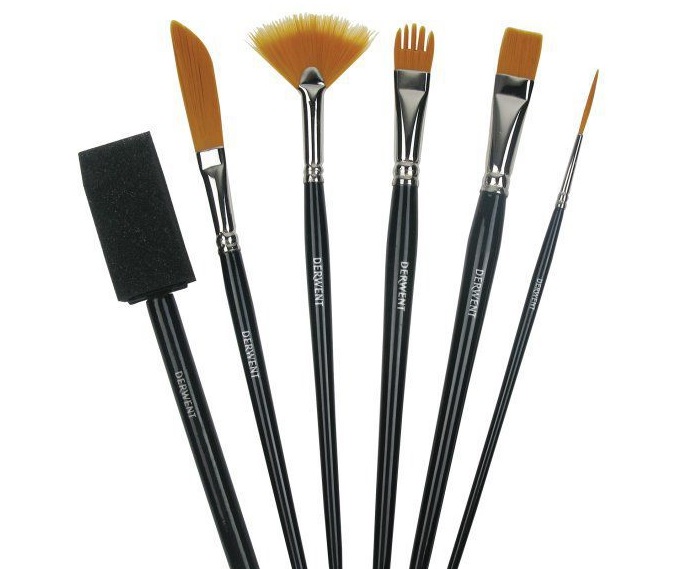
Decoupage brushes
Advice: the final protective layer must be made with high-quality varnish. Its consistency, shade and density will affect the final result. What can happen when saving on varnish can be seen in the photo of handicrafts for the home with your own hands in tutorials. Decoupage varnish is not difficult to find in retail outlets specializing in needlework products.
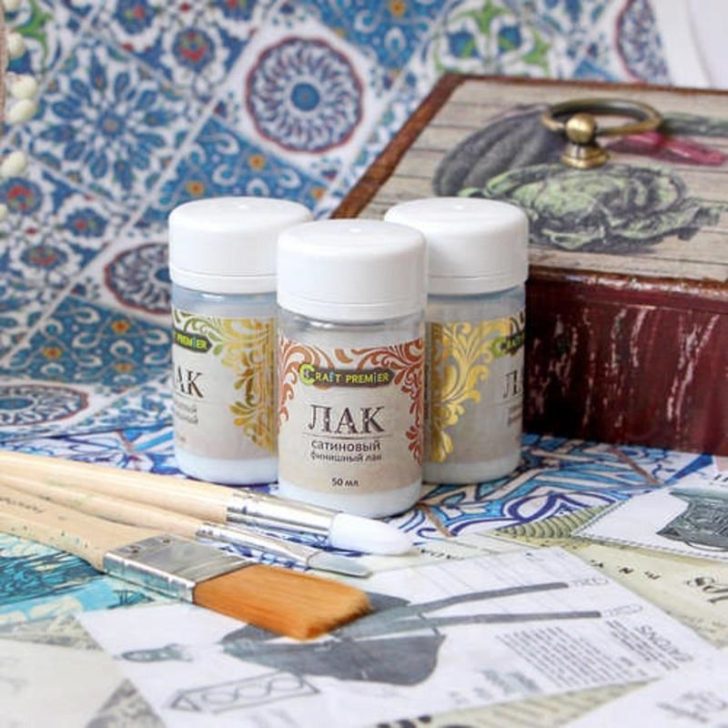
The protective layer must be made with high-quality varnish
Master class on needlework for the home with your own hands using decoupage technique
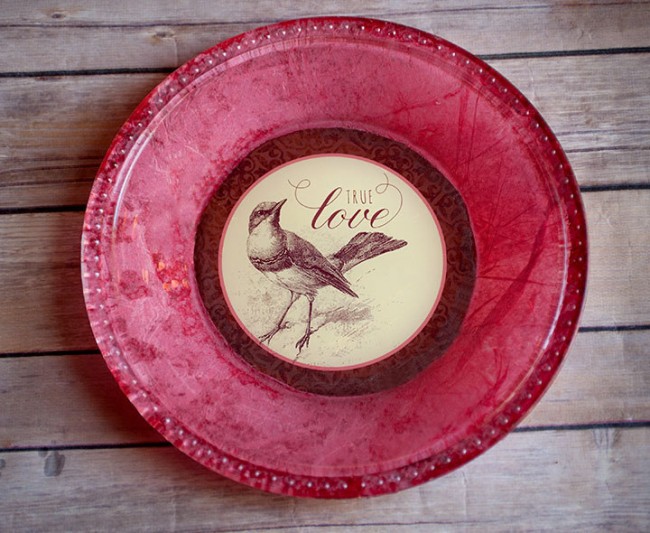
Let's try our hand at creating a New Year's decoration in the form of a plate. For its decor, we will look for a drawing with a Christmas story.To the already described needlework kit, add craquelure, a piece of twine or a harsh thread. From the paints we will prepare acrylic and metallic spray.
Working steps
We open the fat-free and well-dried surface of the plate with spray paint. Cut out the picture and fix it on a plate.
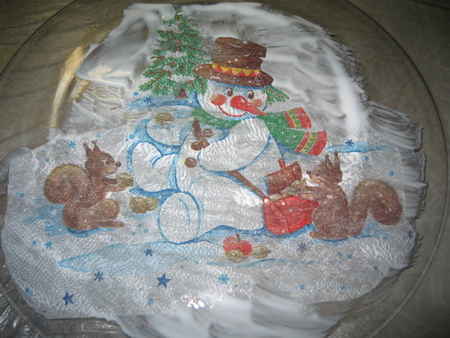
Cut out the picture and fix it on a plate
We cover the edge and the remaining free surface with craquelure and set aside until completely dry. We cover the processed part with suitable shades of paint.
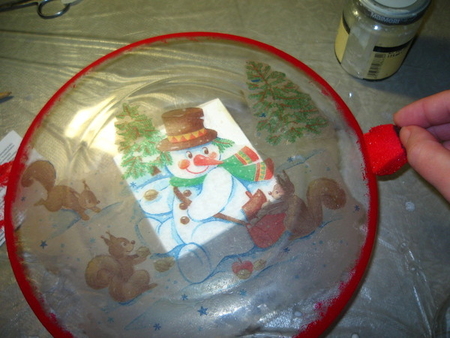
Finished part with paint
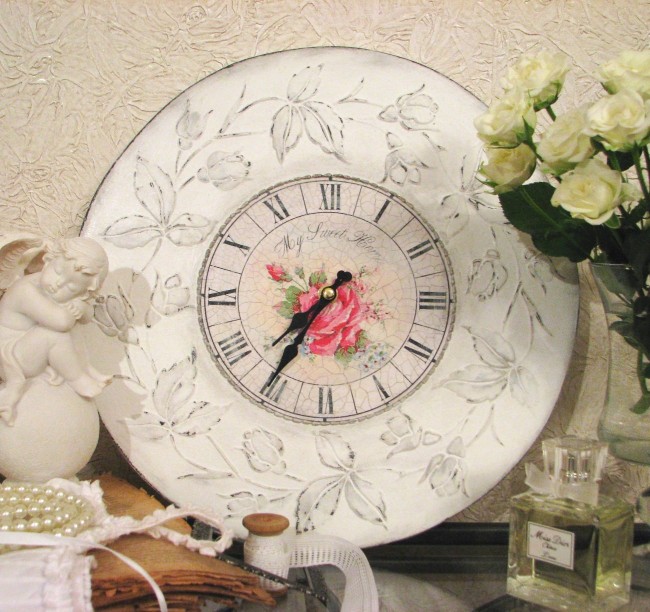
It is very important to make brush strokes when applying it in one direction. The edges of the picture are decorated with metallic droplets. We open a well-dried plate with varnish. See how such needlework for the home should look like in the photo.
We cover the dried plate with varnish
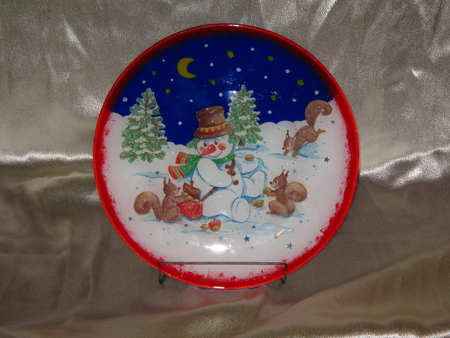
We make a loop from the twine and fasten it on the back with glue. For it, a plate can be hung on a wall or a Christmas tree.
Decoupage is just a storehouse of ideas for home decor. With a minimum of effort, you can get a simply stunning attractive interior, where the most ordinary objects will delight.
Decoupage with a minimum of effort will allow you to get a great interior
DIY home beauty
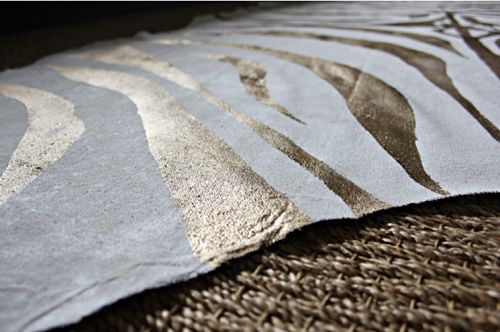
Perhaps there is no better incentive to do handicrafts for the home than the surprised looks of guests and the question of where this beauty was acquired. A zebra-printed rug will certainly receive such attention. You won't believe how easy it is to make.
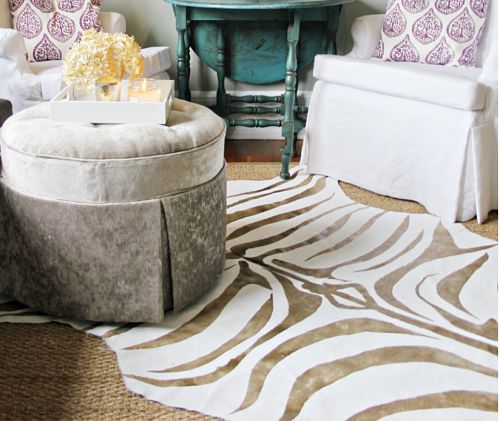
Zebra print rug
Fabric, in principle, you can dial any, but it would be better if it still was not too picky in operation. The surface should be easy to clean and not be afraid of moisture. Ideally meets these requirements vinyl. It's heavy enough to lay monumentally on the floor, and a durable material, plus it's available in a wide range of colors and textures. Of the consumables and tools to implement such an idea for home decor, you will need:
- scissors;
- fabric paint;
- upholstery fabric;
- thick paper.
What why
First of all, let's create a stencil. On paper, draw the outline of a zebra skin with all its stripes and cut out the resulting image. You can not worry about the lack of artistic talent. The main thing is that the strips do not turn out to be symmetrical and the same. For beginners in needlework for the home with their own hands, the Internet will be a good help in this matter. There you can find many options for patterns of zebra skins. They are simply printed out and pasted onto thick paper so as not to bother with redrawing.
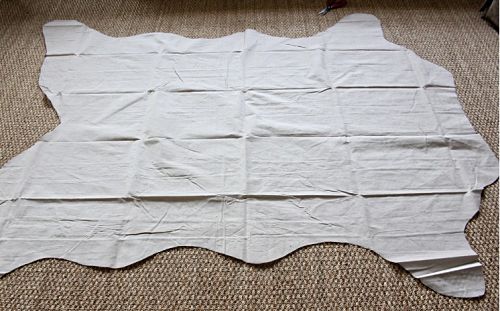
Cut out the outline with scissors
We fix the finished stencil on a vinyl cut. Draw the outlines of the stripes with a pen. We remove the stencil and paint the resulting area inside the contours with paints.
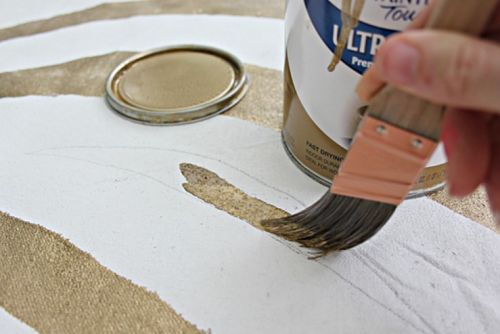
Coloring the areas inside the contours with paints
For a better hold, the pattern can be sealed with a clear acrylic spray.
Cover the finished drawing with acrylic spray
Looking through similar photos of needlework for the home, you can see an interesting effect of gold leaf along the contours of the pattern. Krylon handles help to get it. Their quick-drying paint lays very securely on the fabric, and the pattern can be additionally not protected.
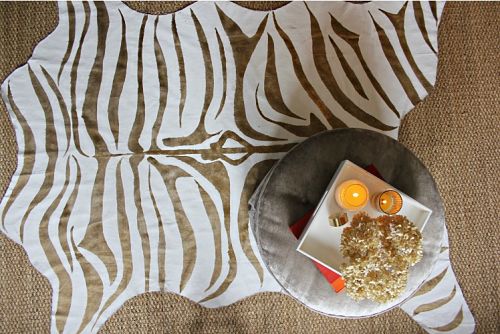
Finished result
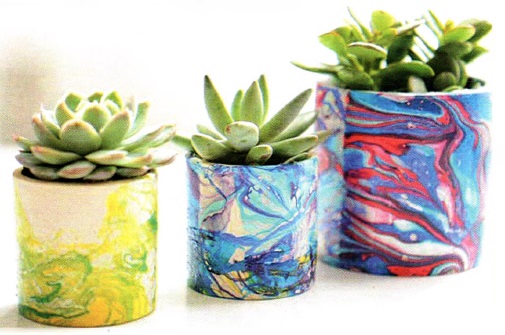
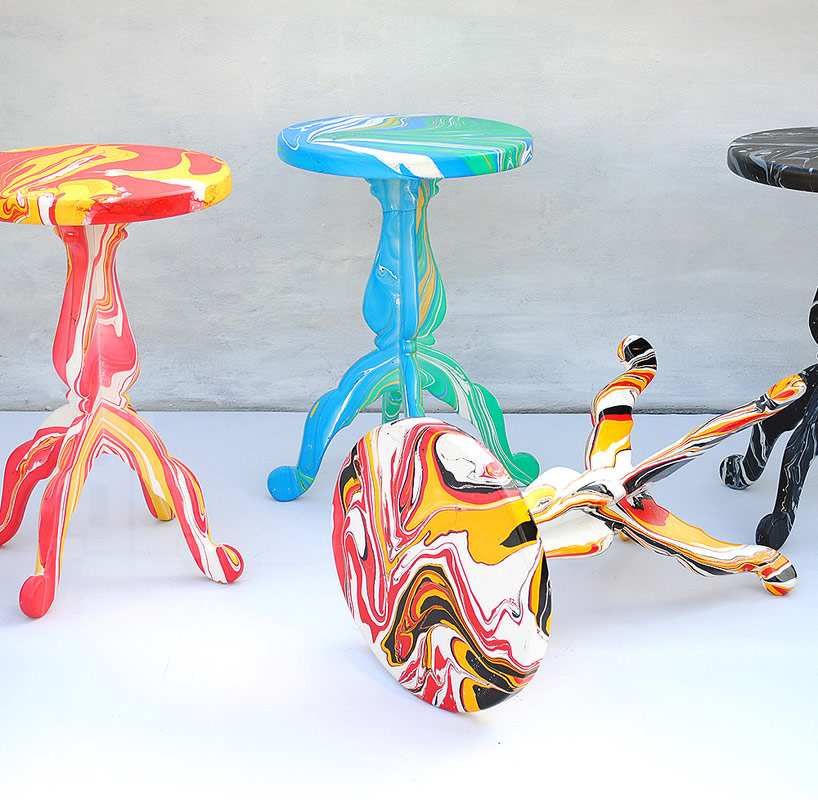
Marble crafts: do-it-yourself needlework master class for the home
How to acquire extremely fashionable items made of marble today? Simulate its texture using nail polishes!
You will need:
1. Decor object. These should be things made of solid materials with slightly absorbent surfaces.
2. Manicure varnishes. Marble needlework for the home for beginners should be limited to two color varieties so that daubing does not work out. Handmade professionals, who have been embodying ideas for home decor for many days, are free to use an arbitrary number of shades.
3. Smart enamel. It can be replaced with a colorless varnish.A disposable plastic container or other containers that you don’t mind throwing away after use.
4. Acetone. You can use nail polish remover.
5. Toothpicks and small-width duct tape.
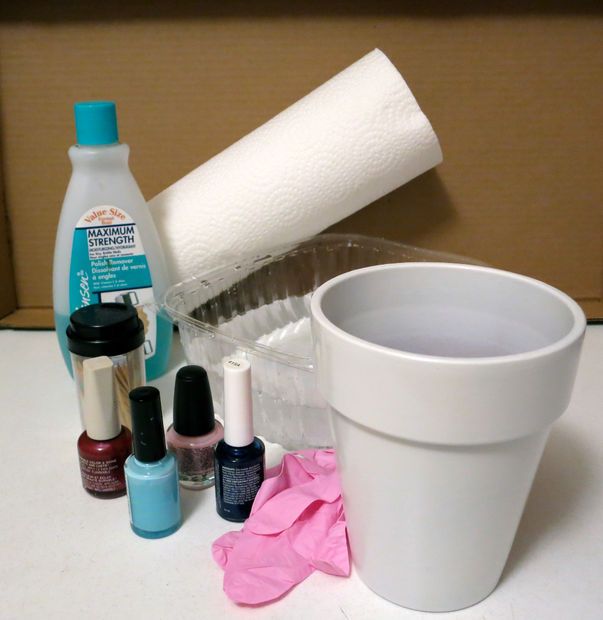
Necessary materials for marbling
Procedure
“If your home decor ideas dictate the use of several marble-like items, you will need to remove the remaining varnish from the container and repeat the preparatory process from the beginning”
The area to be painted is limited to strips of adhesive tape.
The container is filled with water. Now here you will need to add varnishes. They are not poured into water, but dripped from a brush, observing the strict sequence of color layers.
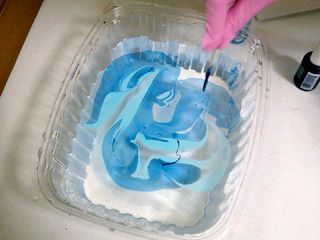
Add varnishes to a container of water
Next comes the toothpick. She will need to draw several strips in the direction from the center to the edges. How this stage goes and what should be the result, you can see in the corresponding section of needlework for the home in the photo.
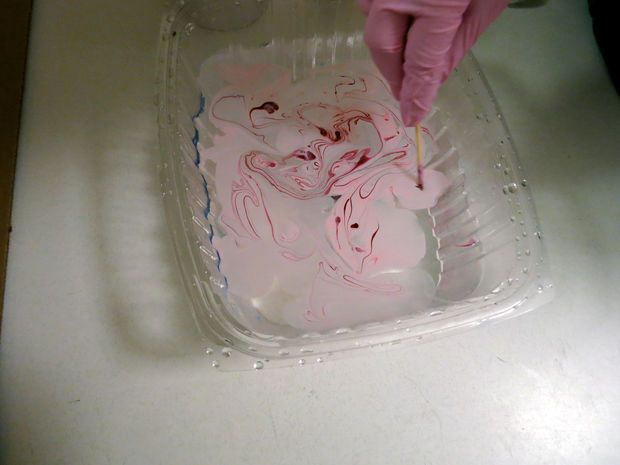
Make patterns with a toothpick
It remains to immerse the part of the dish to be painted into the container and wait until the pattern gathers around it. Carefully remove the item and send to dry.
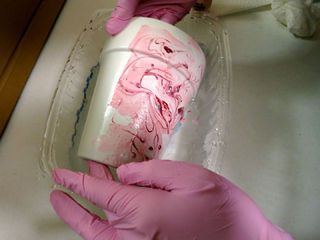
Immerse the pot in the container
If your home decor ideas dictate the use of several marble-like items, you will need to remove the remaining varnish from the container and repeat the preparatory process from the beginning.
The marble pattern on the decorated object is fixed with transparent varnish. The last step will be to remove the adhesive tape and remove varnish streaks, if any.
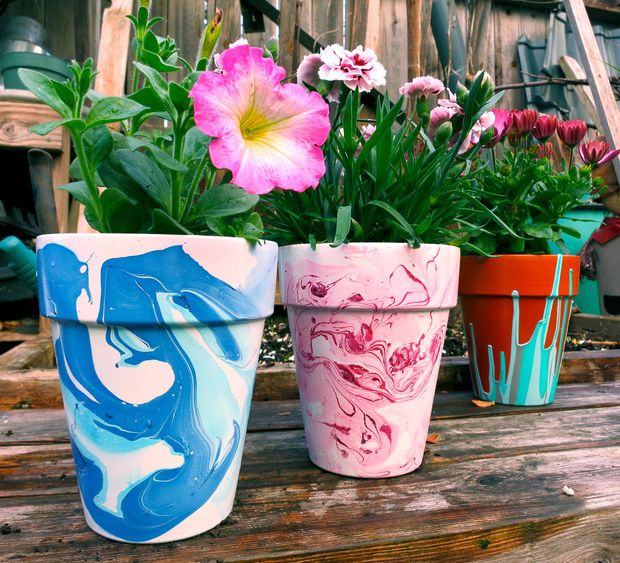
Dry and varnish the product
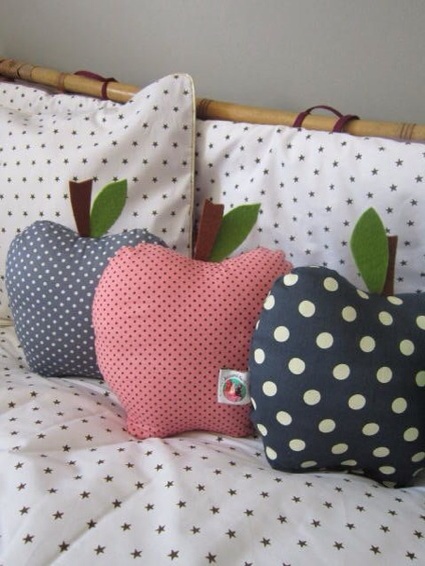
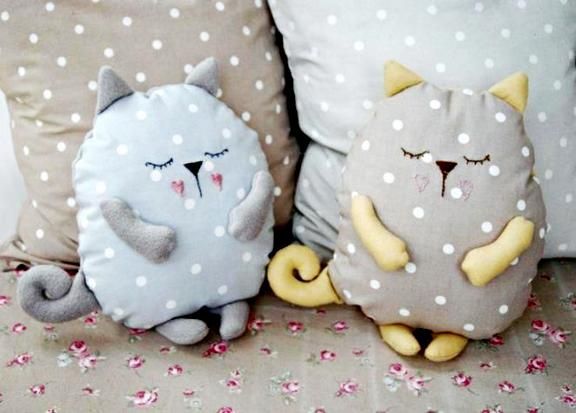
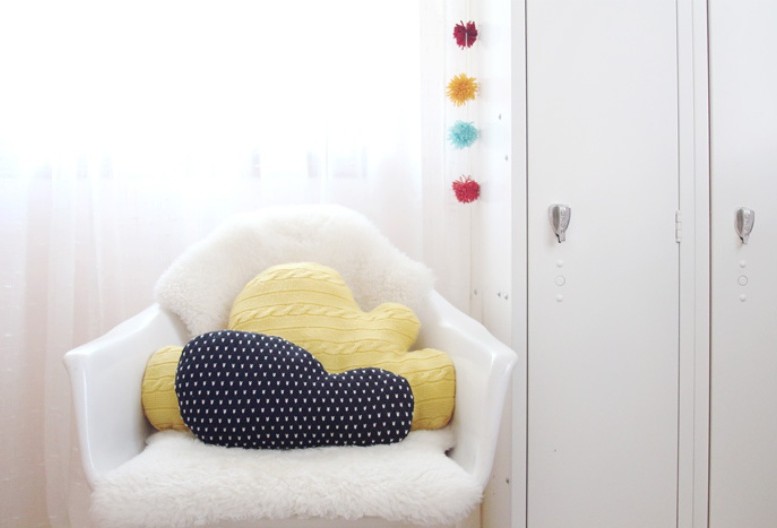
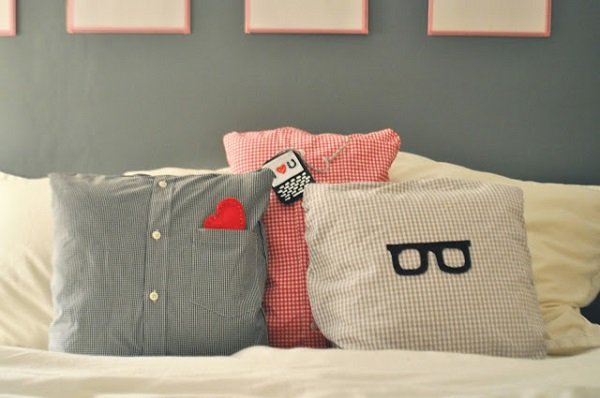
Textile crafts
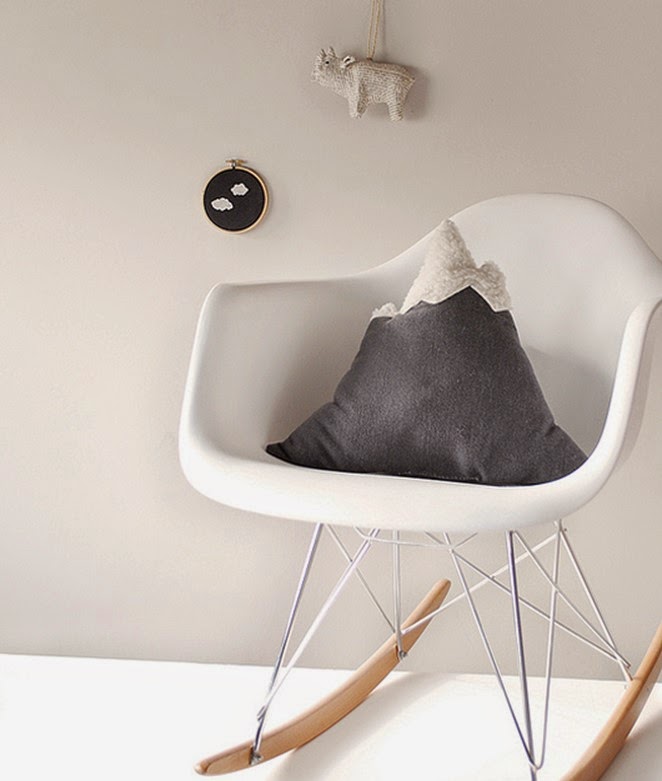
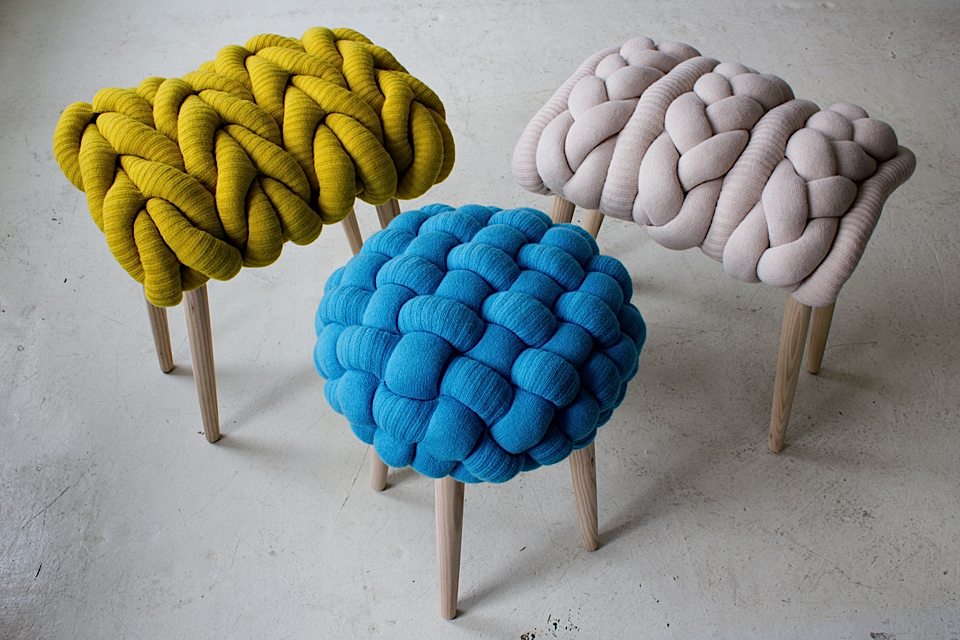
The easiest way to change the interior mood and update the design of the house is bright poufs and decorative pillows. If you have a sewing machine, such DIY needlework for the home will turn into an exciting activity.
You don’t know how to sew and there is no money for new pillowcases, decorate the old ones. They can be repainted or painted. In the absence of imagination, ideas for home decor can be found on the Internet.
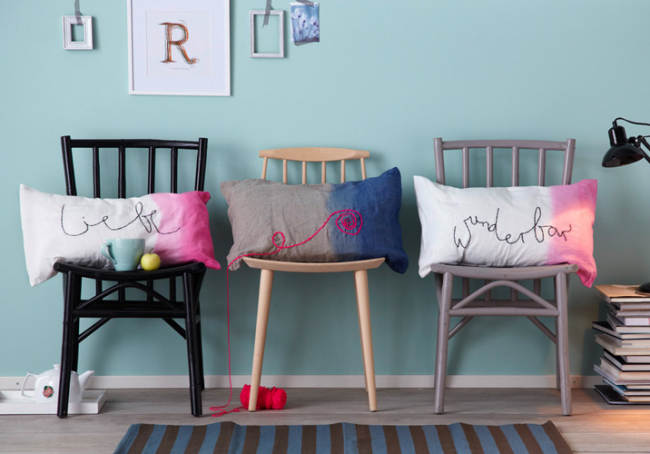
Pillows can be repainted and painted
Pillows painted in ombre style look very interesting.
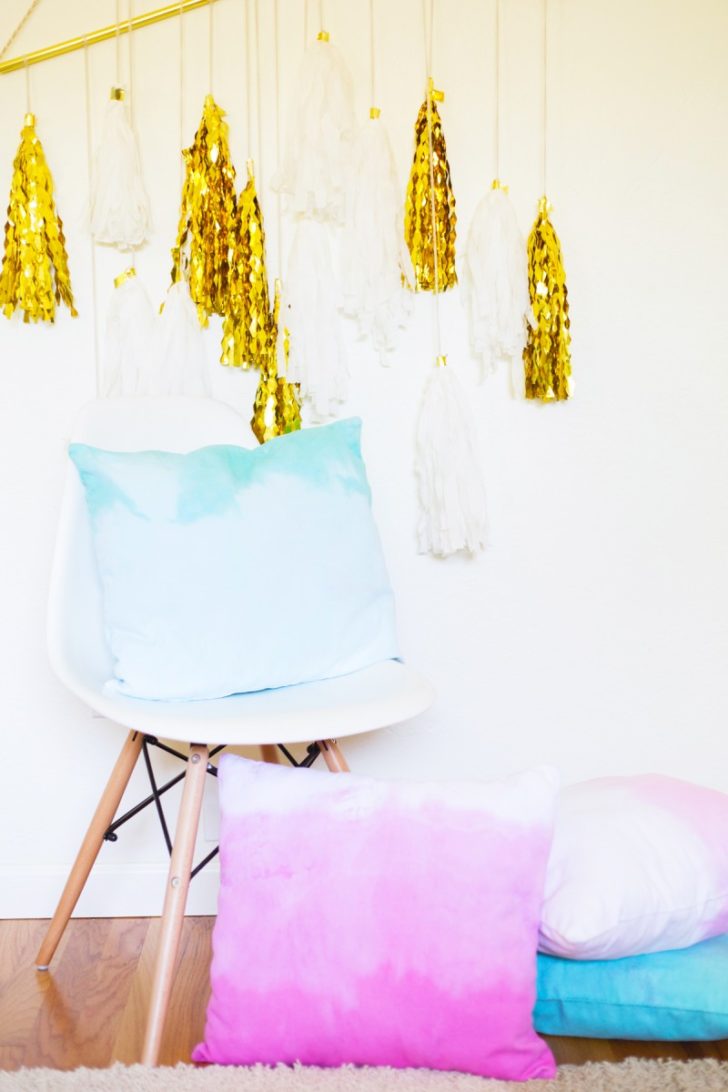
Pillows painted in ombre style
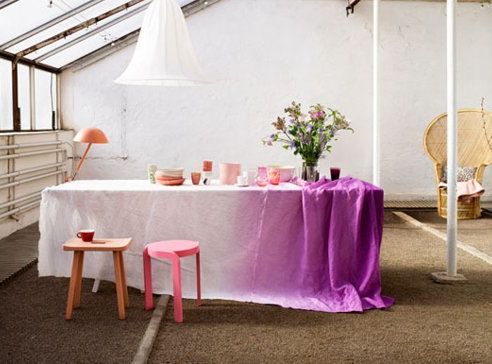
In work it is better to use RIT dyes. In order for the fabric to evenly absorb the paint, it must first be moistened with water. Getting the ombre effect is not that difficult, so the option is ideal for beginners in needlework for the home.
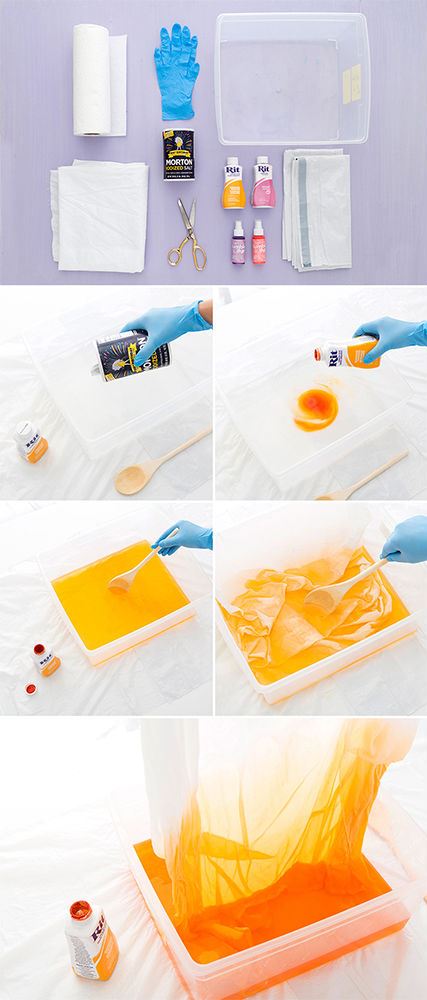
Ombre fabric dyeing
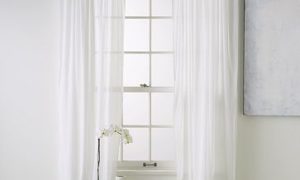
All you need to do is dilute the paint in the basin and dip the selected pillowcase into it, about two-thirds of the length. After that, we immediately pull it up by about 5 cm and in this position we leave it to lie down for several minutes. Again we will pull it up by the next 5-7 cm. We will do this until we completely remove the material from the solution. By the same principle, you can update any textiles in the house, including curtains.
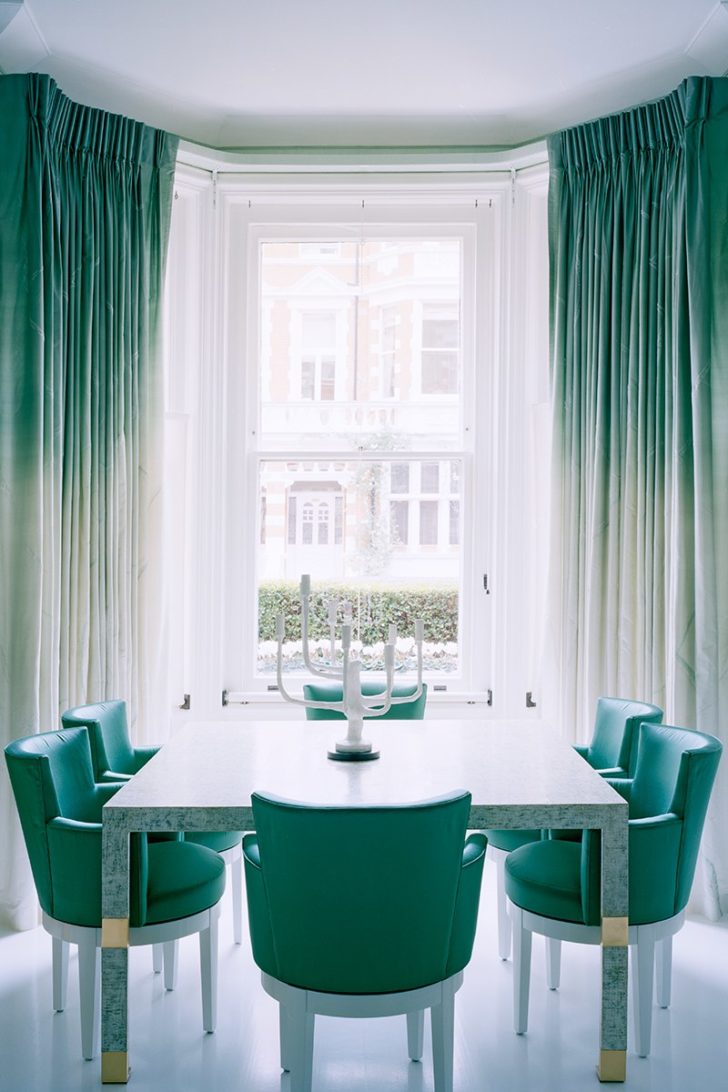
By the same principle, you can update the curtains
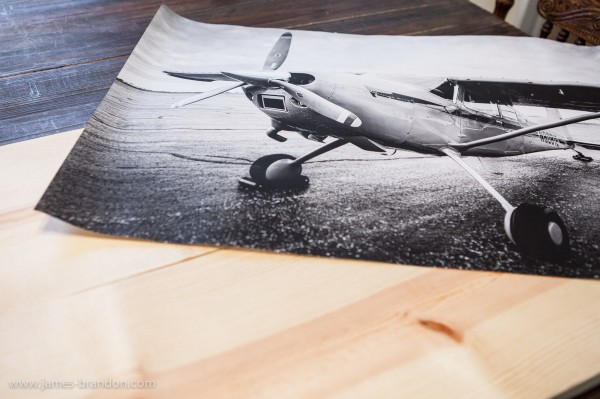
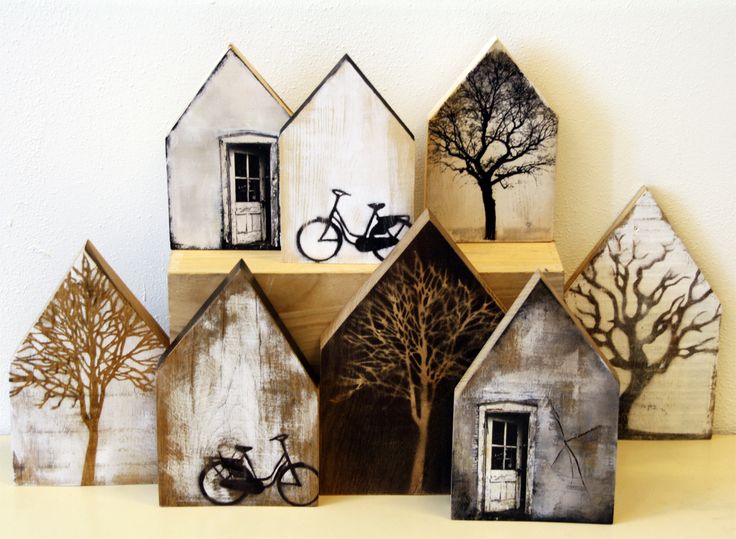
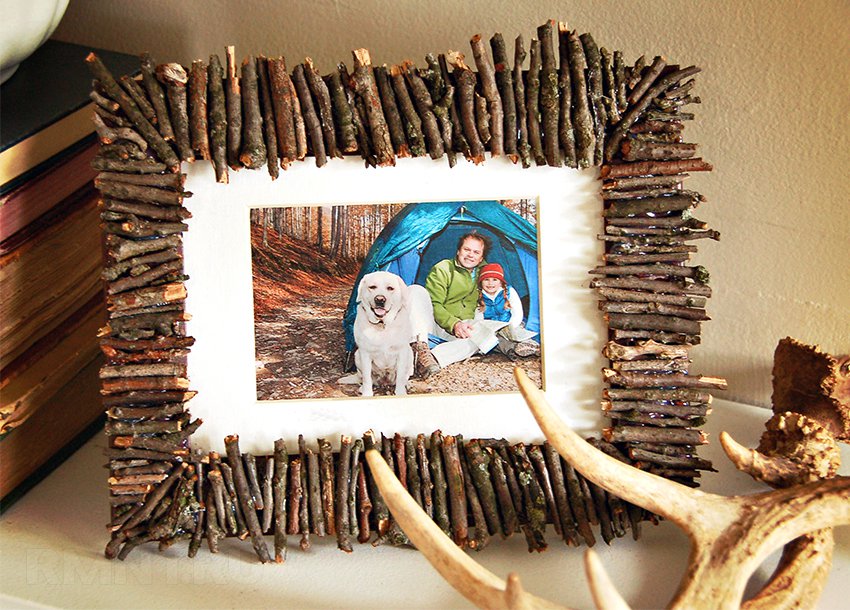
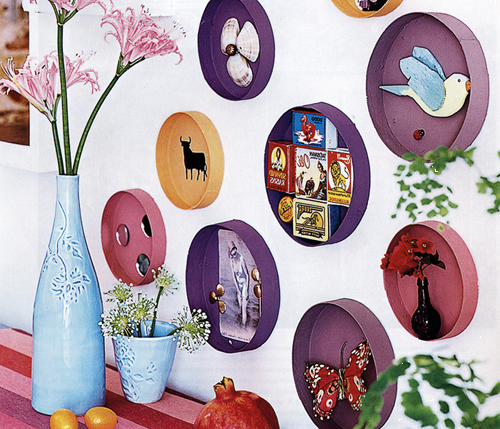
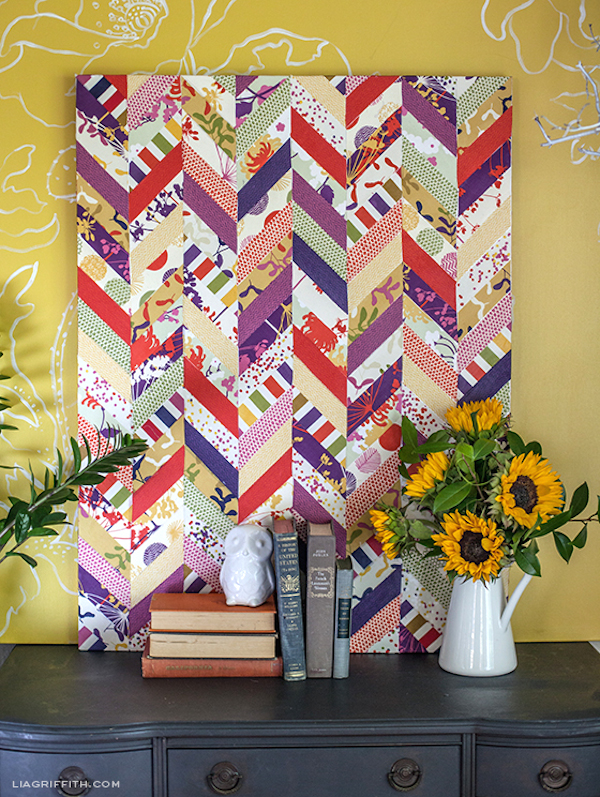
Photo decor
This is not just a photo framed on the walls. Everything is much tougher! There are two ways to create decorative elements.
Option I
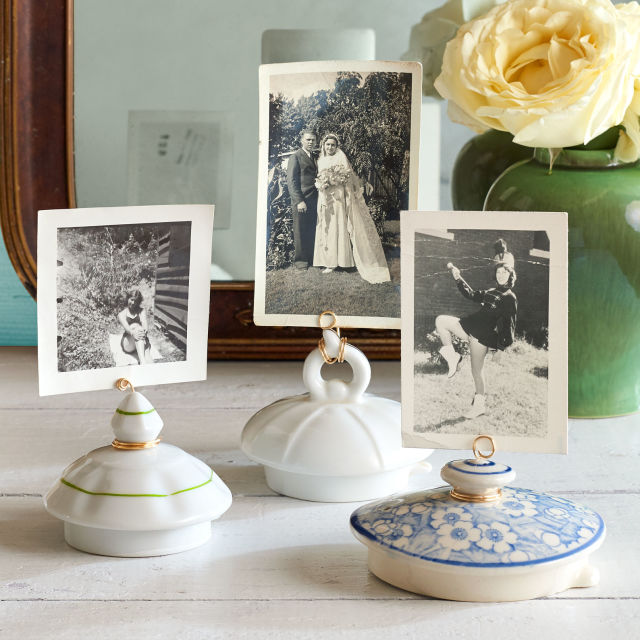
For this type of needlework for the home with your own hands, you will need to find a substrate. Cardboard, polystyrene, plywood, board are suitable for its role. We print the photo in such dimensions that its sheet is five centimeters larger than the size of the substrate. This stock will go to the folds.
The photo is placed on the base. The ends are folded over and secured with tape. You can put them on glue or fix them in any other way. We process the picture to make it shine with an adhesive solution. It remains to come up with a frame, although it is quite possible to leave the masterpiece in this form.
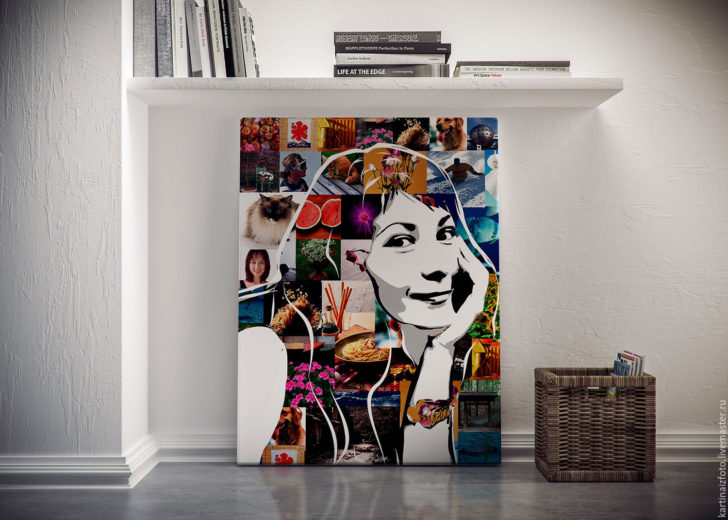
Original portrait from photographs
What's so masterpiece? Approach to image selection. Ideas for home decor in this case, a whole bag.You can make a photo-cut and assemble the pieces a la Salvador Dali, that is, mix legs, heads, hands into a bunch. Or go the other way and leave only part of the body in the picture, for example, legs. This idea looks especially interesting when processing your children's photos. It is interesting to remember in what sandals or boots they once walked.

Pictures from family photos
Option II
Another master class for needlework for the home for beginners. Here you need a base of a slightly different plan. The canvas will play its role. It is stretched on the frame and covered with a greasy layer of a special gel. You can buy medium gels in finishing materials stores.
The photo can be transferred to any surface
A photo is superimposed on the processed canvas, with the front surface inward and tightly pressed with something heavy. In this position, the workpiece will remain for several hours. To prevent the photo from simply drying to the gel layer, it is necessary to sprinkle it with water. It is better to do this with a spray gun.
The final manipulation in do-it-yourself needlework for the home will be removing paper from the back of the photo.
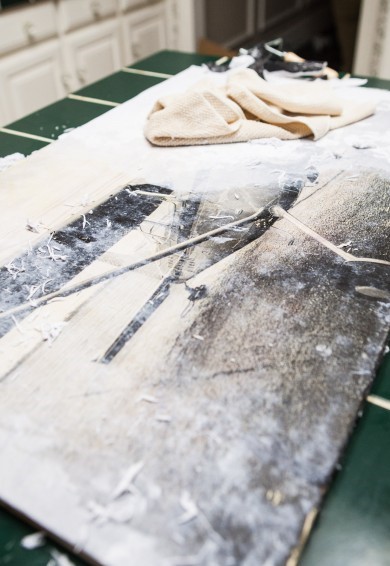
Removing paper from the back of a photo.
This must be done very carefully so as not to damage the image itself. The result is a decor in a vintage style with the effect of antiquity. We fix the image with a protective layer of the same gel that was used on the base.
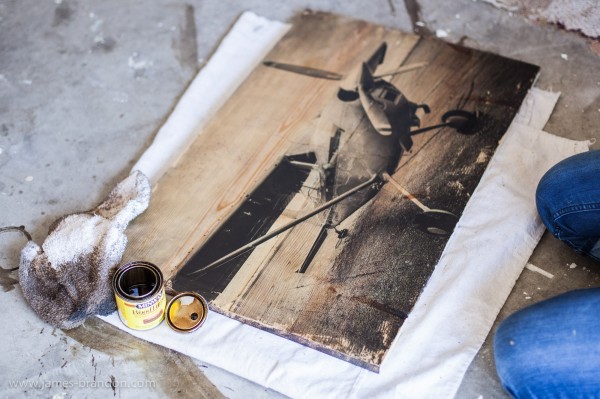
We fix the image with a protective layer
Interesting ideas for home decor
To update the atmosphere, bring additional warmth to it and make it even more comfortable - cute little things will help. Take a look around. After all, there is where to turn around!
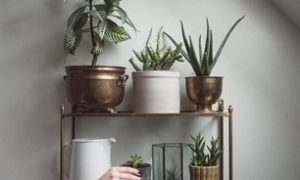
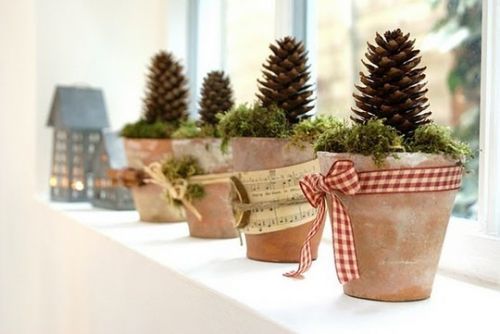
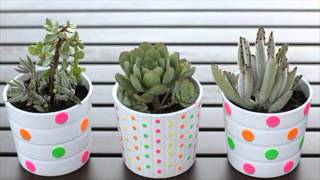
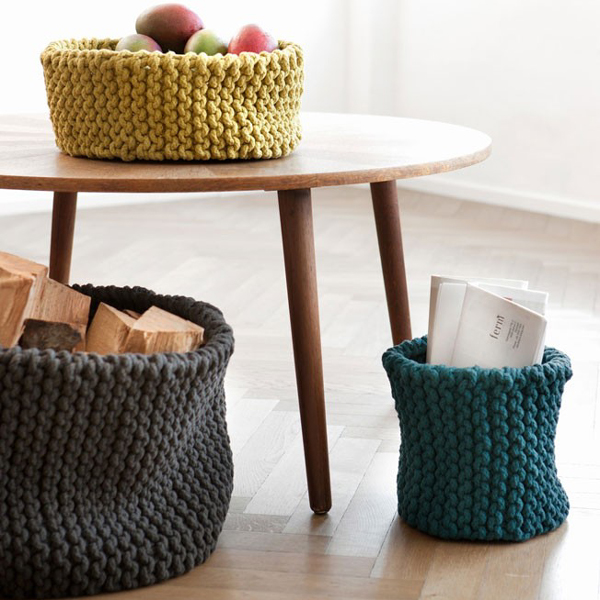
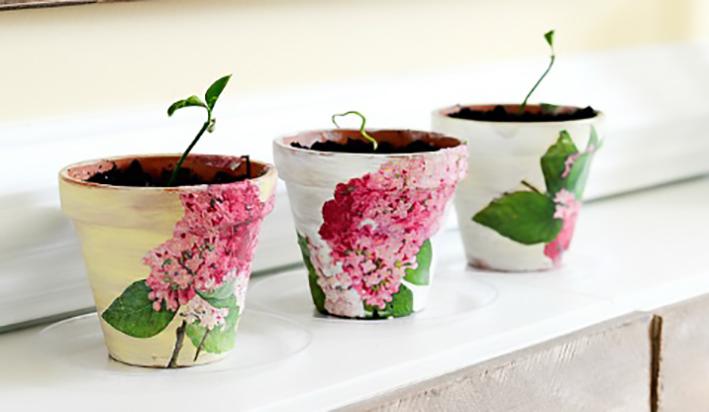
Pots in socks
Home floriculture is a fairly common hobby for housewives and many have a good collection of plants, but the trouble is, clay pots, however, like modern plastic, quickly burn out on windowsills and lose their attractive appearance. You can put them in order in the following simple way - hide them in bright striped socks. It will turn out beautiful and fun. Your garden on the windowsill will sparkle with new shades.
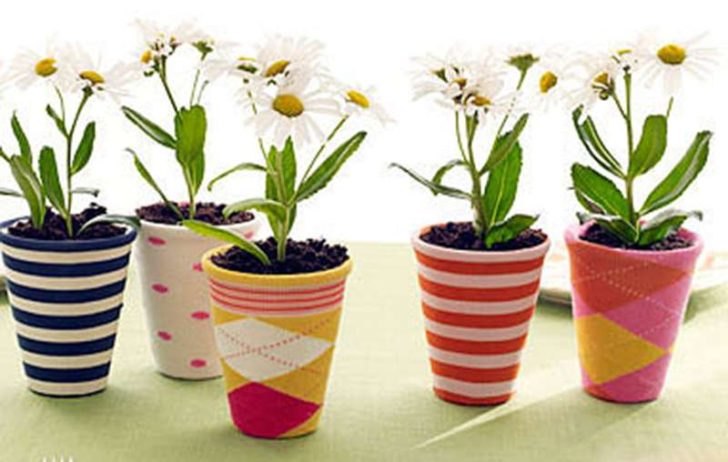
flower pots in socks
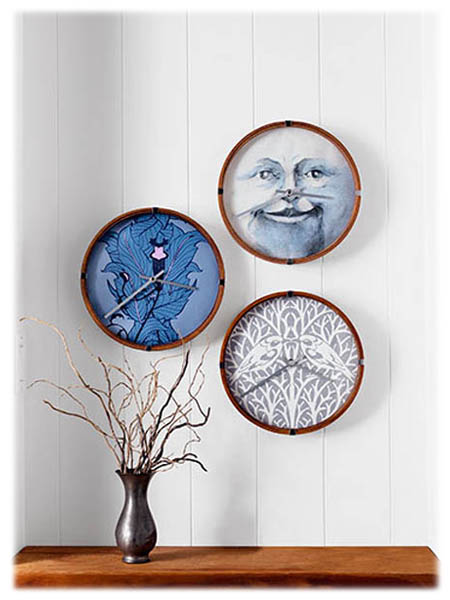
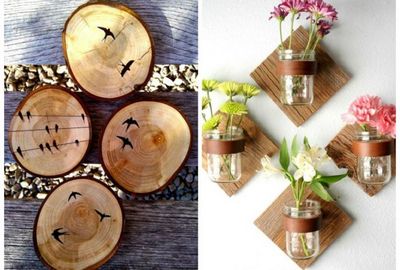
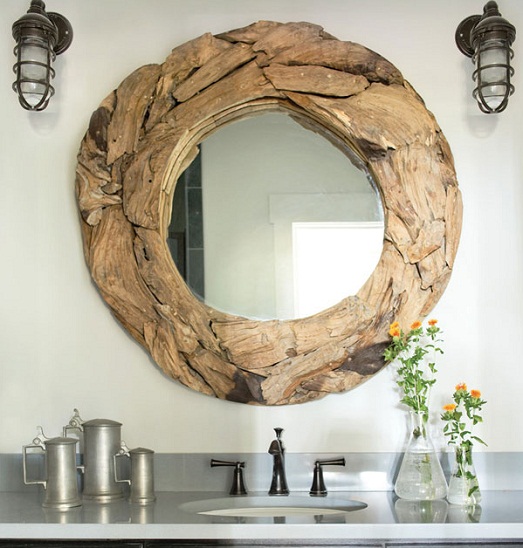
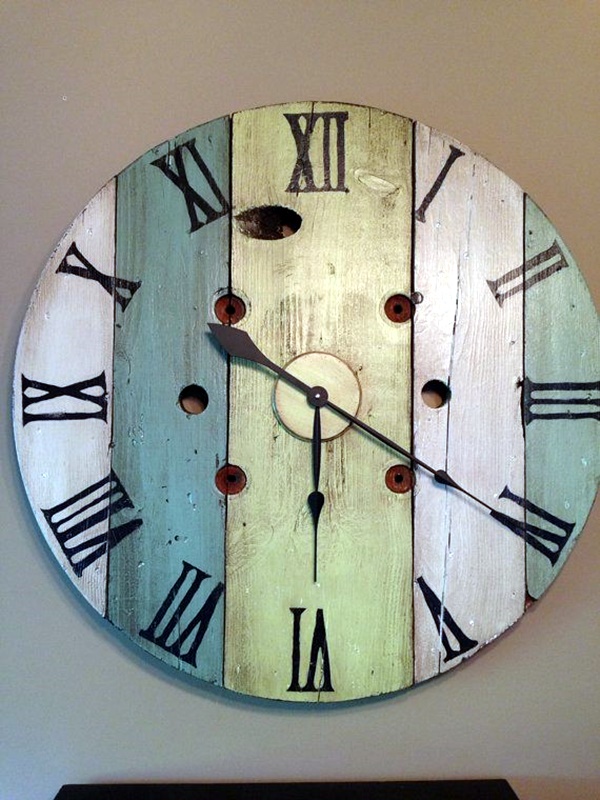
Wall Clock
Those to whom handicrafts for the home bring real pleasure with their own hands can make them in several versions and place them in different rooms. For a bedroom, for example, a dial option in which a family photo serves is suitable. You can also hang a wooden clock in the living room. This is truly needlework for the home for beginners. All you really need to look for here is a beautiful cut of wood. The rest is probably in the home bins. The clockwork can be removed from old clocks. From there, grab the arrows.
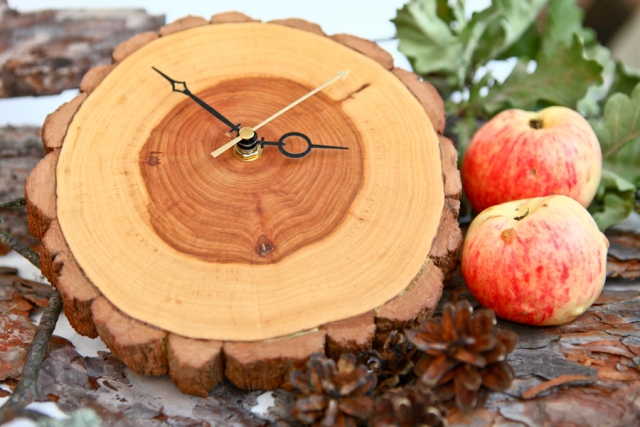
You can make a clock from a cut of a tree with your own hands
The wood cut is polished with emery. This will be the dial. It is not necessary to apply the entire circle of numbers on it. It is quite enough to burn out the indicator 12 with a soldering iron. We open it with varnish and let it dry. Now we drill a hole in the center and fasten the hands with a clockwork. How else can such needlework for the home look like, look at the photo.
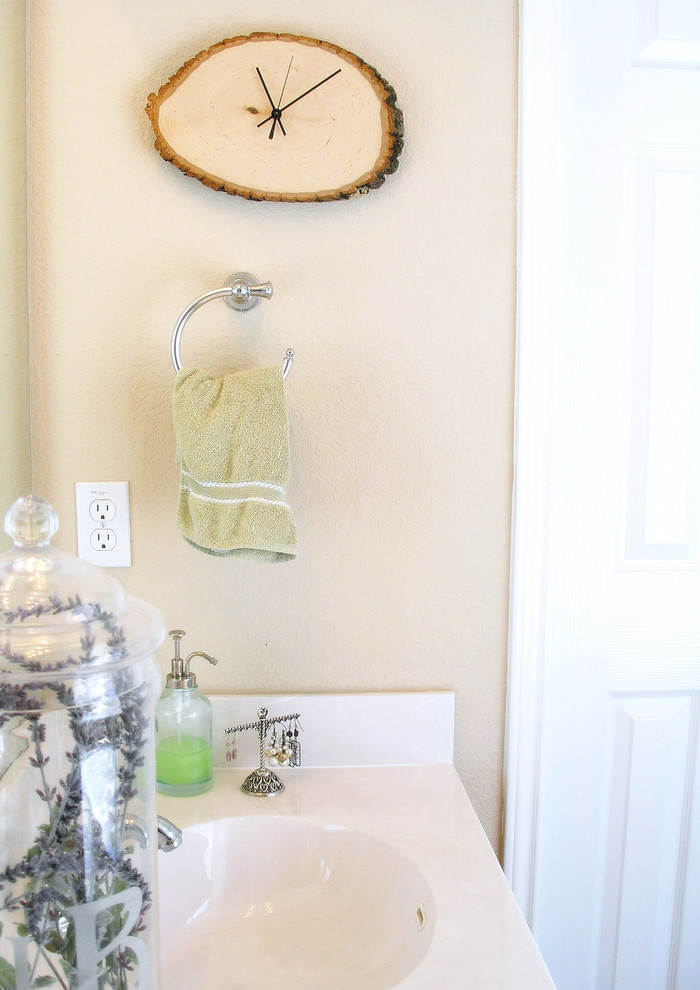
Clock from a slice in the interior
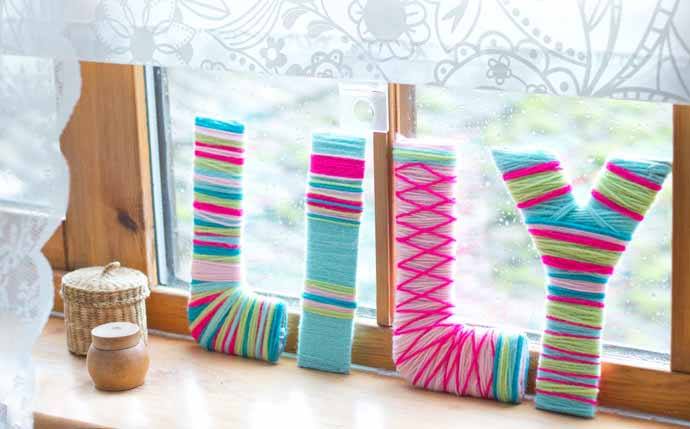
An old t-shirt turns into...
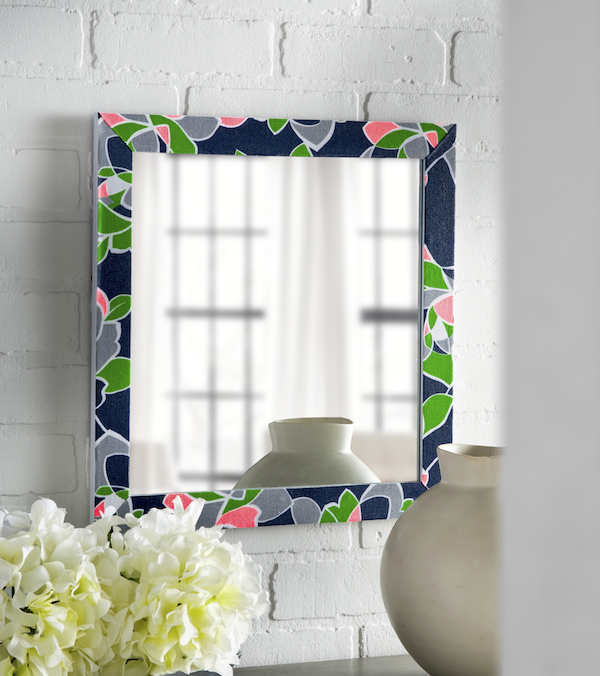
Into the picture! The thing is out of fashion, and there is no strength to part with it? Use it in needlework for home decor with your own hands. This is done very simply. Wash and starch the product and cut out the most remarkable part that bears a print or lettering. Stretch it on a pre-prepared frame and fix it with small carnations. You can use hoops for this purpose. Now it remains to make a beautiful frame, the options for which can be searched in ideas for home decor.
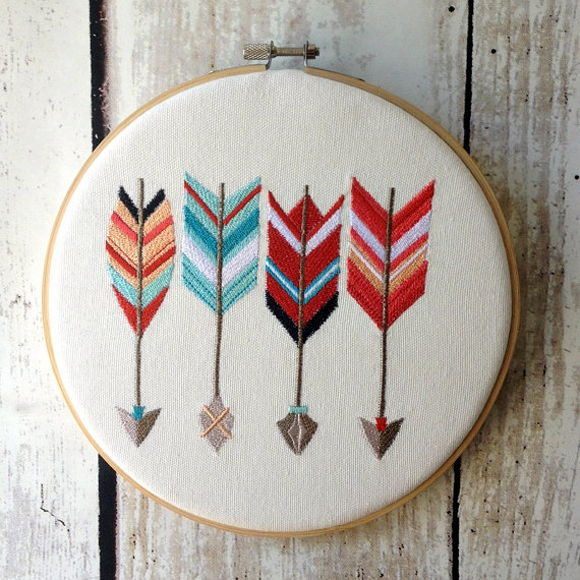
Home decor from an old T-shirt
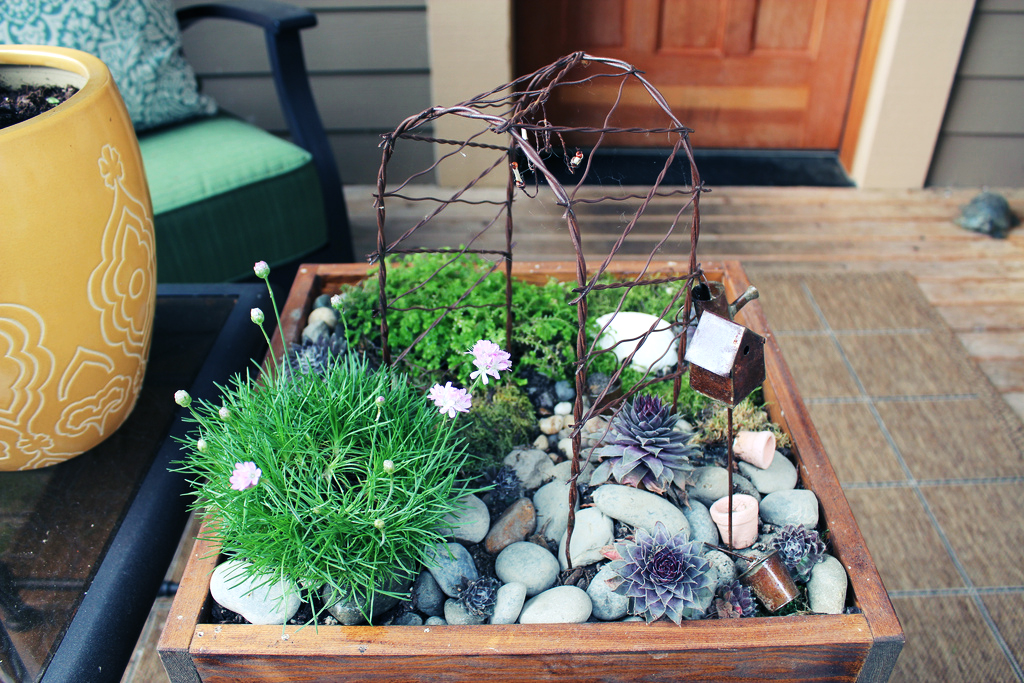
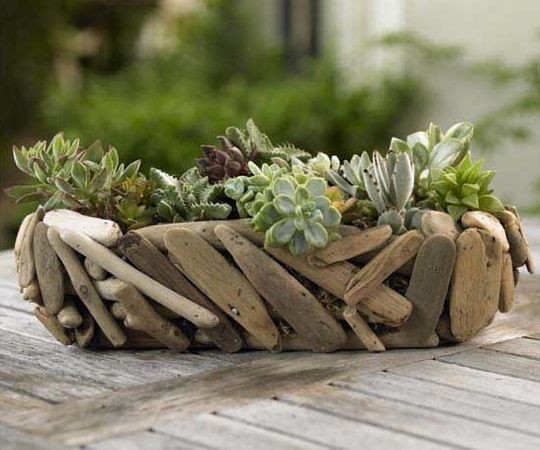
living decorations
You won't find a more sustainable way to decorate your home. The home plants of the succulent group are used. Unpretentious, in rich colors, they become the accent centers of interior compositions. So how do you get such an impressive decor?
To do needlework for your home with your own hands, you will need:
1. Wooden container of small depth.
2. A piece of metal mesh.
3. Wooden frame corresponding to the perimeter of the container.
4. Any succulents.
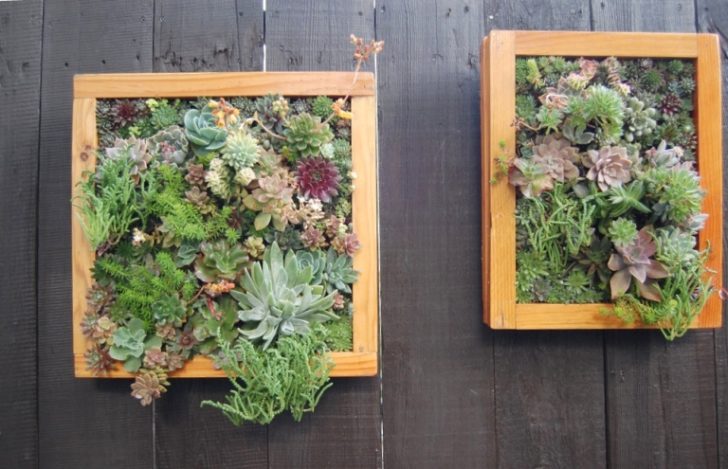
Wall arrangement of succulents
Preparing the plants "home". We fix the sect to the container with the help of a frame. We fix the frame with staples or small nails. We are preparing a set of succulents for composition. Combinations of different types of plants that differ in shape and color will look most advantageous. What are succulents?
1. Miner.
2. Stonecrops.
3. Stone rose.
4. Aloe.
5. All cacti.
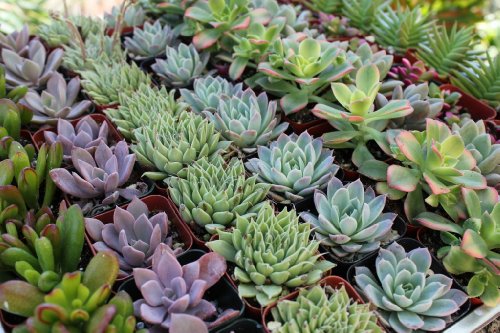
Combinations of different types of plants look advantageous
But back to the implementation of the idea for home decor. We fill the container with soil and plant the selected plants in the cells. You can plant cacti not so densely and decorate the remaining voids with colored gravel. It remains to find a suitable place to demonstrate what has been received.
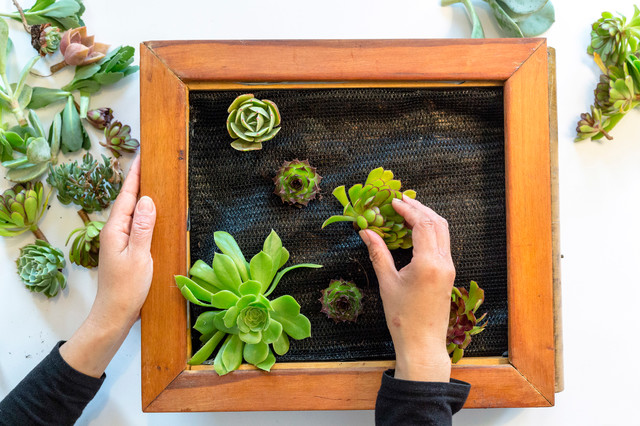
The process of planting succulents
Under such an arboretum, you can take an empty aquarium. It will turn out incredibly unusual, just a mini-desert at home.
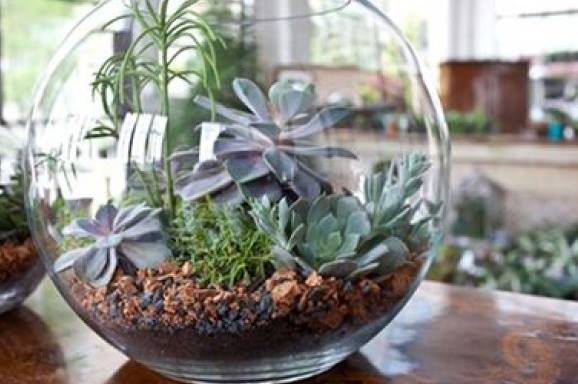
Succulents in a small aquarium
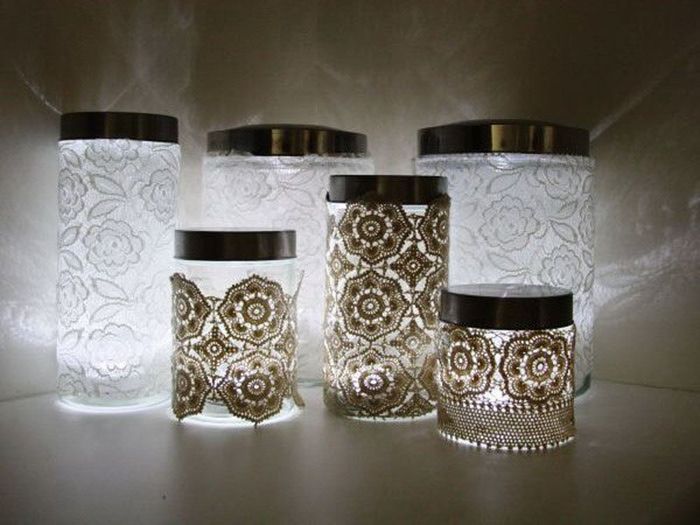
Lampshades
That's where the mass of ideas for home decor lies. What are they not made of. Plastic spoons and cups, wooden clothes hangers, threads, tins, tetra packs, fabric, wire, in general, everything that is at hand, even hats, are used. Lampshades from the latter will make the interior more than original. Elegant cylinders and bowls will create a specific atmosphere in the hallway or kitchen. A master class on needlework for the home can be found on the Internet.
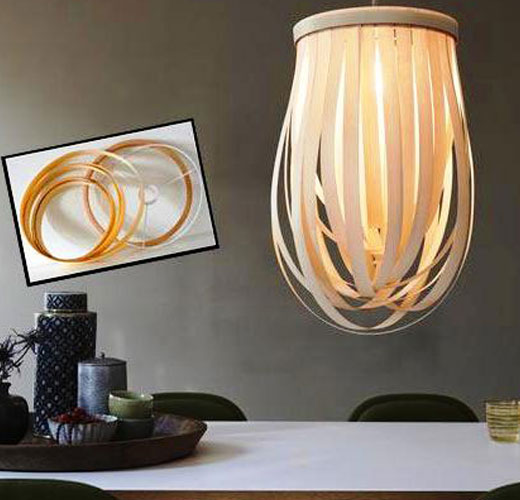
Original DIY lampshade
What do you think of the idea of using a square grater instead of a lampshade? The design looks great and gives a nice diffused light. Naturally, the scope of its use will be limited to the kitchen, but how creatively the situation will be perceived!
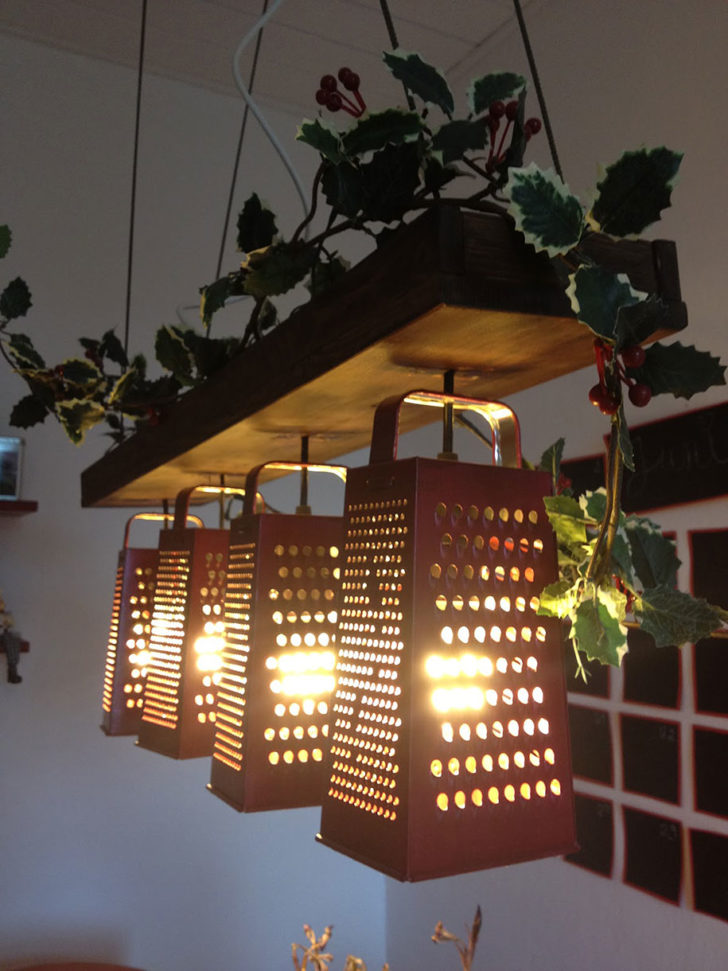
Creative grater lampshade
Conclusion
Buy or use home decor ideas and make your own decorations? The question is rhetorical. But if you are an adherent of the individuality of the interior, then it is still better to choose needlework. Hand-made objects will bring not only originality to the house - they will fill it with a special, incomparable comfort.
Photo gallery - needlework for the home


Video