A holiday ... He will never come to a house where he is not expected and where they are not prepared for him. But creating a festive atmosphere is not at all difficult. Sometimes such a seemingly unsightly step is enough, how to make a postcard with your own hands. A little ingenuity, a little effort, and now people close to you have a smile on their faces, an appropriate mood is formed.
- How to make DIY postcards: the art of cardmaking
- How to make a postcard with your own hands: the choice of materials
- How to make a beautiful postcard yourself: design nuances
- How to make DIY postcards: popular techniques
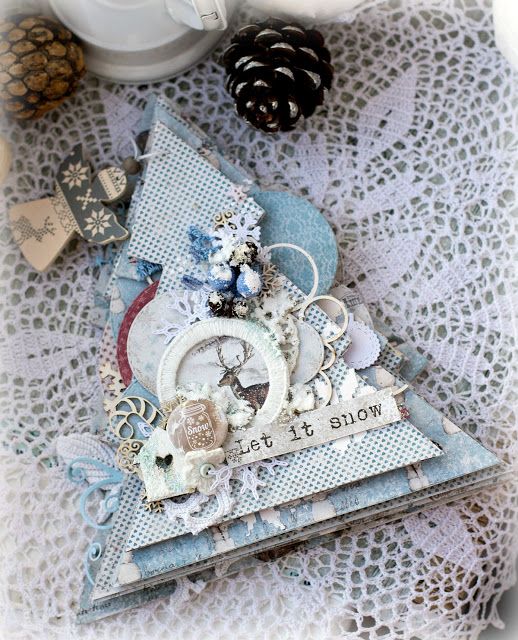
- Volumetric postcards
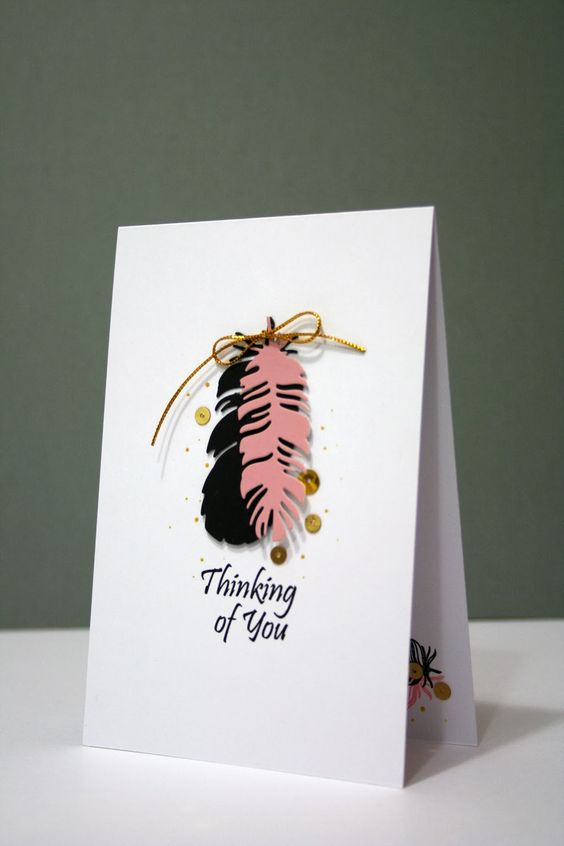
- How to make a beautiful birthday card
- How to make a beautiful card for mom
- Conclusion
- Photo gallery - do-it-yourself postcard
- Video
Why handmade? The answer is banal. At least a piece of the soul will be invested in the product. In addition, a hand-made postcard is a 100% exclusive and a hit on the topic. It will never be soulless punching, which means it is guaranteed to create the necessary emotional background and even more, it will become a memorable souvenir of a significant event.
Creation postcards - the process is quite exciting. It is available even to those who have never been fond of handmade. Just a little theory - and you can get down to business.
back to index ↑How to make DIY postcards: the art of cardmaking
Modern needlework professionals called cardmaking the sacrament of creating beautiful postcards with their own hands. The process is based on working with improvised materials using available techniques. To help the creators of masterpieces, modernity is given auxiliary tools, a variety of fixtures and an abundance of accessories for decoration. Some of them may require specific skills to use. And they should be mastered in order to learn how to make truly touching and original postcards.
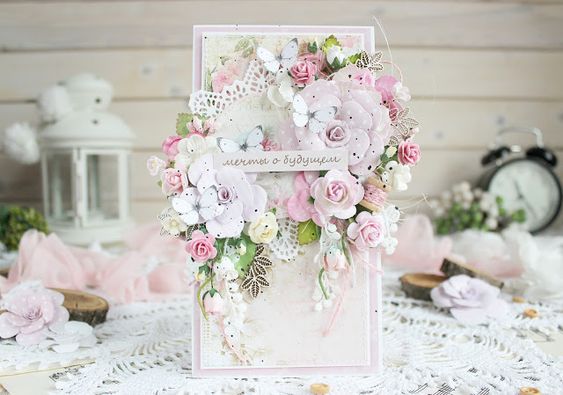
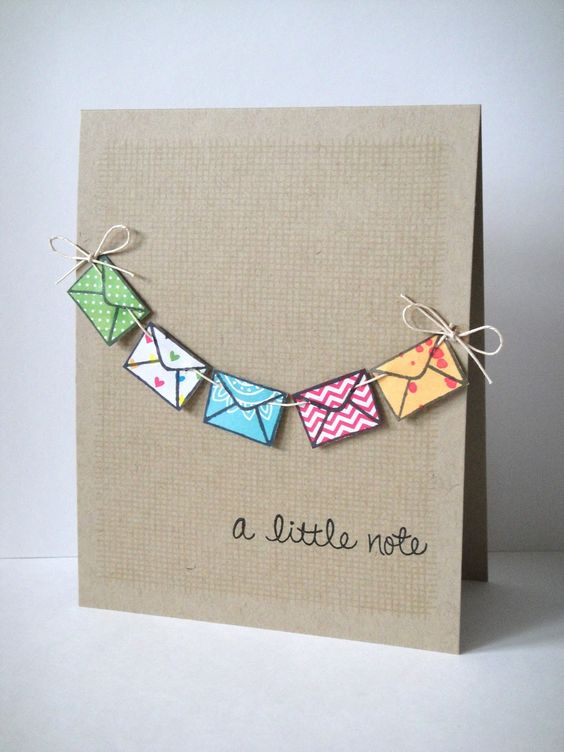
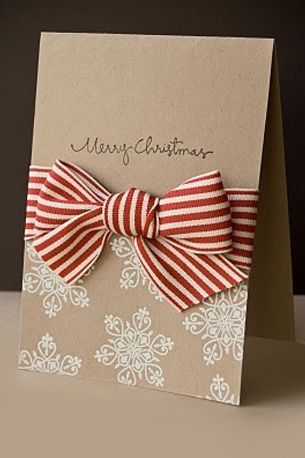
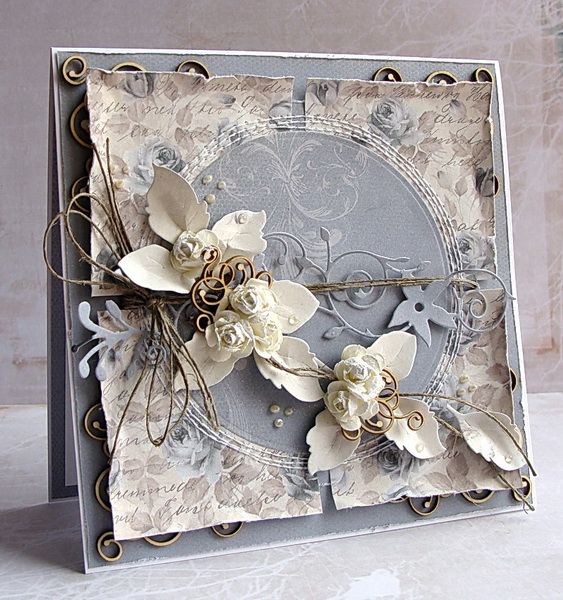
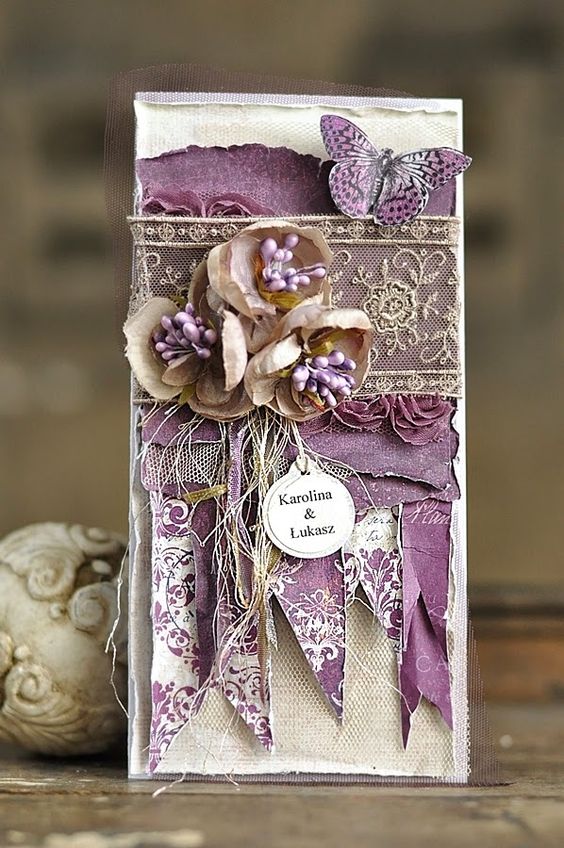
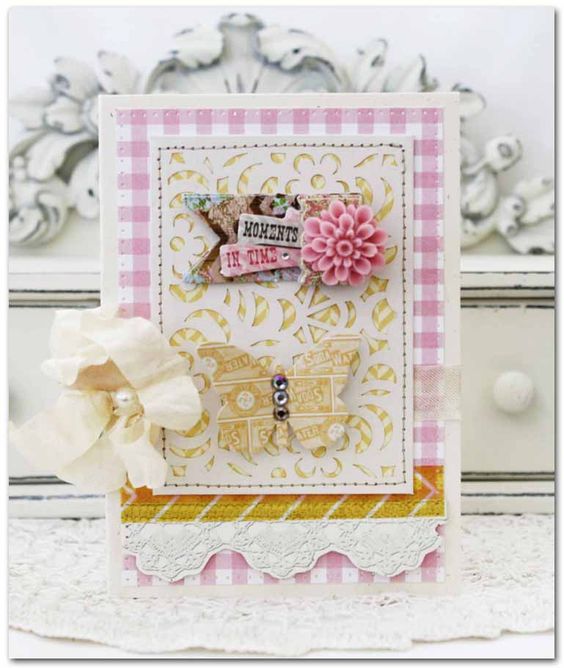
A do-it-yourself postcard will become a memorable souvenir of an important event
The design will require the ability to combine colors and create harmonious compositions from motley details. Here it is permissible to rely on a personal sense of taste.
As in any business, the experience and advice of professionals will help to improve in the art of making beautiful postcards with your own hands.
back to index ↑How to make a postcard with your own hands: the choice of materials
“If you understand how to make postcards with your own hands, you can make something yourself with professional tools”
For beginners, work on a postcard can be started using a standard type of blank or take material with well-studied qualities for this purpose. Basically, for the manufacture of postcards they recruit:
- Paper of various density and color;
- fabric scraps;
- Tapes.
Of the tools and consumables involved:
- adhesive compositions;
- Scissors;
- brushes;
- Paints;
- All known decorative elements.
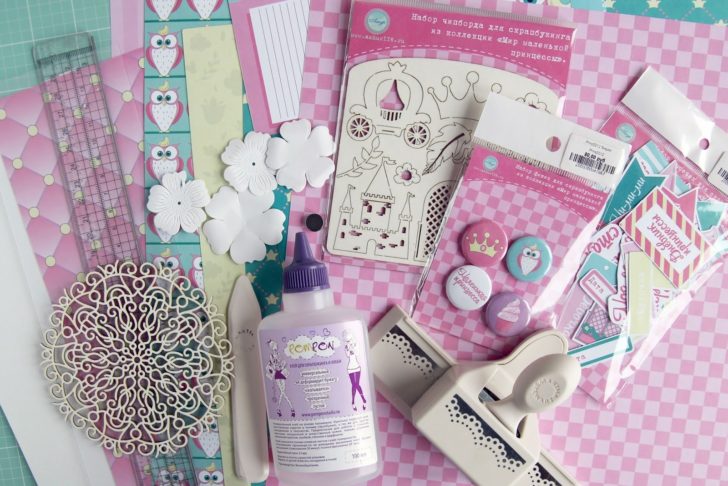
DIY postcard materials
With the growth of personal qualifications and understanding of how to make a beautiful postcard with your own hands, the technology for the production of postcards can be complicated and the range of items and accessories used in the work can be expanded.An alternative to cardboard and album sheets in this case will be paper specially made for scrapbooking and quilling. A worthy place among beads, flowers, brads, clips, buttons will be occupied by chipboards, along with simple and voluminous stickers. Also in the decor, it will be possible to turn to the craquelure technique, use stamping, stencils, and use gel and watercolor pencils. To give the product a non-standard shape, scissors with a device for curly cutting, sharp knives for cutting paper, curly hole punches and double-sided tape will help.
An example of a chipboard for decorating postcards
If you understand how to make postcards with your own hands, you can make some of the professional tools yourself. This will give you the opportunity to significantly save money, and additionally develop creatively. So, for example, it costs nothing to make a stamp blank from improvised means. This will require a potato tuber, a well-sharpened knife and cookie cutters.
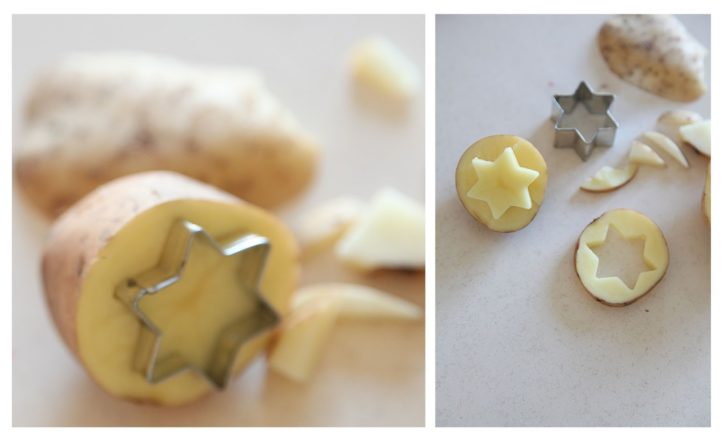
Making stamps from potatoes
The potato tuber, washed from dirt, is cut across and figured molds are pressed into the resulting halves. Excess pulp on the outside is cut off. The stamp is ready to use. To make a print, you just need to dip it into the prepared paint and press it against the surface to be decorated. It is clear that this kind of stamps do not differ in durability, but they make it possible to diversify the image of the prints.
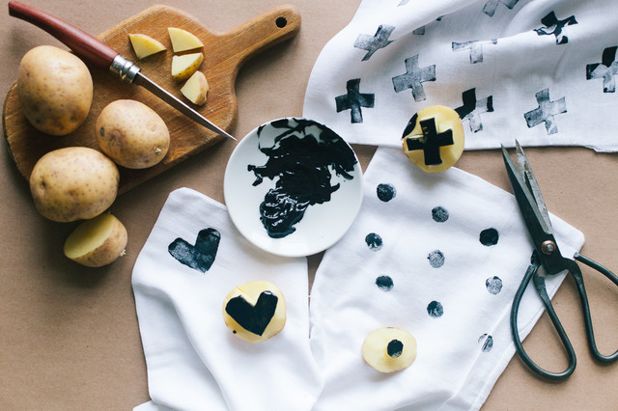
Potato stamps diversify print images
A stalk of Beijing cabbage can act as a stamp. Carefully cut off the leaves from the head of cabbage and leave an imprint of the basal part on the card. The drawing will look very much like a blossoming rosebud.
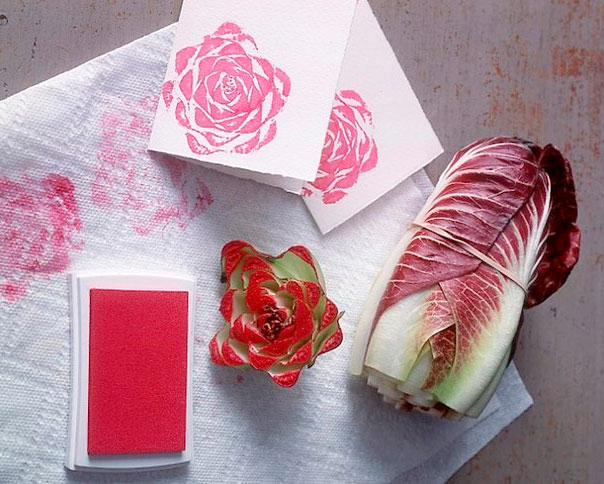
Chinese cabbage root stamp
How to make a beautiful postcard yourself: design nuances
Comprehending the science of how to make a beautiful postcard yourself, it is better for beginners in cardmaking not to go into the wilds and lean towards the simplest materials to work with. But the riot of fantasy will be very useful! The desire to create, give joy to others and willingness to painstaking work will help create a true masterpiece.
The choice of design method depends entirely on the subject of the upcoming event, the gender and age of the addressee. A postcard in pleasant colors, decorated with beads, bows and flowers will please your mother, grandmother, sister or beloved girlfriend. Men, on the other hand, need to choose a more restrained color palette of decoration and focus on strict and elegant decor elements. Applications in the form of figures of cars, imitations of banknotes, drawings reminiscent of your favorite hobby will look good on calm shades of a color base.
The choice of decoration depends on the theme of the holiday
What is the easiest way to make a beautiful postcard with your own hands? Decorate the cardboard sheet with standard stickers. A base of a given size is cut out of bright cardboard, folded along the middle line and the fold is smoothed out with an iron. This will help make it neat and not out of shape. On the inside of the card, it is worth making a lighter background. On it, the written wish will look as clear and expressive as possible. From the outside, the product can be painted with paints and pencils, decorated with applications, etc.
Laconic postcard with a watercolor pattern
How to make DIY postcards: popular techniques
The following types of cardmaking techniques are considered the most accessible to learn and easy to implement.
scrapbooking
In fact, this is cutting out various patterns and figures from paper, ribbons, fabrics, followed by gluing them onto the workpiece. How to make a beautiful card for mom or birthday using this technique?
Using this technology, it is possible to create the most non-trivial and cute presents.You can make a ready-made, printed postcard, as well as a home-made version of it, unique. To create from scratch you will need:
- 3 cardboard sheets, one of which must be white and the rest in color;
- Three paper or fabric flowers;
- Stripes of lace;
- Ribbons;
- Three buttons.
From auxiliary tools it is necessary to prepare a ruler, a capillary pen, scissors and glue.
We will use white cardboard for the base of the postcard. Cut out a 16x20 cm rectangle and fold it in half. Colored sheets of cardboard are cut in accordance with the dimensions indicated on the drawing. On one of the small rectangles of colored, and preferably white paper, a congratulatory text is written.
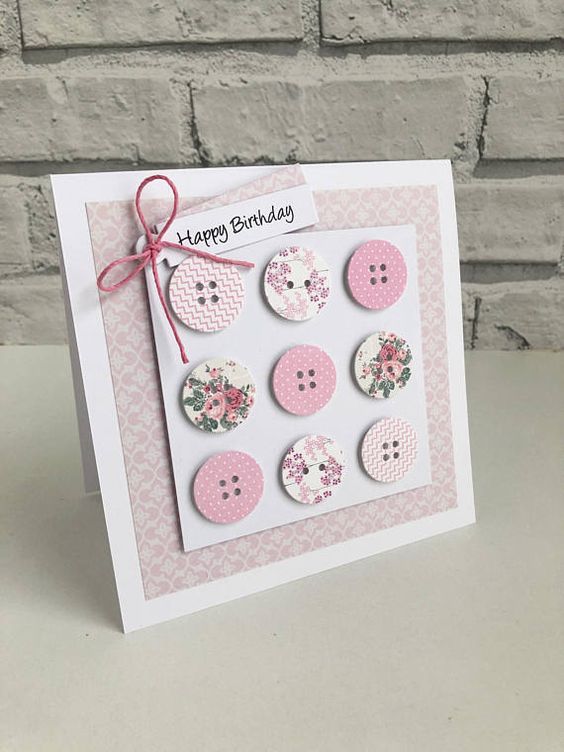
Gentle DIY card with buttons
The pieces of colored cardboard are glued together so that it looks like the smaller rectangle is in a frame. Lace strips and ribbon will be glued along this indent. In accordance with the idea, all this will be crowned with a bow assembled from a ribbon with finished edges. Usually they are singeed along the cut line to prevent fraying, but they can also be carefully glued.
Buttons, flower blanks are placed and fixed in a smaller rectangle. The decorative cover is ready. It remains to stick on top of the base of the postcard. If necessary, you can supplement the picture with monogram paintings made with a capillary pen.
Postcard decor with buttons
From identical decorative elements, you can assemble several completely dissimilar decorative compositions.
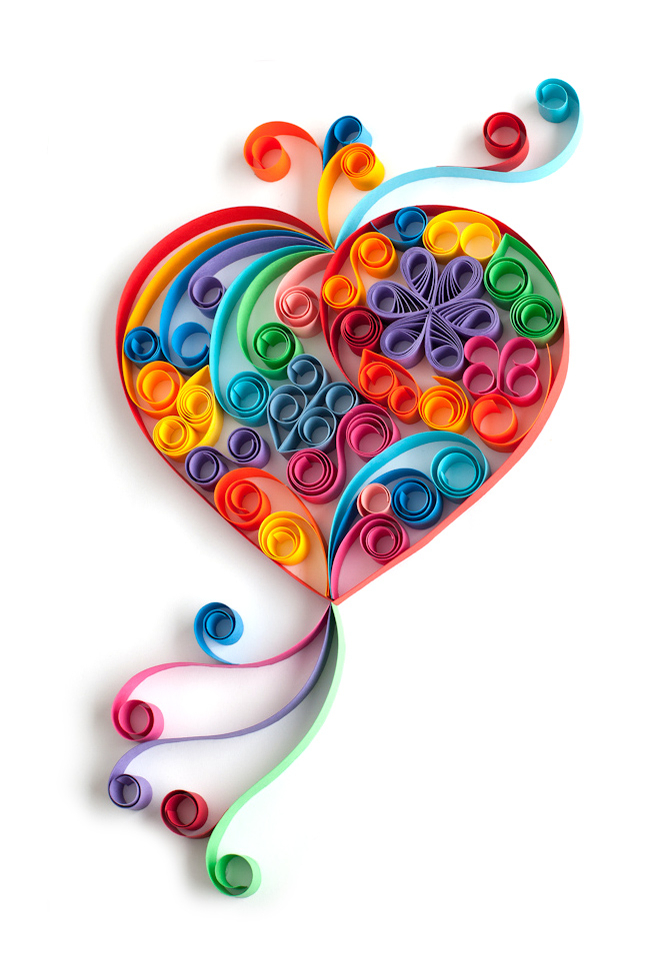
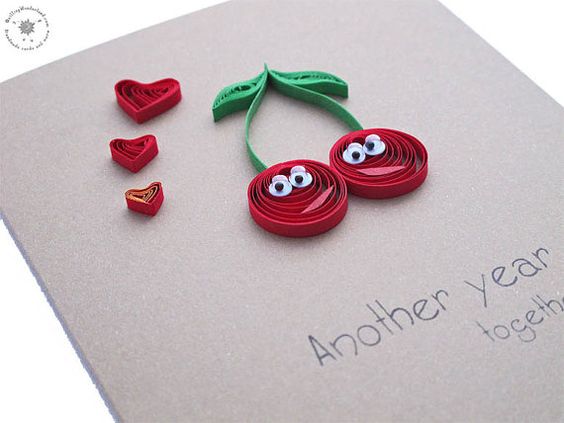
quilling
Curls of various types and sizes are formed from paper strips, from which decorative compositions are then created.
We must pay tribute to the technique - it is incomparable! However, painstaking work requires great perseverance and accuracy. With the help of quilling, you can make both a beautiful postcard with touching patterns, and perky applications that delight children..
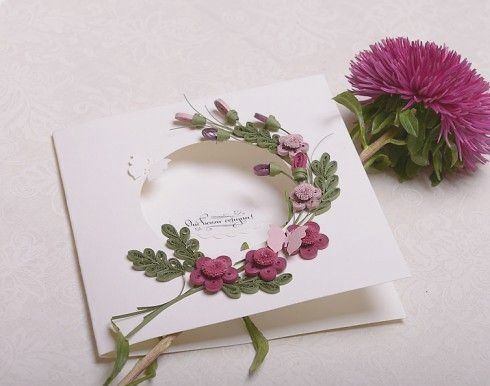
DIY postcard using quilling technique
The basis of the process will be the twisting of thin, like serpentine, paper ribbons into spirals and giving them certain shapes by means of finger pressure. For blanks, sheets of colored paper with double-sided coloring are taken. Of the auxiliary tools, you will need a toothpick and stationery glue. The toothpick will serve as the axis around which the paper strip will curl.
The resulting skein is removed from the base. The winding density of the spirals is slightly reduced. The remaining free edge of the tape is fixed with glue. Now the workpiece can be given any shape. By holding the spiral with your fingers, you can stretch it into an oval or make it voluminous.
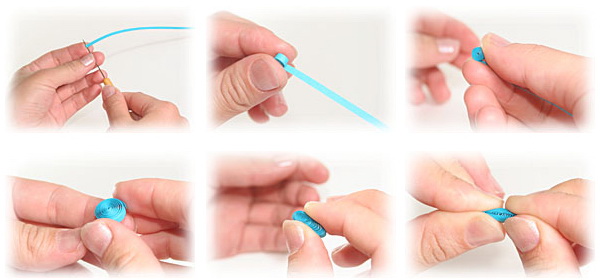
Stages of twisting paper tapes
How to make a beautiful postcard with your own hands easier and faster? For this, there is a whole set of basic elements that are certainly used when creating compositions. The sequence of their location on the postcard can change in any order to get interesting patterns or make original figures.
This technique is very popular with children. They easily master it and are happy to create postcards as a gift for moms, dads and just to decorate their room. Such a hobby is not expensive for parents. Just buy your child cardboard, colored paper and glue, and he can handle the rest himself.
Quilling technique is very popular with children
iris folding
Original, spirally twisted images are obtained by stacking paper strips and ribbons in a certain sequence. This technique is often referred to as "rainbow folding". The process is quite laborious and requires the creation of preliminary sketches of the future image. And the very schematic layout of the stripes will require concentration and considerable diligence.
A festive greeting for Easter will look great in this technique. There is a beautiful color on the card.
Postcard decor using the iris folding technique
How to make postcards with your own hands using this technique? First you need to take a plain cardboard and make the basis of a postcard out of it, on the title part of which a decorative image scheme will be applied. You can work not only with paper, but also with fabric ribbons, as well as use additional decorations. Of the tools you will need a clerical knife and good cutting scissors. Fixing parts is done with glue and thin tape.
Work is carried out according to the template. On the workpiece, according to its configuration, the corresponding figure is cut out with a clerical knife.

Template for iris folding technique
The finished part is placed face to the table. A template with a pattern scheme is temporarily inserted into the cut hole, and only after that the creative process itself begins.
Decorative elements are laid out according to the scheme and permanently fixed with adhesive tape. You need to move clockwise. When all the details of the pattern are fixed, the template is removed and the workpiece is glued to the base. Additionally, the front side of the postcard can be painted or decorated in some other pretty way.
Do-it-yourself New Year's card using the iris folding technique
Iris folding is loved for its positivism, as the technique allows any image to be presented in iridescent colors.
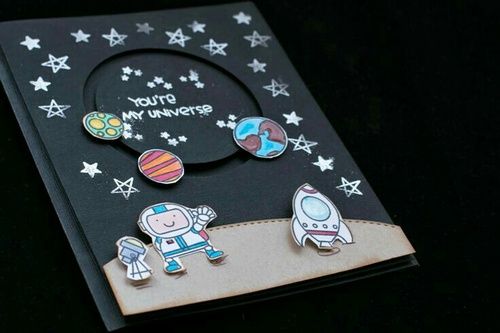
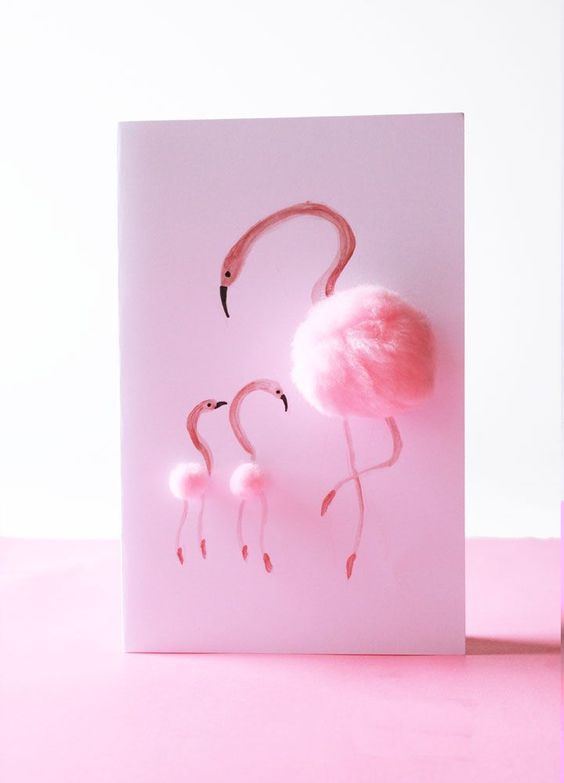
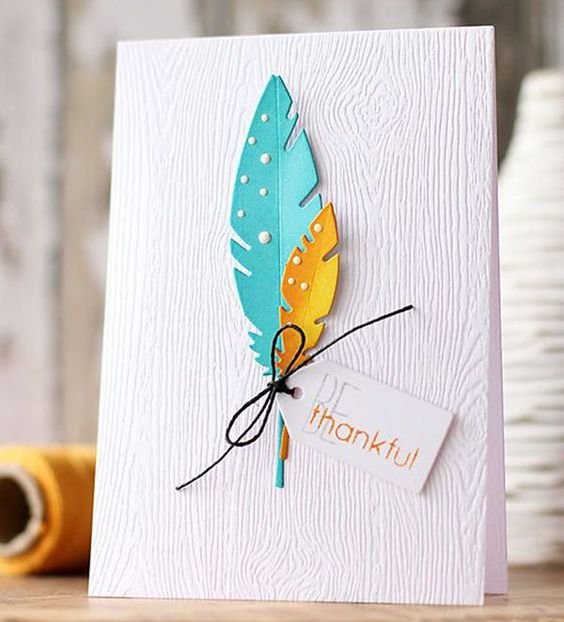
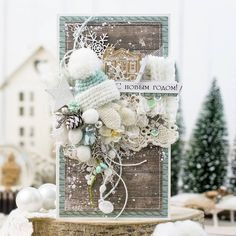
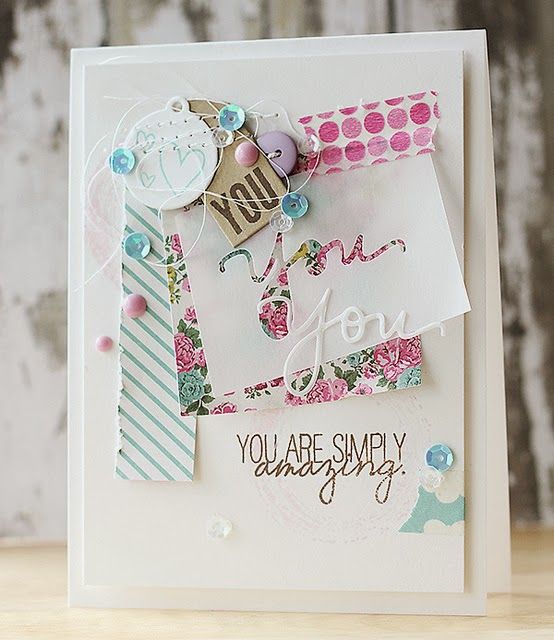
Types of beautiful handmade greeting cards
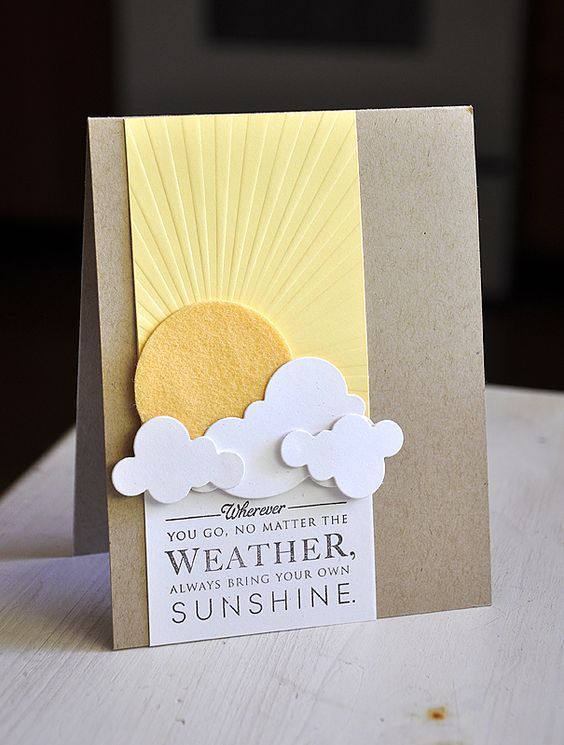
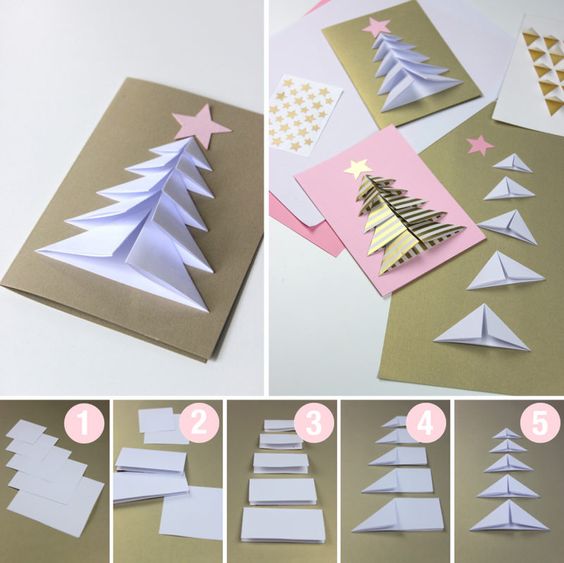
back to index ↑Volumetric postcards
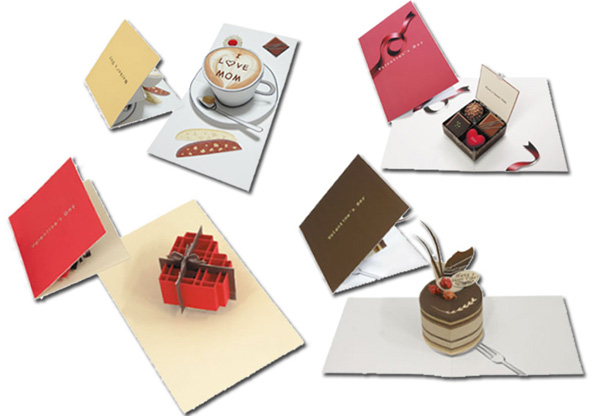
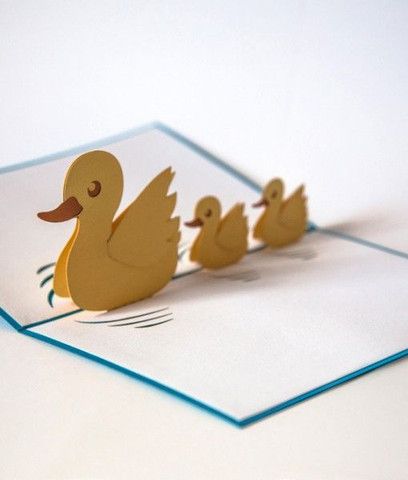
These are very impressive souvenirs, standing as a separate line in master classes for making surprises. They hide a "secret" within themselves. The composition or image hidden inside becomes available for viewing only when the postcard is opened, and they appear in 3D projection. For beginners, it often seems an impossible task to create such a miracle, but as soon as you delve into the basics of technology, everything immediately becomes intuitive. So how do you make a beautiful voluminous postcard yourself?
The front side of such a product can be decorated in any style and design. The inner part will have to be assembled from elements glued in the given order. You can get a three-dimensional effect by properly incising and bending the insert.
So. To make a postcard with a three-dimensional tab inside, you need to prepare:
- multi-colored cardboard;
- ruler;
- stationery knife;
- glue;
- pencil;
- place to work.
You need to start the process by drawing a picture of a gift on the inside spread of the postcard. This should be done so that the base of the gift is at the fold of the sheet. After careful fitting with a knife, vertical cuts are made to be able to make a bow. A hole should also appear on the decor.
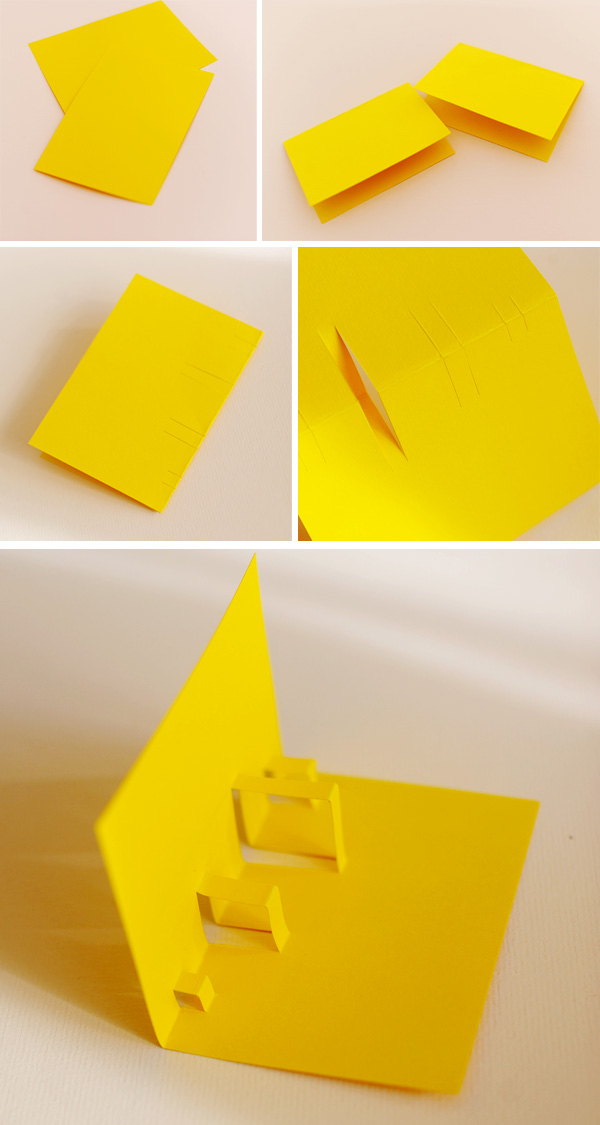
Make cuts on the inside of the card
To give the resulting workpiece volume, it is bent along horizontal lines. Now it can be pasted into the spread of the postcard and the gift will be ready for delivery.
The technique allows you to create do-it-yourself postcards for a wide variety of celebrations and decorate them with figurines of various themes.
Decorate with figurines that suit the theme
With the second method of creating a three-dimensional postcard, they act a little differently. A single base is made from two caton sheets by gluing them one into the other. Previously, incisions of different depths and paired nature are made on the inner liner. The resulting planochki will be bent inward and will become a place for fastening a decorative insert. The latter can be put on glue or attached with tape. The front part of the postcard is decorated in any way you like.
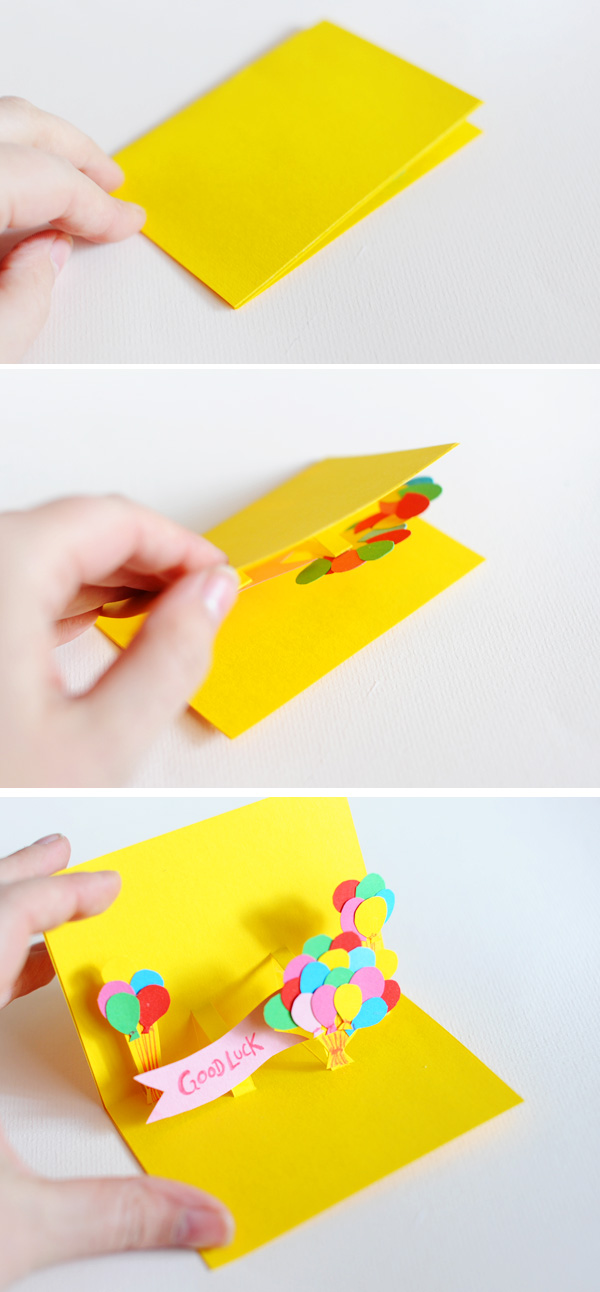
Do-it-yourself volumetric postcard
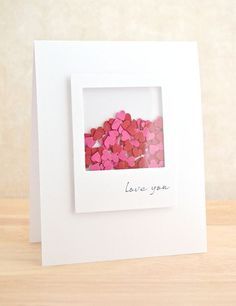
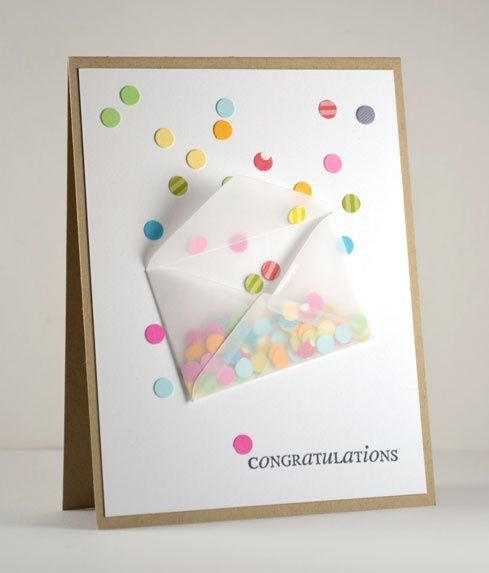
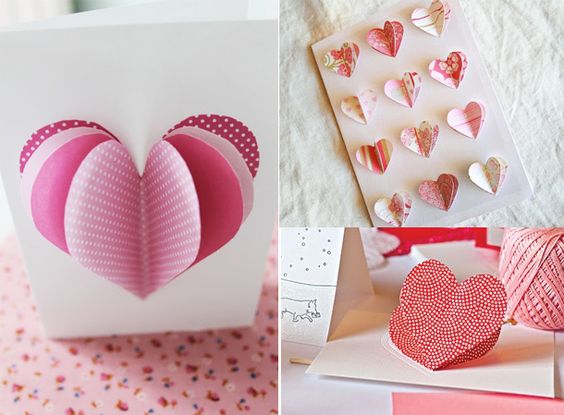
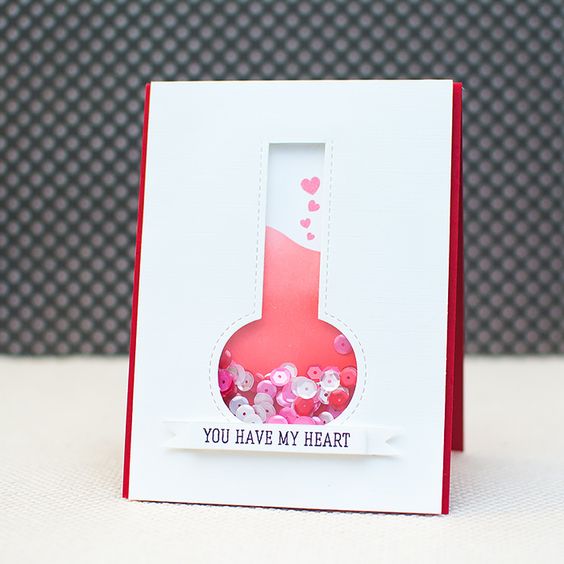
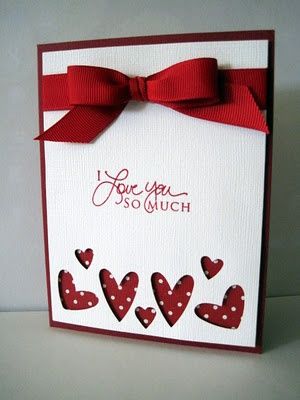
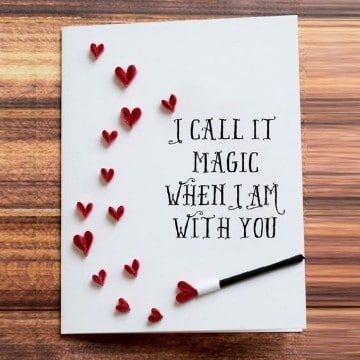
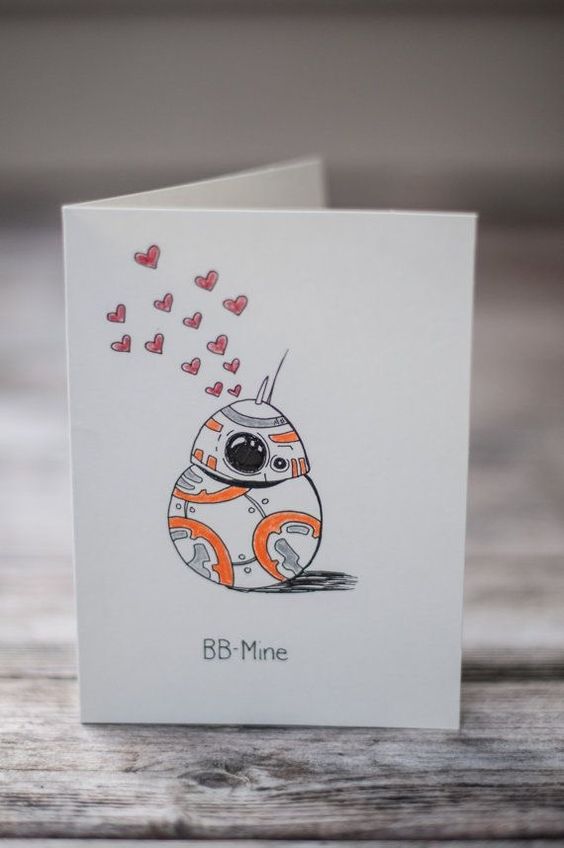
An interesting idea for creating a souvenir for Valentine's Day. Inside such a postcard are two connected hearts. This can be done as simply by cutting blanks out of paper and laying them one on top of the other, or you can go further by making the composition more original. In the latter case, each heart is cut along a spiral line. Start cutting from the center.After such a procedure, the hearts are intertwined with each other and only then they are glued inside the postcard, fixing there only at the edges. As a result, when opening, you should get a three-dimensional picture of fluttering lace hearts.
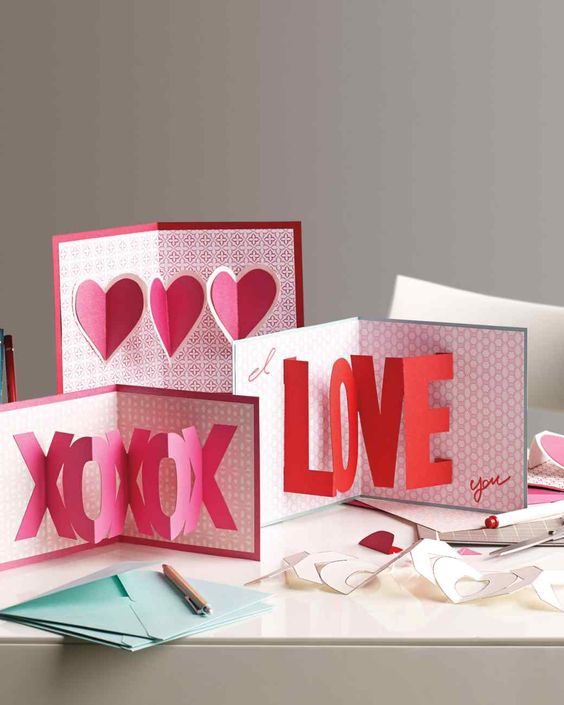
Volumetric cards for Valentine's Day
How long does it take to make a beautiful voluminous postcard? Despite the complexity of the idea, it does not take much effort and time to create such a postcard, but it produces an amazing effect, delivering real pleasure to the addressee.
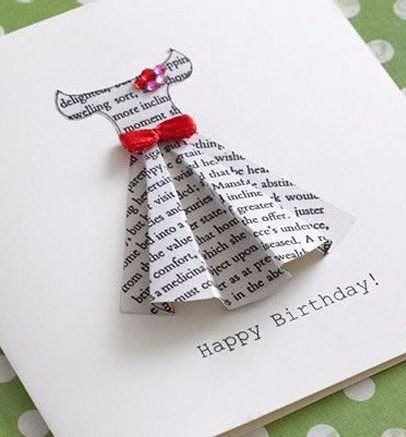
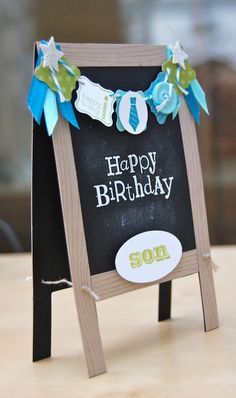
back to index ↑How to make a beautiful birthday card
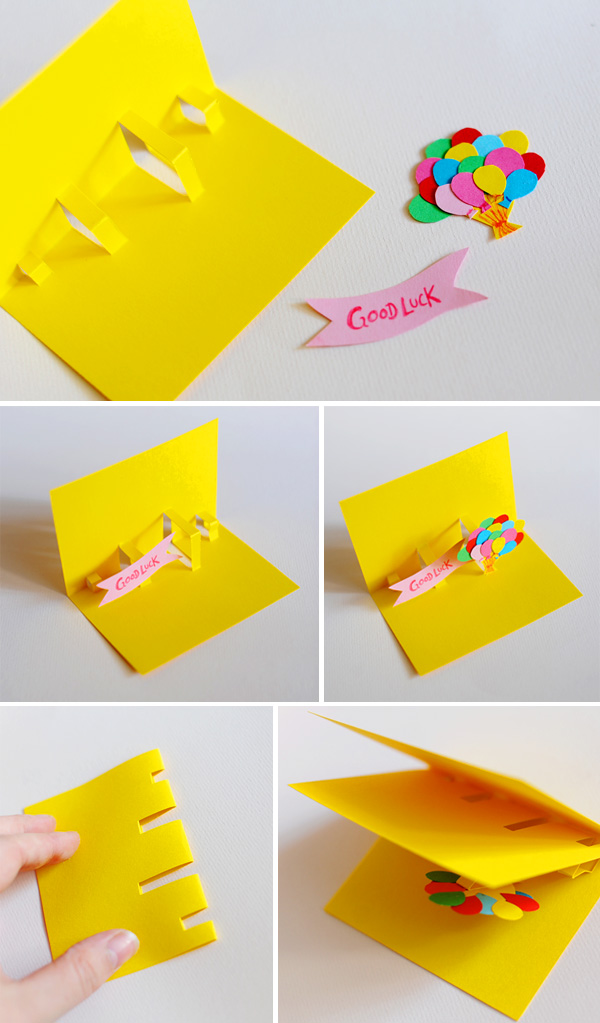
“How to make postcards with a composition of balloons with your own hands so that they are as attractive and pleasing to the eye as possible? Give them dimension!
You can find a lot of creative ideas for its manufacture. There are voluminous options, and musical ones, and even sweet ones. Yes, it is quite possible to present your gift in this way. Therefore, before starting work, you need to decide how exactly the surprise will be designed. What do experienced needlewomen offer?
Volumetric bouquet
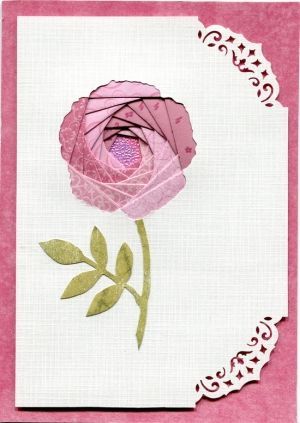
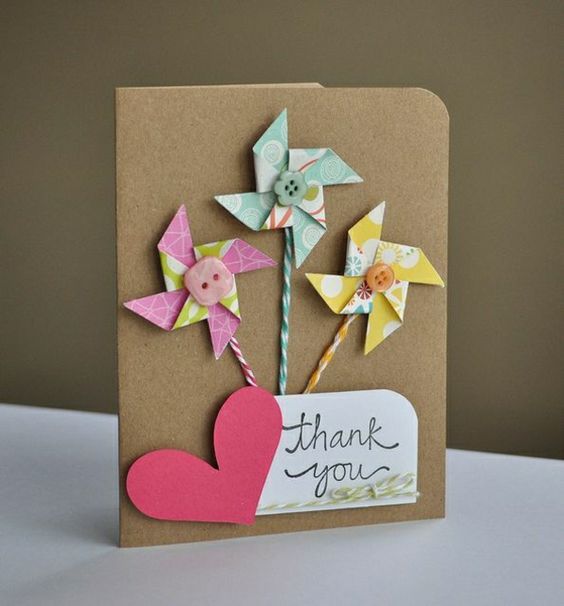
A cute card decorated with flowers is a wonderful addition to a gift. We will collect it from colored cardboard and the same paper using scissors and glue.
How to make a beautiful birthday card and what is needed for this?
We need to prepare seven multi-colored flowers. From the available paper, cut out seven squares of the same size and fold them into a triangle, bending as many times as we want to see the petals on the bud.
Holding the resulting part by the top, cut off the base of the triangle, trying to give it the shape of a deep or not very semicircle.
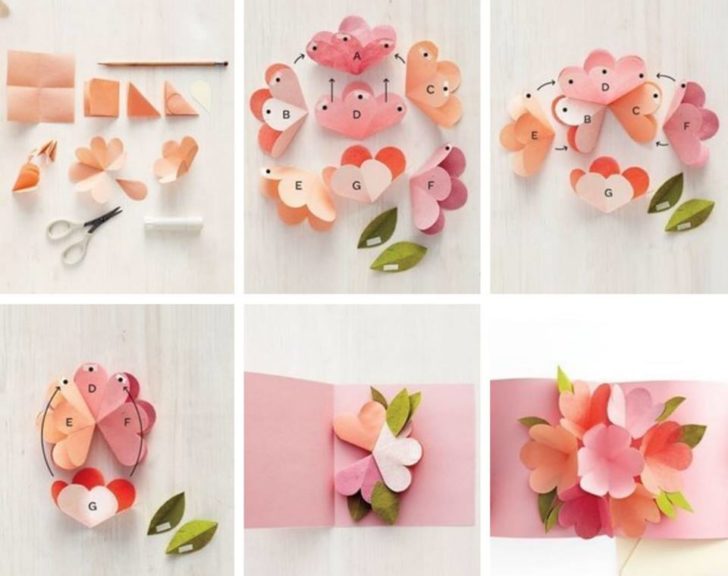
DIY card with voluminous flowers
Now cut out the leaves and stems. We will assemble the composition and paste it into the bouquet inside the postcard using a glue stick. Let's do it in such a way that when opened, the bouquet looks not like an appliqué, but a three-dimensional figure.
We decorate the front part of the cardboard base as desired. The application for the birthday gift is ready!
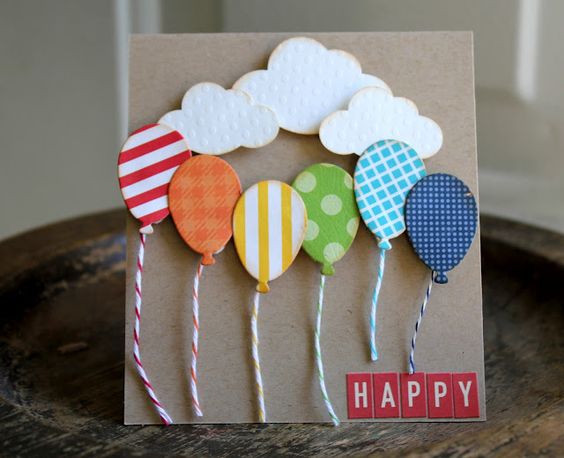
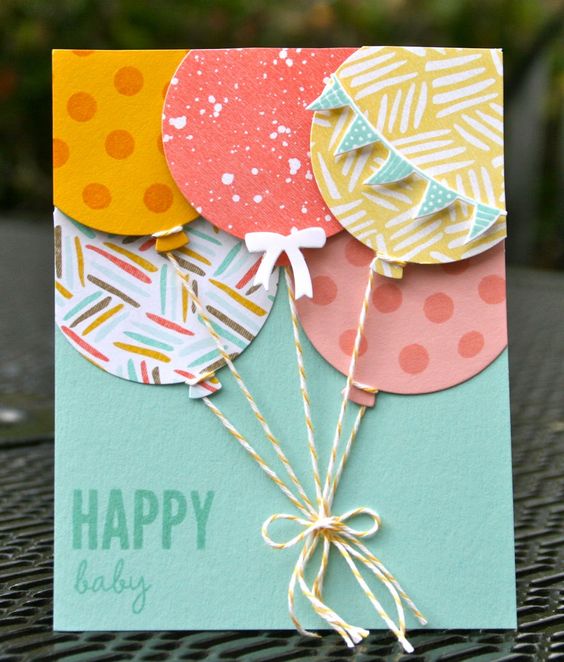
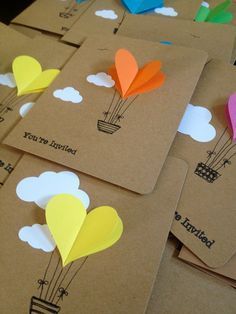
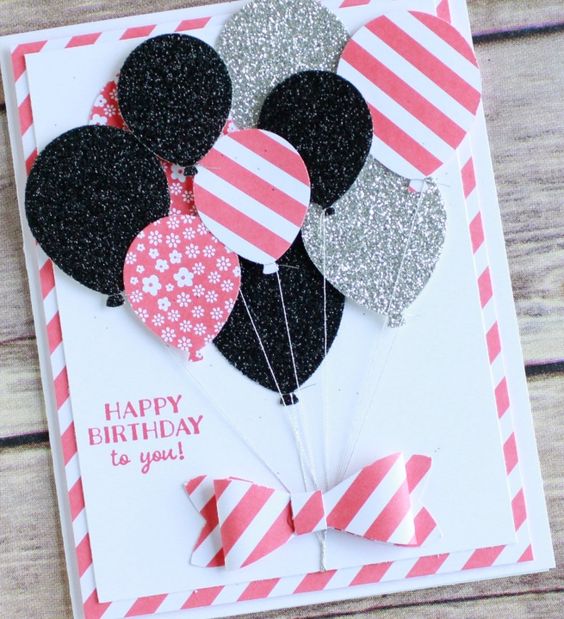
Balloons
A child will be delighted with such a card. In principle, an adult will also be pleased to receive such a message, because a birthday always has a taste of childhood. How to make postcards with a composition of balloons with your own hands so that they are as attractive and pleasing to the eye as possible? Give them dimension!
We need white cardboard with colored paper and thread. Let's start the manufacturing process by cutting out the balls. They are allowed to come up with different shapes and make them of arbitrary size and colors. We glue a thread to each of the elements.

Balloons for a future postcard
Next, we will cut out the flags. They should turn out to be double, so we will prepare squares from colored paper, which will subsequently fold in half. Cut triangles upside down. The number of flags should be equal to the number of letters in the prepared inscription. For each letter, you can make a flag of an individual color. We write letters and collect the phrase into a garland, sticking flags on the thread.
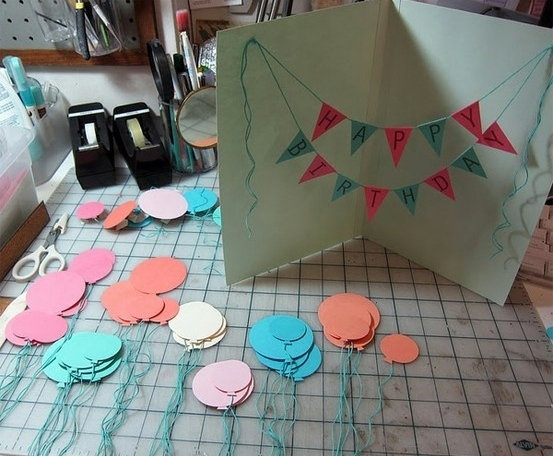
Attach a garland of flags
Let's get back to the balls. Some of them can be sent to the inside of the postcard as a border, and from the rest, you can assemble a three-dimensional composition. To do this, each element will be planted on a paper spring.
It remains to paste the garland, and the card can be handed!
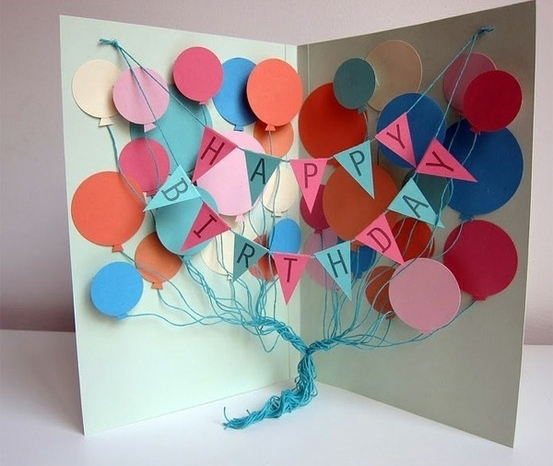
Finished volumetric composition
funny hedgehogs
The idea of how to make a beautiful birthday card is suitable for those who can draw. In addition to inspiration, to make greetings with cute hedgehogs, you will need a sheet of white paper and a set of colored paper, cardboard, felt-tip pens and scissors with glue.
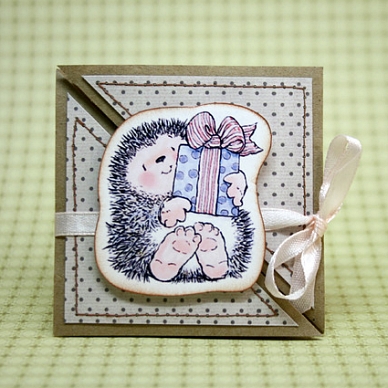
DIY postcard with a hedgehog
Draw a hedgehog on a landscape sheet using paints, pencils, felt-tip pens. Complete the picture with an applique of colored circles of various diameters and voluminous balls, inside which you can hide pleasant wishes or draw hearts.
postcard book
The simplest thing you can do with your own hands.The basis of the product is taken quite thick cardboard. It is bent, pasted over with multi-colored paper, all kinds of sparkles or other decorative elements. Next, you will need to fill the cover with pieces of paper with congratulations and wishes. It can be either one page or several. The color scheme is optional. In addition to text, drawings or applications may appear on the pages of the book.
Do-it-yourself postcard with a book
You can simplify the task and make the inside in the form of an accordion liner.
Sweet congratulations
To create it, the scrapbooking technique is used, so you will have to purchase special paper. The remaining consumables are in the form of standard white paper, cardboard, bulk adhesive tape. From non-standard tools you will need a hole punch. Decorative finishing is done with distress ink, sugar, printed pictures. How to make such a postcard with your own hands?
The base must be prepared first. The part for it will be cut out of cardboard. Then, taking a ruler, we will make an even fold strictly in the middle. We paste over the inside of the postcard with plain colorless paper, after which we decorate the edges, processing around the perimeter with a figured hole punch. In the absence of such a tool, we select a different design that is adequate to the idea.
Original “sweet” voluminous postcards
To decorate the outside, we prepare two rectangles, one of which is cut out of white paper, and the other is painted. We additionally decorate the last blank with lace.
Next, we will need to sew the resulting paper rectangles or otherwise fasten them. From the remnants of painted paper, you need to cut out another strip to decorate the postcard. Congratulations will be written on it. We will attach it to the lace.
Let's prepare pictures depicting sweets and cups. We process them around the perimeter on the front side with glue and sprinkle with sugar. After a few minutes, shake off excess sand and attach the elements to the front of the postcard. For greater attractiveness, lace details can be supplemented with buttons planted on glue.
Fill in the pictures with edible candy
A sweet postcard can be decorated in a different way, replacing the pictures with really edible sweets. They are attached with double sided tape. Such a decision will be appreciated by children.
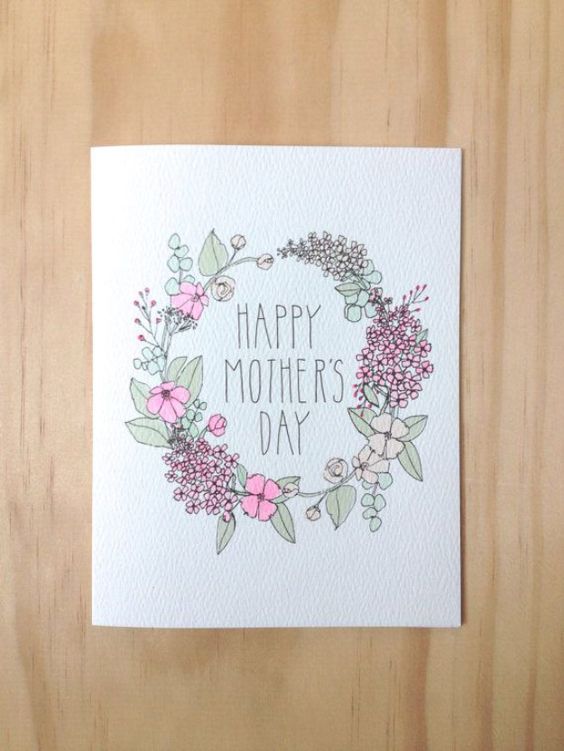
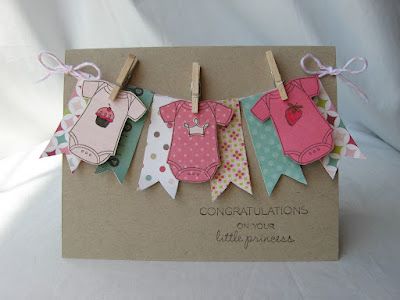
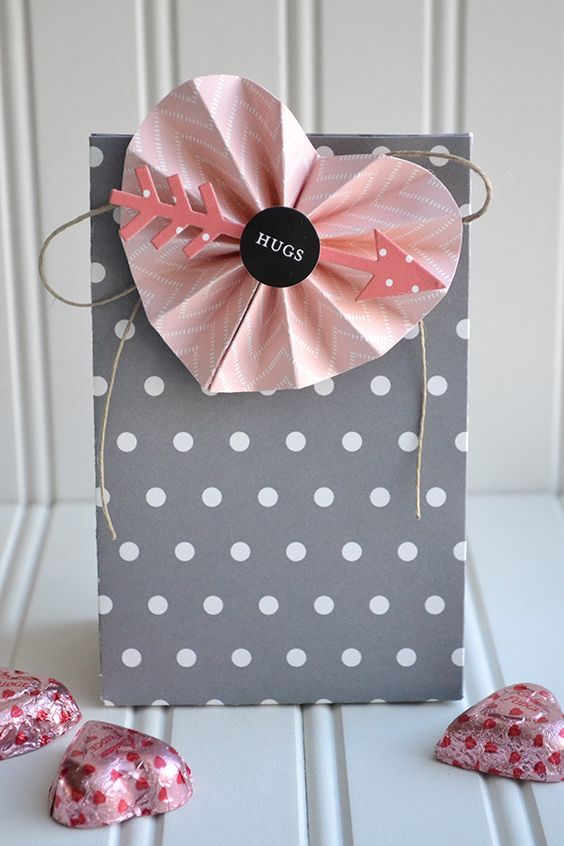
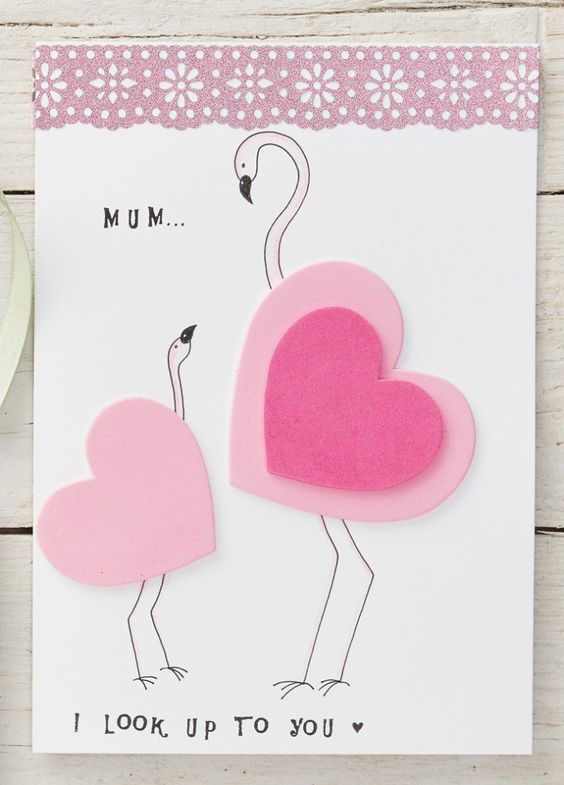
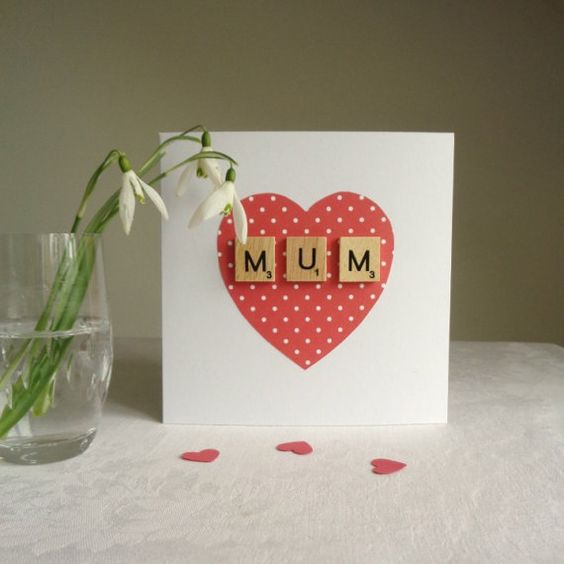
back to index ↑How to make a beautiful card for mom
Mom, like no one else, appreciates attention to herself and love, so she will perceive a postcard made by her own hand with much more joy than something, even if very expensive, but purchased in a store. If this present is also made by children's hands, then there will definitely not be a more valuable gift for the holiday for her.
How to make a beautiful card for mom? Ideas, in fact, a lot. Draw, glue, 3D, embroider. The flight of creative imagination is not limited here.
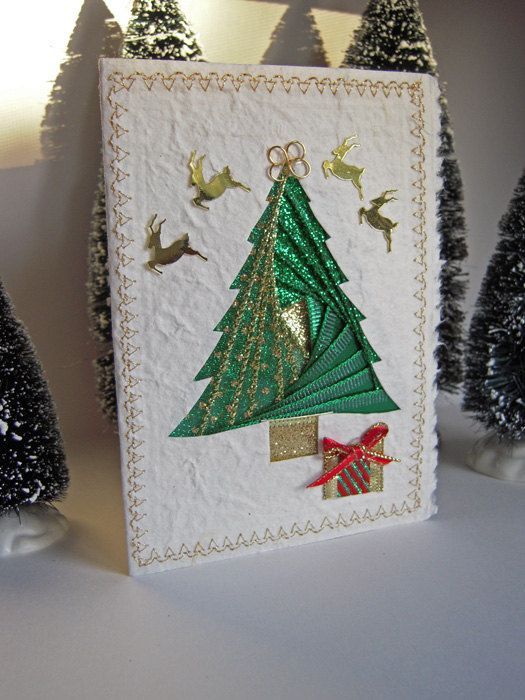
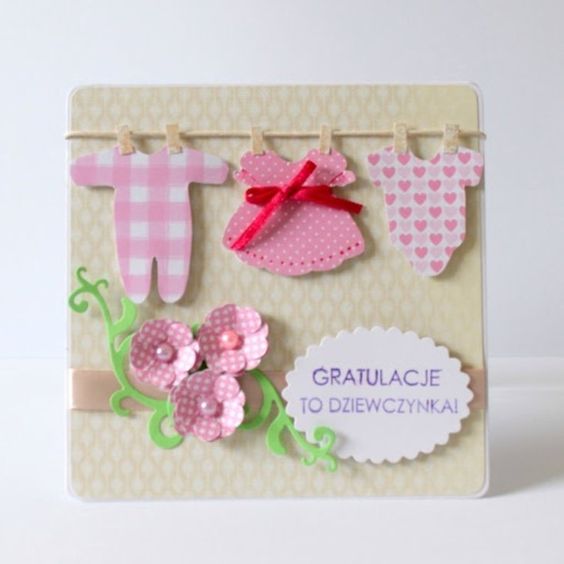
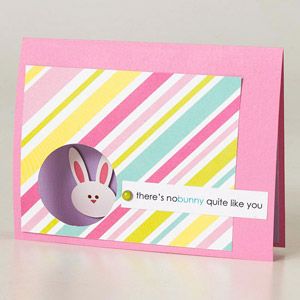
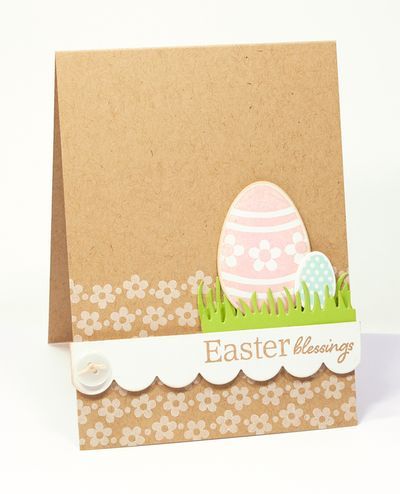
The easiest way to make a card unique is to give it an attractive shape. Make it in the shape of a heart or circle your palm with a pencil, then cut along the contour. A postcard can be made in the theme of the holiday for which it is made. If this is Christmas, then the theme of the Christmas tree, winter, New Year's paraphernalia is relevant. For Easter, vyshyvanka, krashenka, Easter bunnies are more suitable. On a birthday, a congratulation in the form of a cake with candles will please.
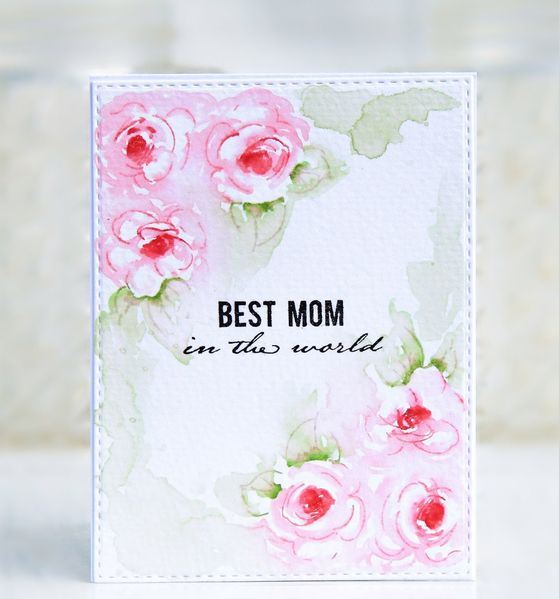
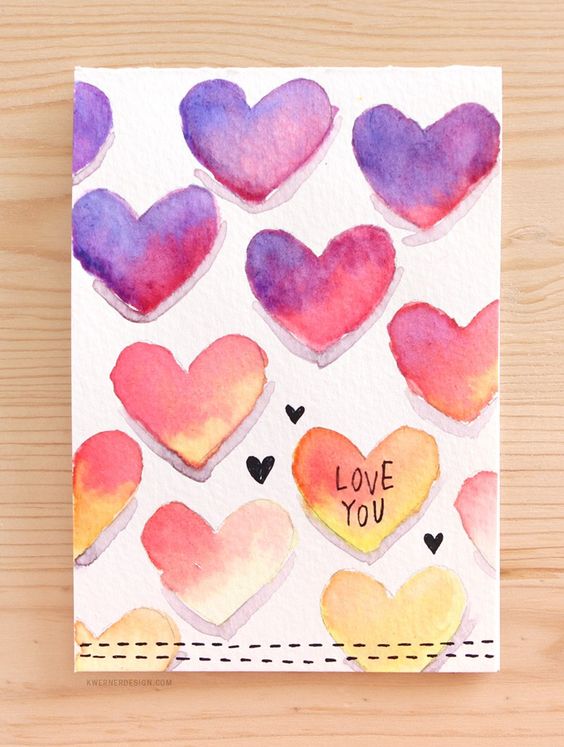
Delicate watercolor card for mom
Quickly a beautiful postcard will help to make an application. Unfading daisies will look incredibly impressive. A bouquet of them is collected in a matter of minutes. Cut out a lot of oval blanks from a sheet of white paper. To speed up the process, the paper needs to be folded several times.
The next step is to prepare the cores. Cut out a few circles from yellow paper. For greater decorativeness, their edges can be incised, making them fringed.
Next in line are leaves and stems.We will make them from green paper. We will attach three leaves to each stem.
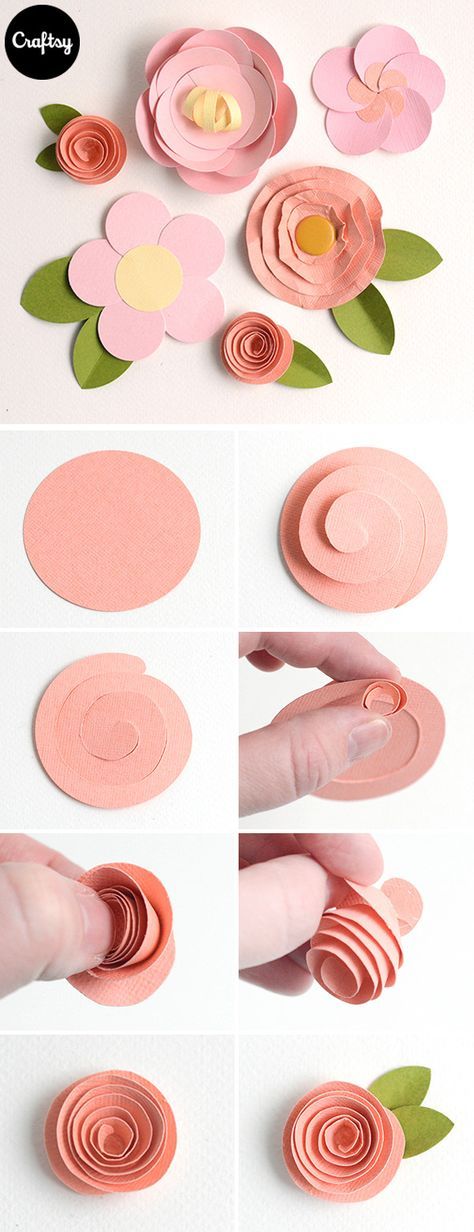
Making volumetric flowers for a postcard
We start collecting the bouquet from the bottom up. We lay out and glue the stems with leaves, then add white petals laid out in a circle to their top. They can be laid in several rows, making the flower voluminous, or the petals can be glued completely to the base, like a simple appliqué. We coat the center of the bud with glue and fix the yellow center on it. Delicate, romantic, summer bouquet is ready!
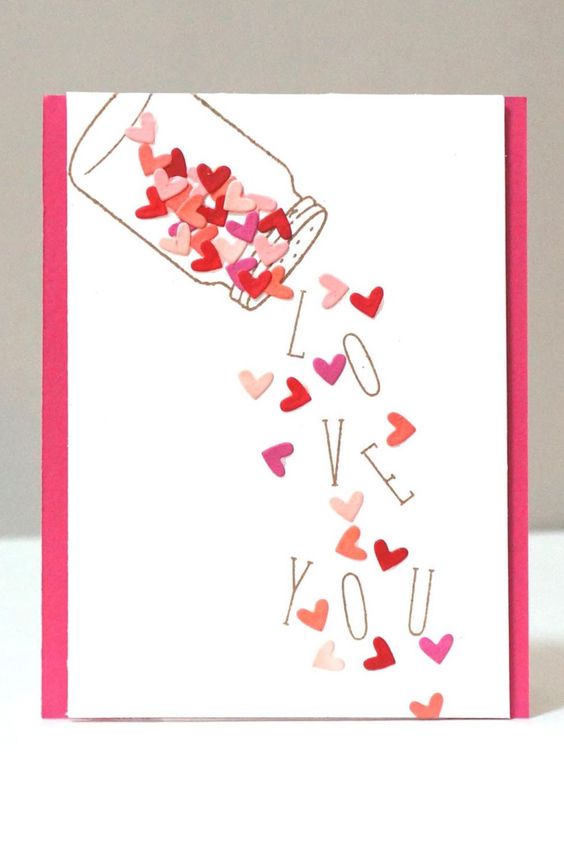
How else can you make a beautiful card for mom? For example, take a ready-made postcard and hide a pleasant surprise inside it.. Glue inside an endless heart cut out of red paper and folded into an accordion, or use the spiral cut blanks discussed above.
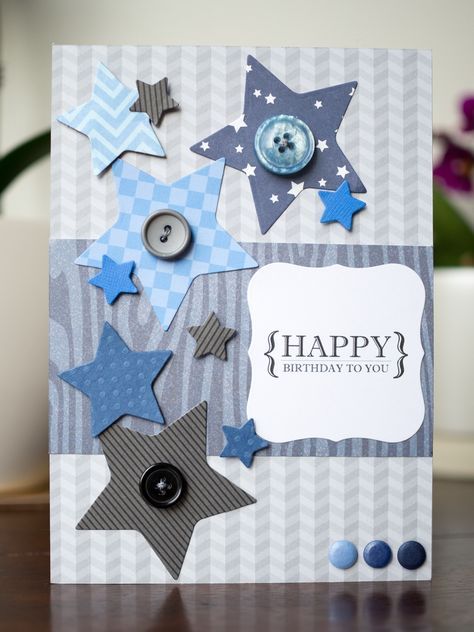
Quite standard things in everyday life look very impressive on postcards. Their front side can be elegantly decorated with a composition of buttons. Collect from them the sun or a flower. In the first case, a circle is laid out from small buttons and rays are launched from it. In the second, the core of the flower is made from a button that is larger in diameter and different in color, and petals are already removed from it, onto which small buttons are allowed. The stem and leaves can be painted with paints, depicted with a thick thread. The flower can be "put" in a vase or "planted" in a pretty pot.
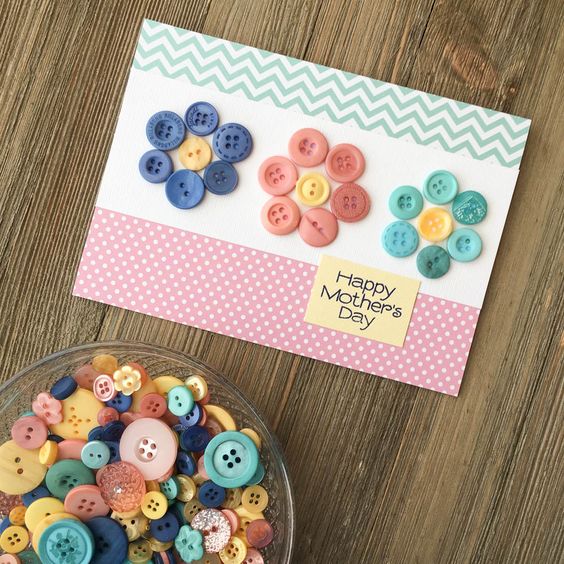
Bright postcard decor with buttons
Try working with knitting yarn. It also makes amazing flowers. Collect the leftover threads of different shades. Draw a sketch of the bouquet. Then you just need to glue each element of the composition with glue and lay out the yarn in it so that the entire contour is filled. Petals can be made multi-colored, like a semi-flower, or play with shades inside each petal.
back to index ↑Conclusion
There are many suggestions on how to make a beautiful postcard with your own hands, but this does not mean that you do not have the right to bring something from yourself into the creative process. Don't be afraid to show up! Reveal your talents and who knows, maybe you will be able to become the founder of a new cardmaking technique.
Photo gallery - do-it-yourself postcard


Video