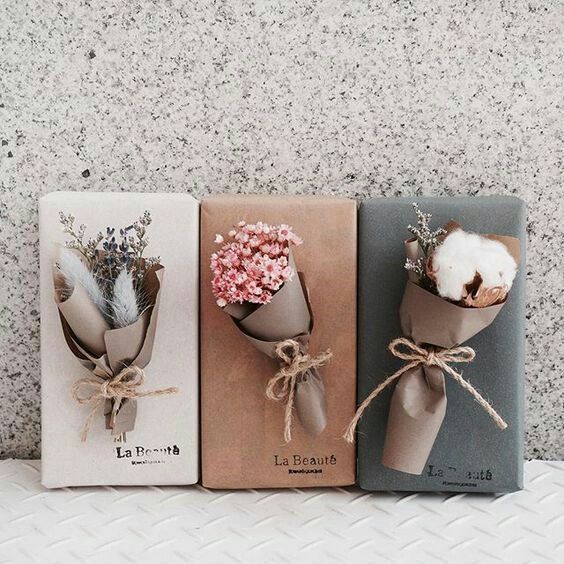
A holiday or celebration is approaching, but you still don’t have a worthy gift? Make it your own. It will take quite a bit of time, and the effect it will produce is phenomenal. But what will present a unique chance to demonstrate your disposition towards a person and become a truly memorable souvenir? Yes, almost everything: a box, a photo album, and a beaded tree, but 3D is the fastest and easiest to do postcards with your own hands.
Why you should give preference to voluminous postcards
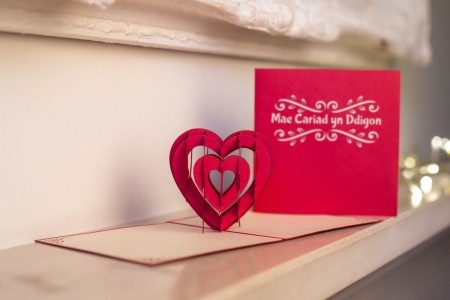
One should not think that such an offering is not entirely solid. In fact, such a present will look more than original. You can write your best wishes on a card, as well as something that is difficult to convey in words. In such a frame, poems will look great, especially those written for the addressee personally, a declaration of love.
It is also important that everything you need for needlework is always at hand, because you can make a 3D postcard, both from paper and from cardboard, fabric, etc. The simplest things that can always be found in household use are also used as decorations. It's about:
- ribbons;
- braid;
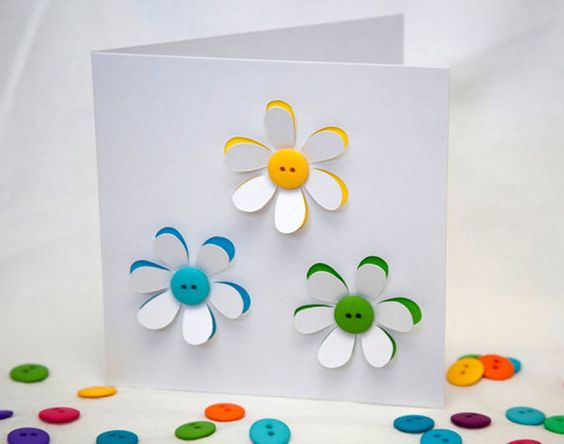
- buttons;
- beads;
- beads;
- shells.

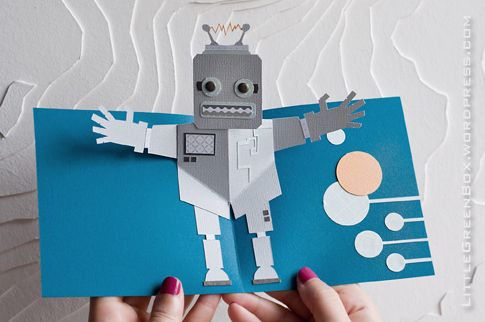
Volumetric postcard will be an original gift
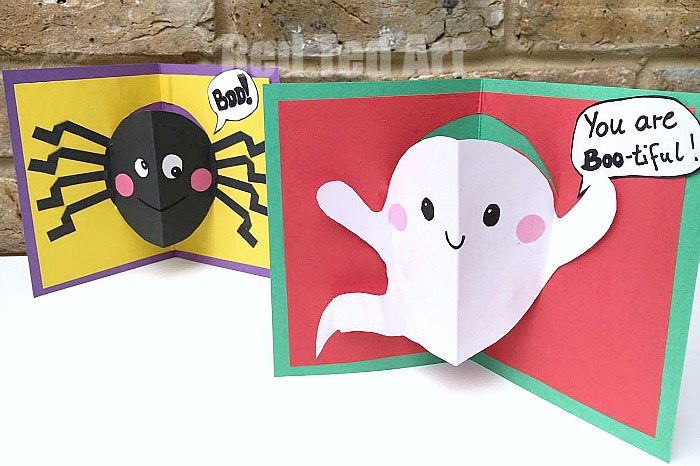
Even children will work with all this with enthusiasm, the main thing is to give them an entertaining idea. So what can be made from such uncomplicated materials?
back to index ↑For all occasions
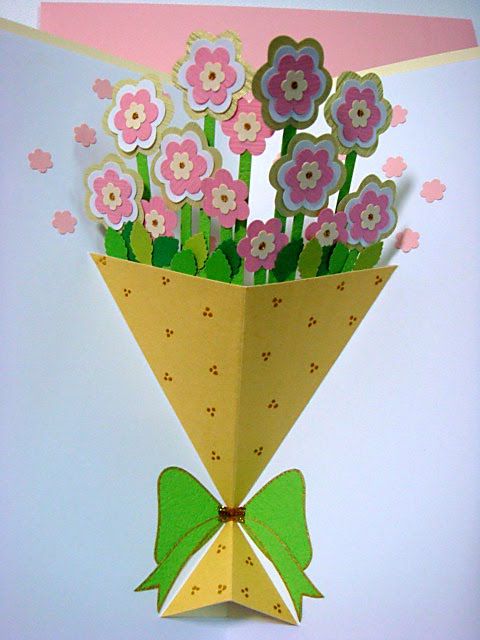
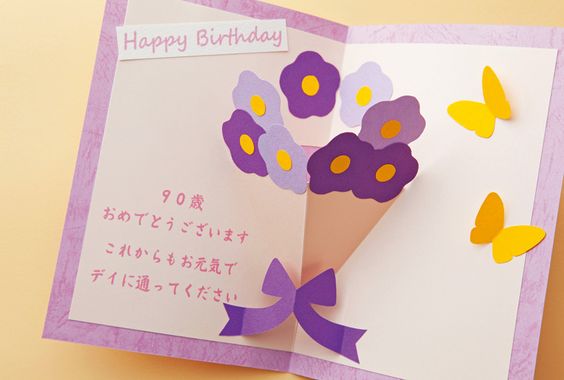
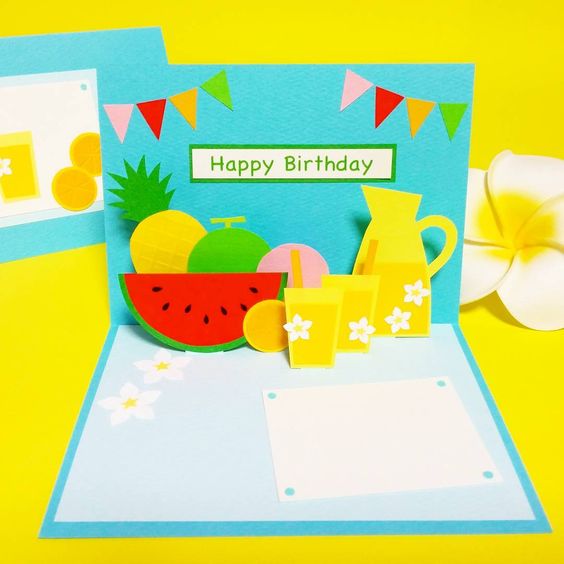
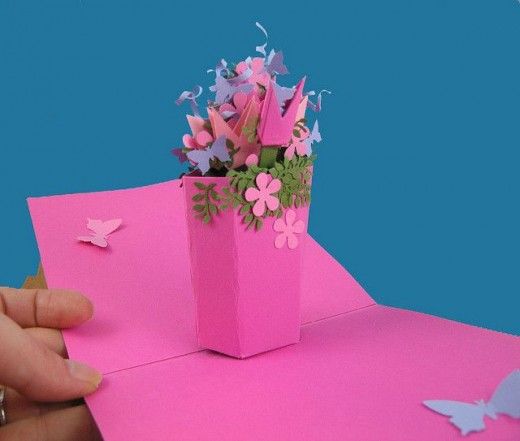
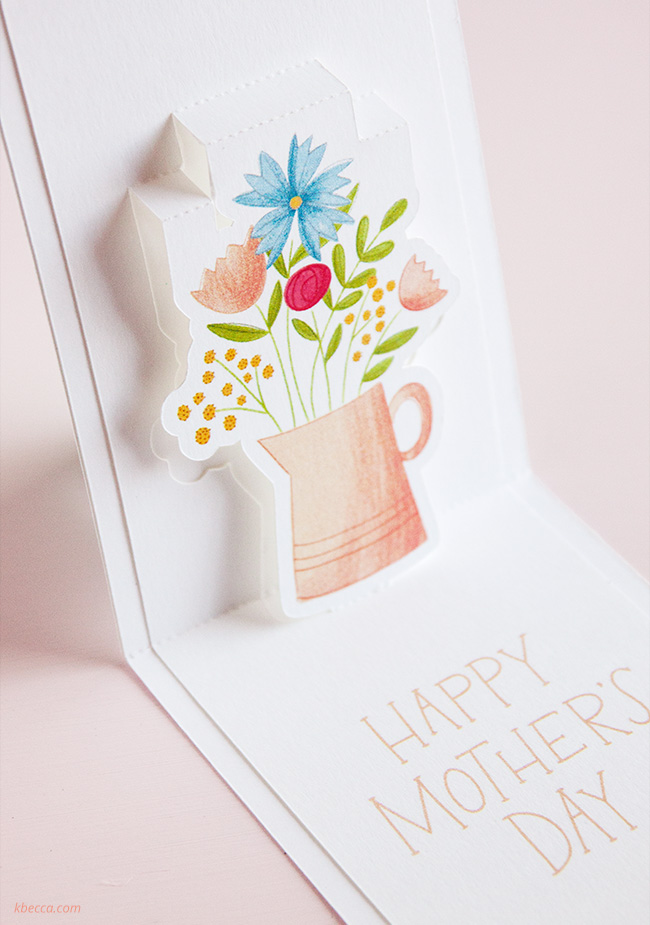
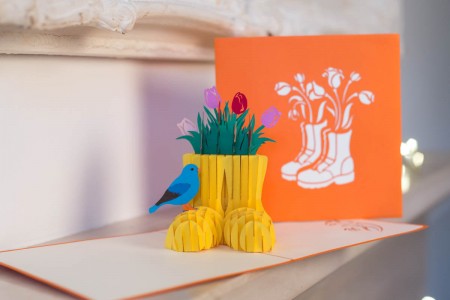
Bouquet in a vase
To create a three-dimensional postcard, you will need a package of colored cardboard, a glue stick. In the absence of such, it is permissible to use ordinary PVA glue.
If you choose the latter option, then work with liquid glue very carefully, apply it little by little so that the paper does not sag and become bumpy. The highest quality products are obtained by using double-sided adhesive tape to assemble parts.
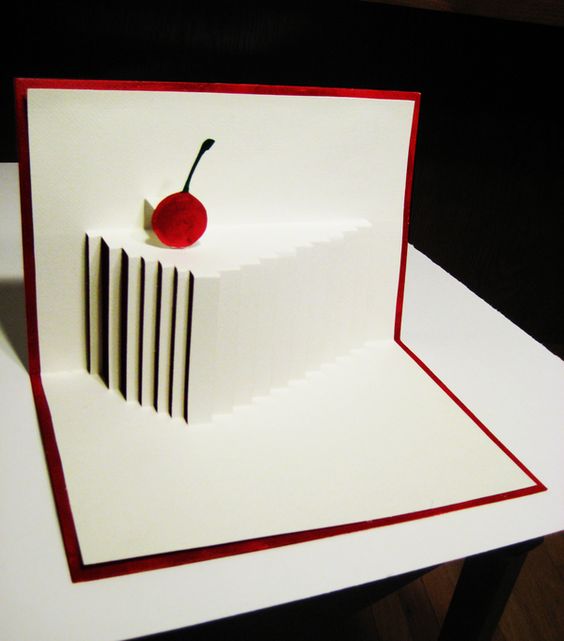
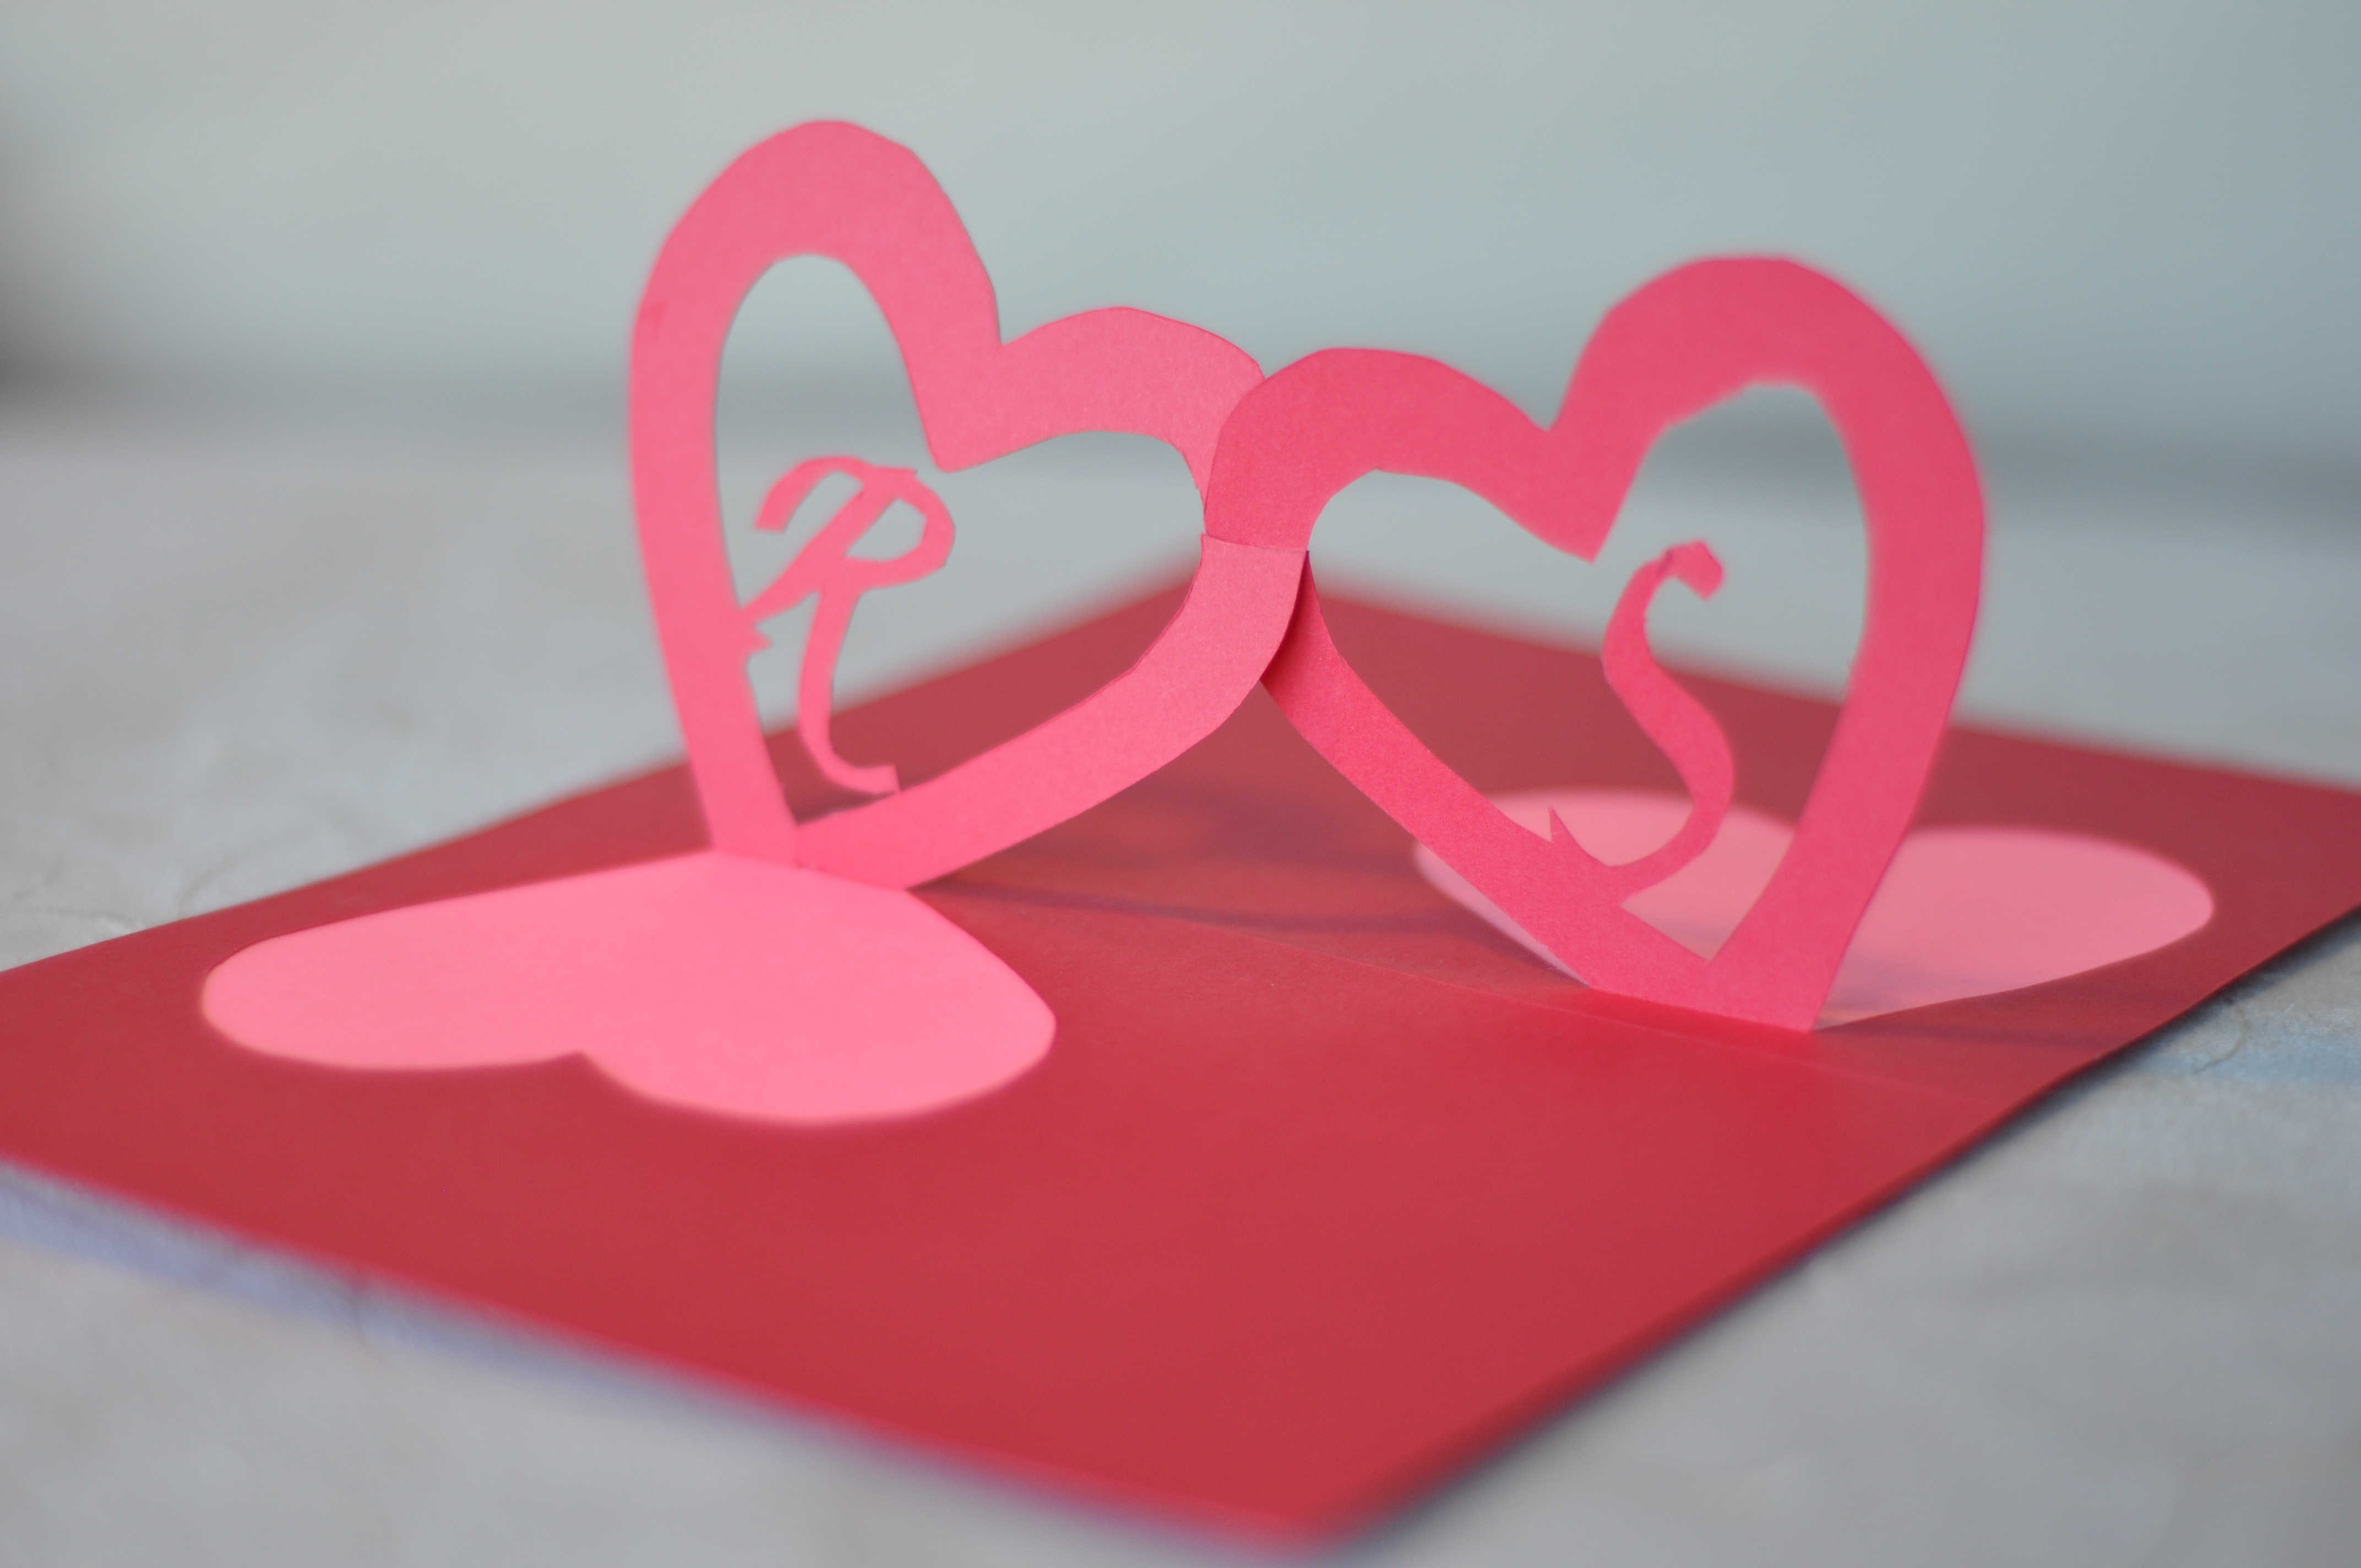
The do-it-yourself postcard with 3D flowers is assembled according to the following algorithm:
- Let's choose cardboard sheets for the title side of the postcard and the inside. The second should be slightly smaller than the base, so we measure 2 cm on each side, draw a new rectangle and cut it along the resulting perimeter.
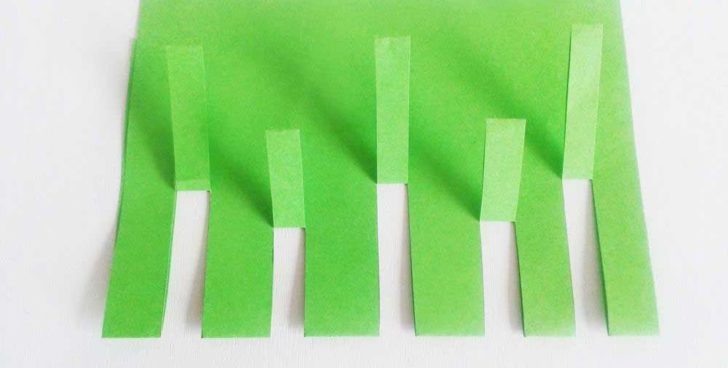
- We fold the smaller workpiece in half and from the side of the fold we begin to draw 7 lines. We do it according to the following scheme. The length of the lowest line should be 2 cm. Set aside the given size from the fold and draw with a pencil. The next line will appear one centimeter above the first and will be equal to 2.5 cm. Each subsequent line will also increase by 0.5 cm. The step distance of 1 cm is maintained for all seven levels.
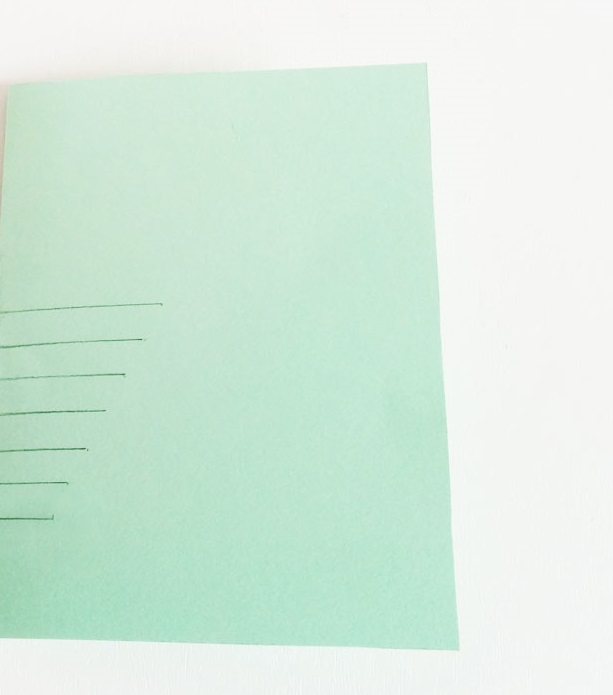
Draw 7 lines from the fold side
- We cut the folded cardboard along the lines obtained. We bend the strips in one of the sides and carefully press the folds. This will make it easier to work later.
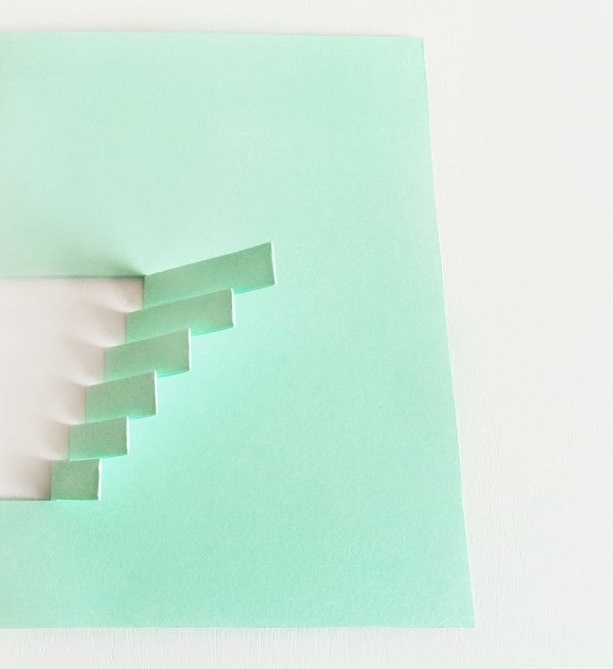
Bend the strips to one side
- We unfold the strips and open the cardboard sheet. The cut is concave inward.We'll have to fix them and bring them out. Remove each of the strips by folding inward at the edges and outward in the middle. Close the blank and place it under the load. The paper needs to "settle down" to open and fold easily.
- Now let's reveal the main secret of how to make a three-dimensional postcard. Let's do the title part. We bend it in half and glue the inside with threaded strips. This must be done so that the folds of both cardboard boxes converge with jewelry accuracy. Do not hurry. Fix first one half, and then take care of the second. This will reduce the risk of bias.
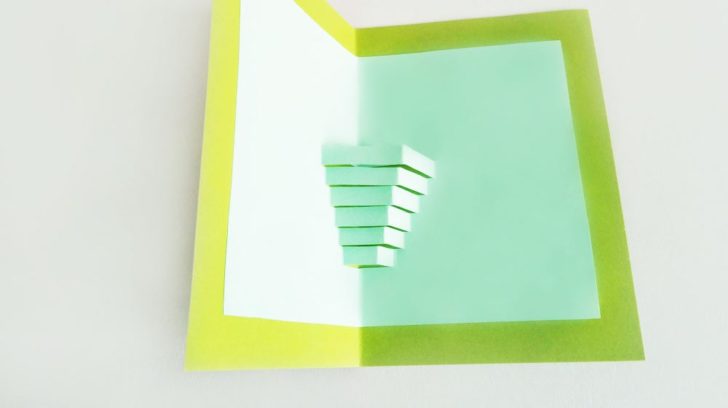
Glue cut strips on the inside
- The main work has been done. It remains to fill the vase with flowers. From green paper, you need to cut the stems immediately with leaves, and from paper of a different color, several flowers. Do not chase curiosities, draw what you can. Plant two buds on the stems, and leave one as it is.
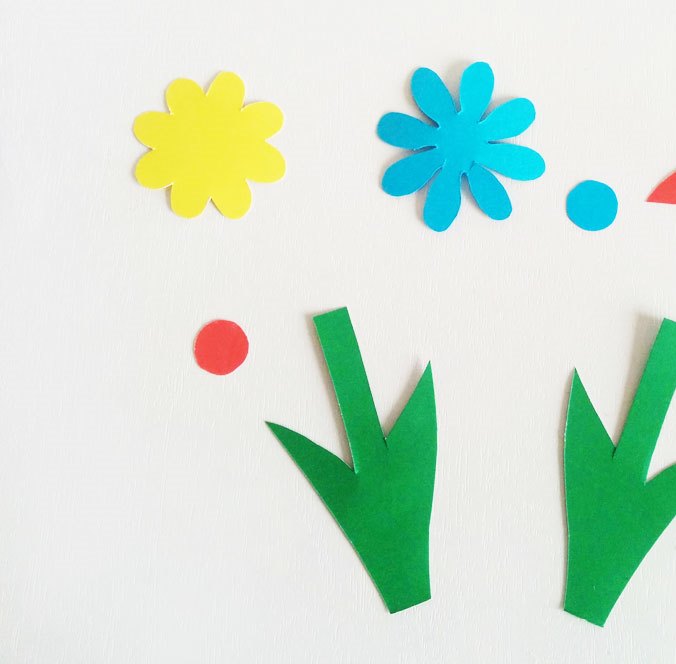
Cut out stems and flowers
- Trying to put the bouquet in a vase. We glue one flower on the stem on the left side of the postcard, the second on the right. We coat with glue only the lower third of the stem. This will allow the element to remain mobile and take a standing position when the postcard is opened. A bud without a stalk is glued to the top strip of the vase.
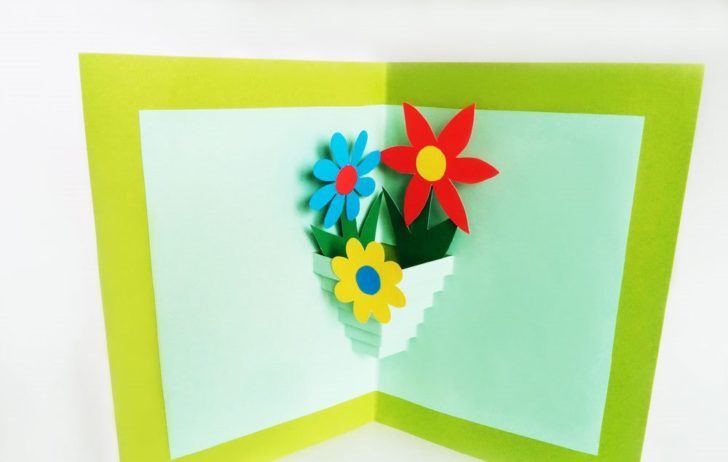
Put the bouquet in a vase
- We check the quality of work. We close the postcard. If everything is done correctly, then decorative elements will not peek out of it and its doors will open and close with ease.
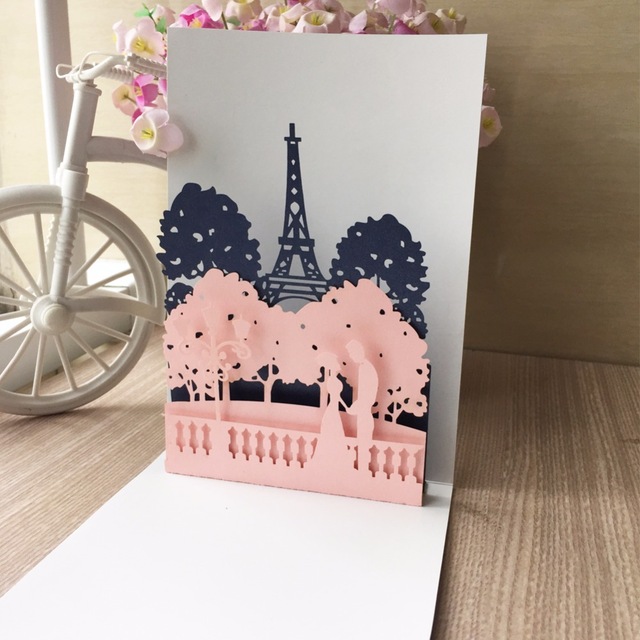
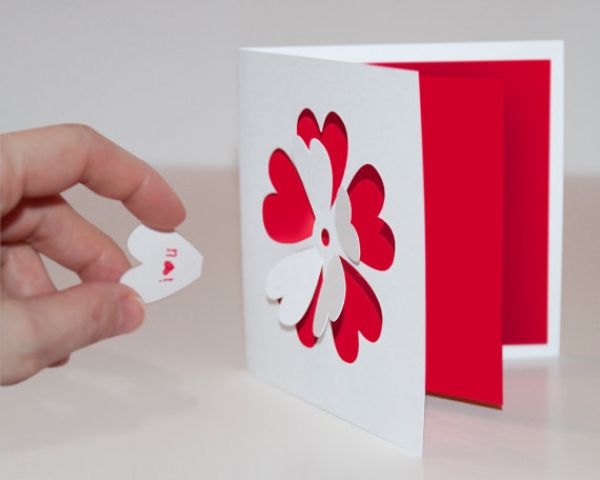
There is another interesting option, how to make a 3D card with flowers.
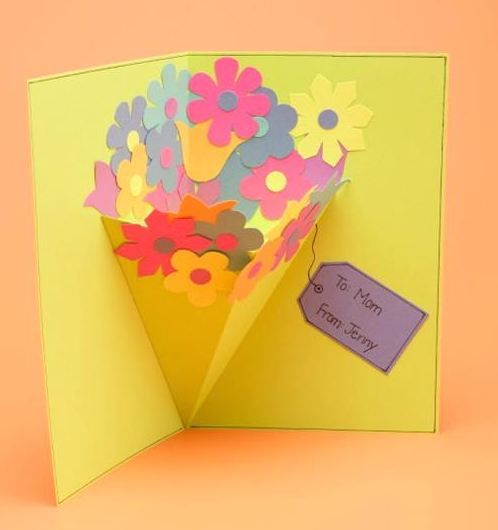
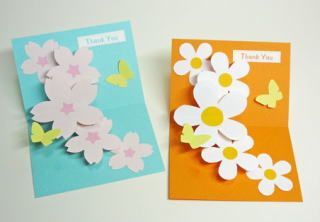
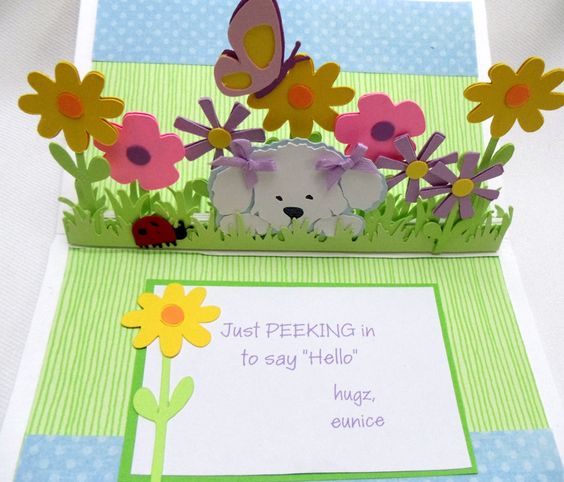
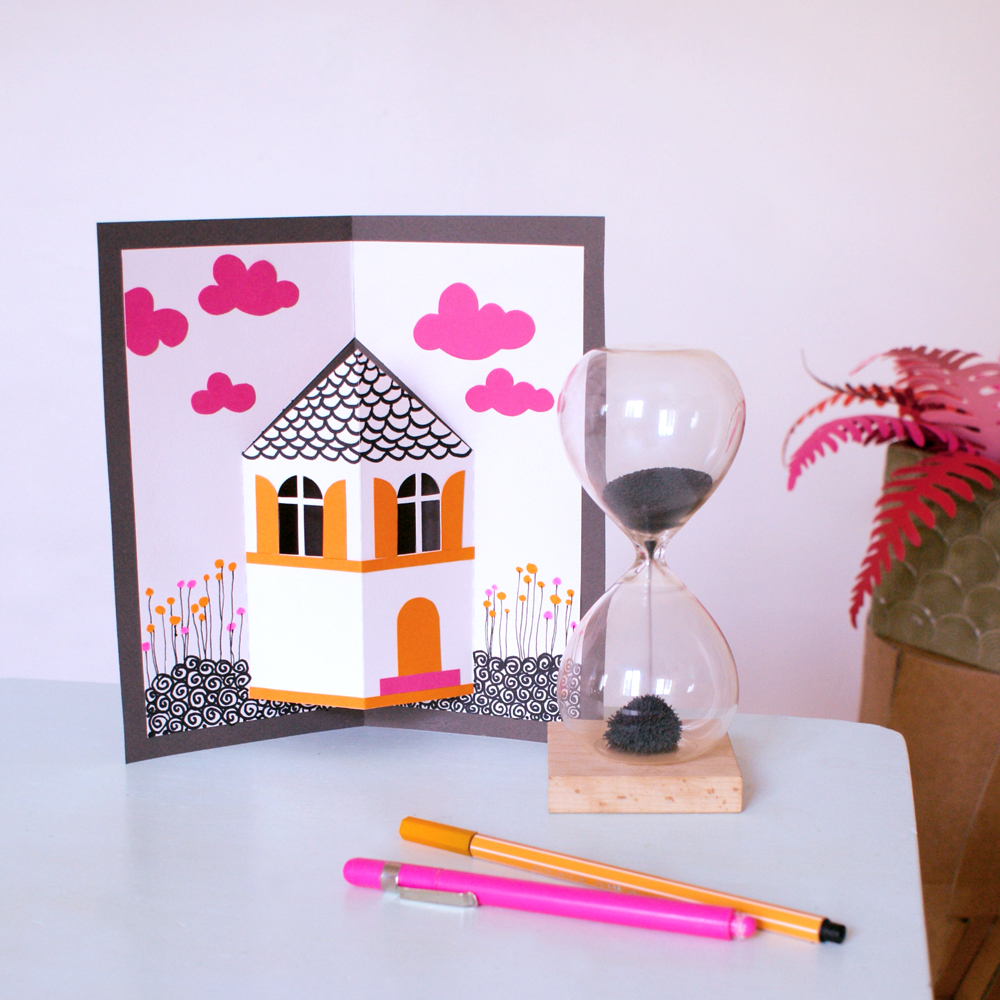
flower meadow
To create this masterpiece, you will need green and orange cardboard, a package of colored paper and a few sheets of pure white.
Stages of work:
- Take cardboard sheets. We will leave the orange in its original form and use it for the cover, and slightly correct the green. It will need to be reduced somewhat. We will shorten it from the sides by one and a half centimeters. Let's make the top edge wavy.
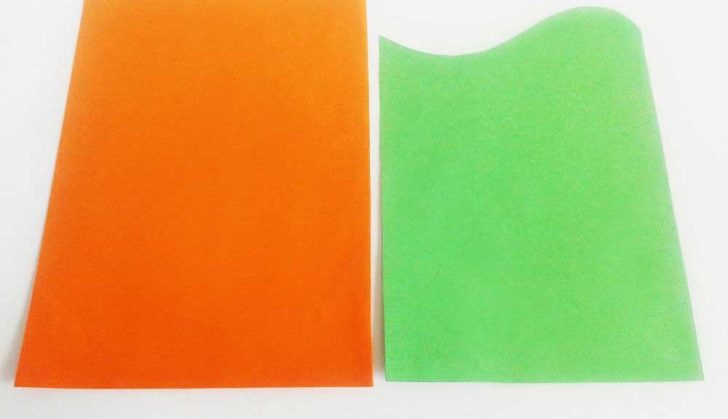
Make the top edge of the green leaf wavy
- Fold the sheet in half and draw 5 stripes on it, a little more than one centimeter long. The starting point should be the fold.
- We cut out the strips, slightly bend them up, and then return them to their previous position.
Fold the strips up
- We open the workpiece and bend the strips outward, making a bend in the middle of the cut segment.
- We glue the part to the base. The entire surface area must be smeared with adhesive composition, leaving only the zones of the cut strips intact.
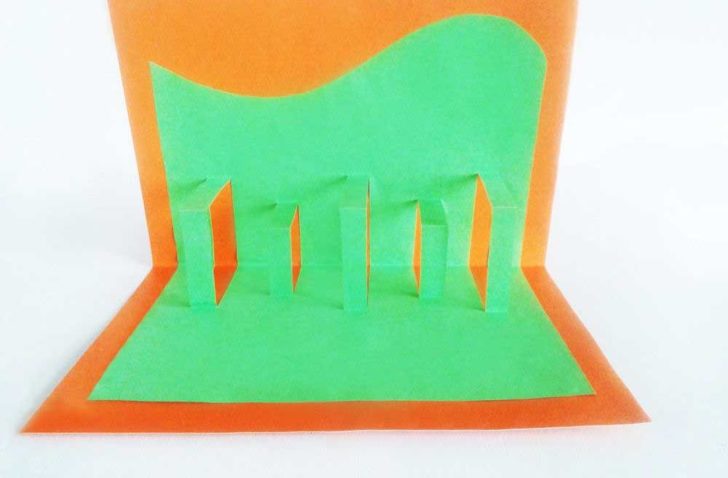
We glue the part to the base
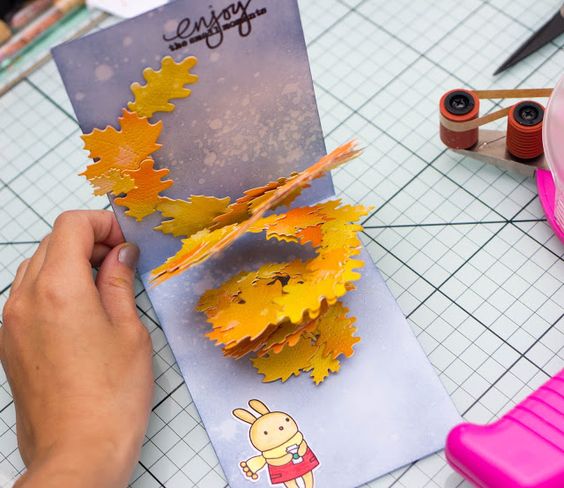
- It's time to do the flower bed. Let's decorate it with flowers. From colored paper of different shades we will make blanks of various shapes and sizes. Let's plant them on stems with leaves. Let's place the finished parts in the clearing. You can supplement the composition with butterflies, put a wasp on the flower.
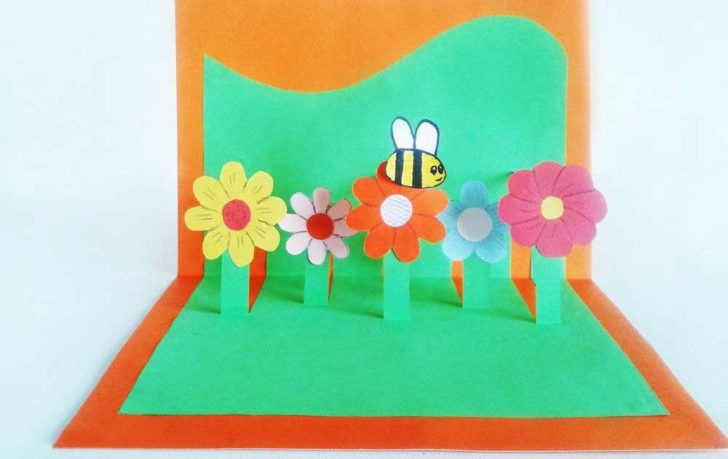
Place the finished parts in the clearing
How to make a voluminous postcard for February 23 with your own hands
What can please dad, grandfather, brother on this holiday? First of all, your attention, therefore, without wasting time, we get down to business.
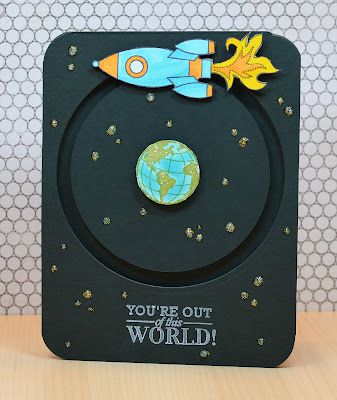
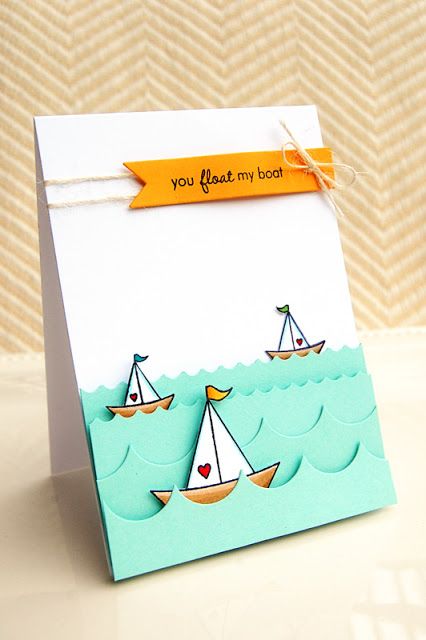
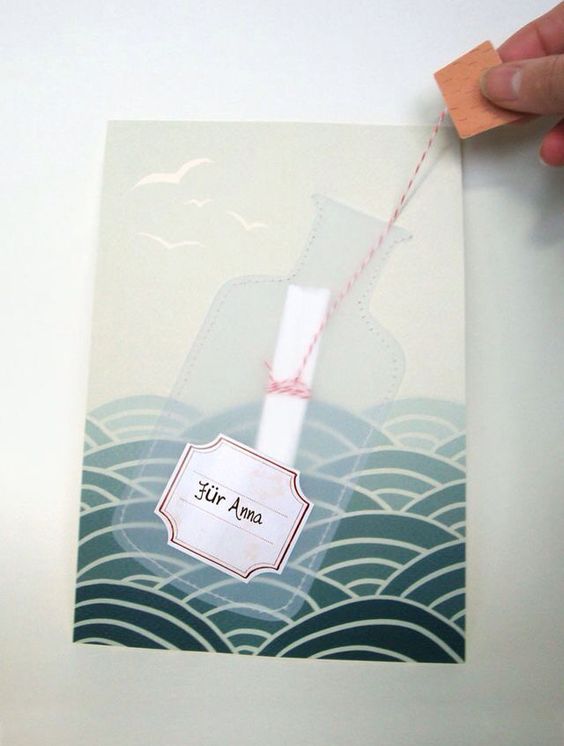
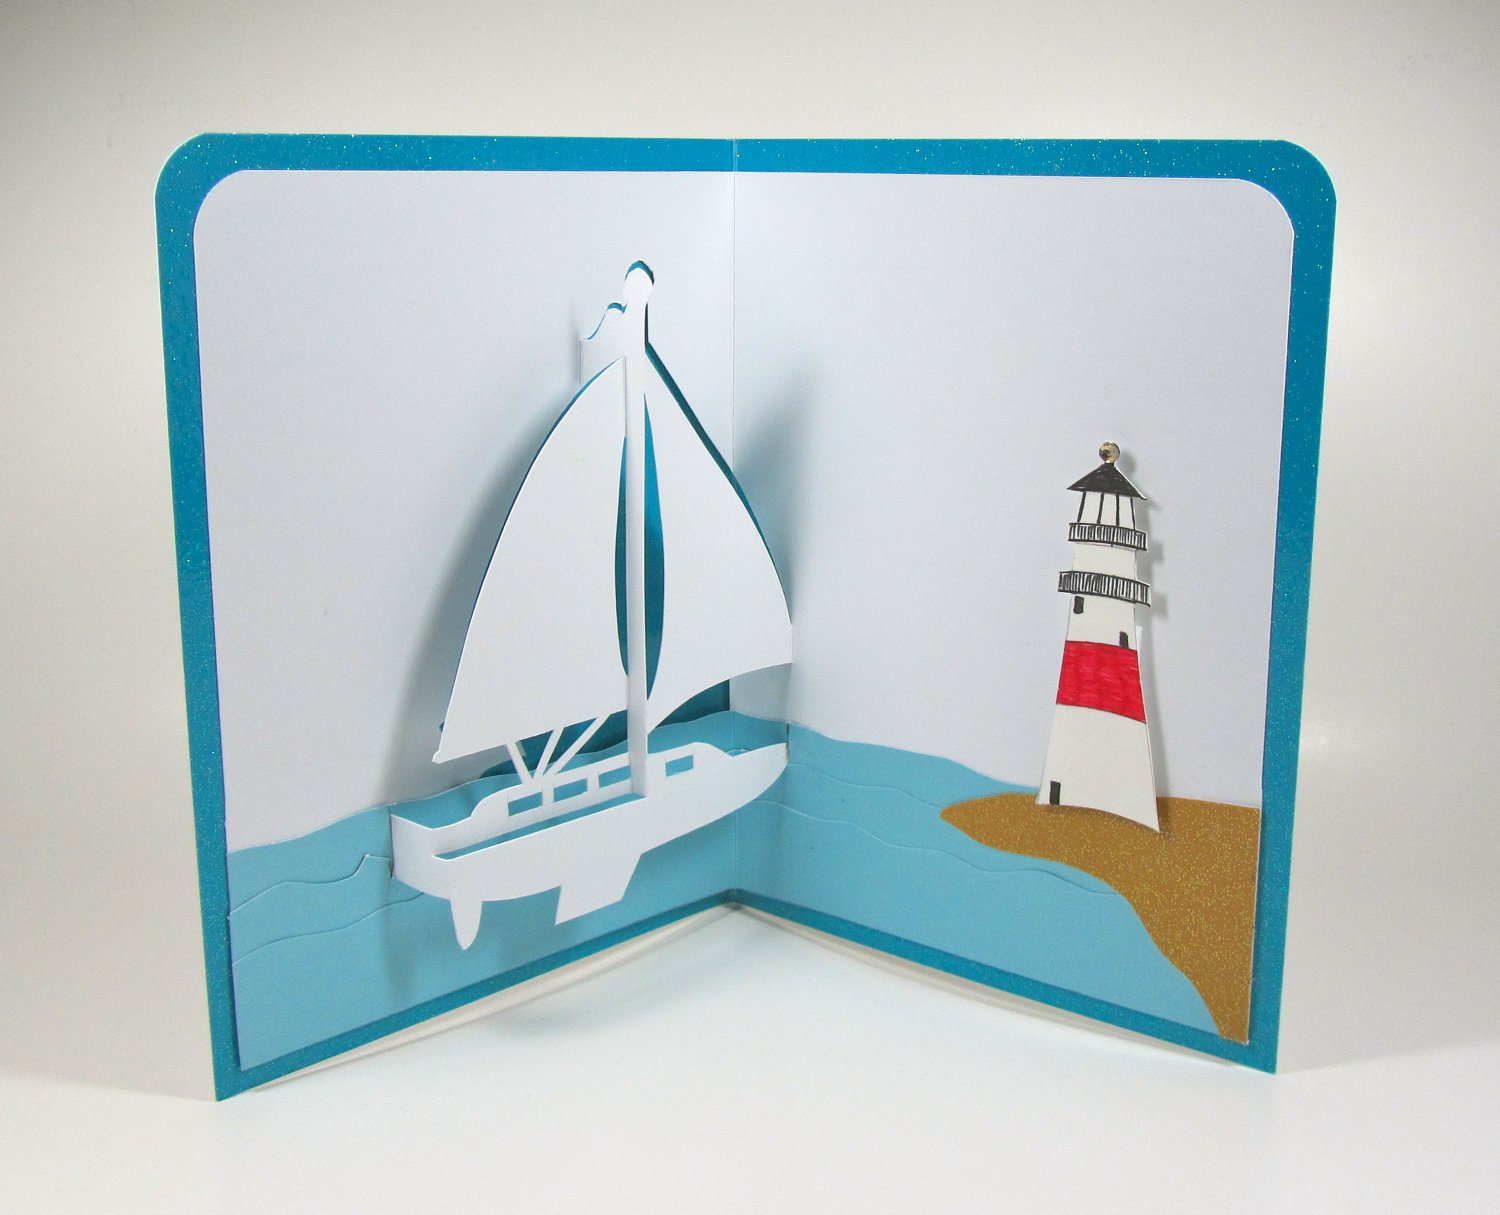
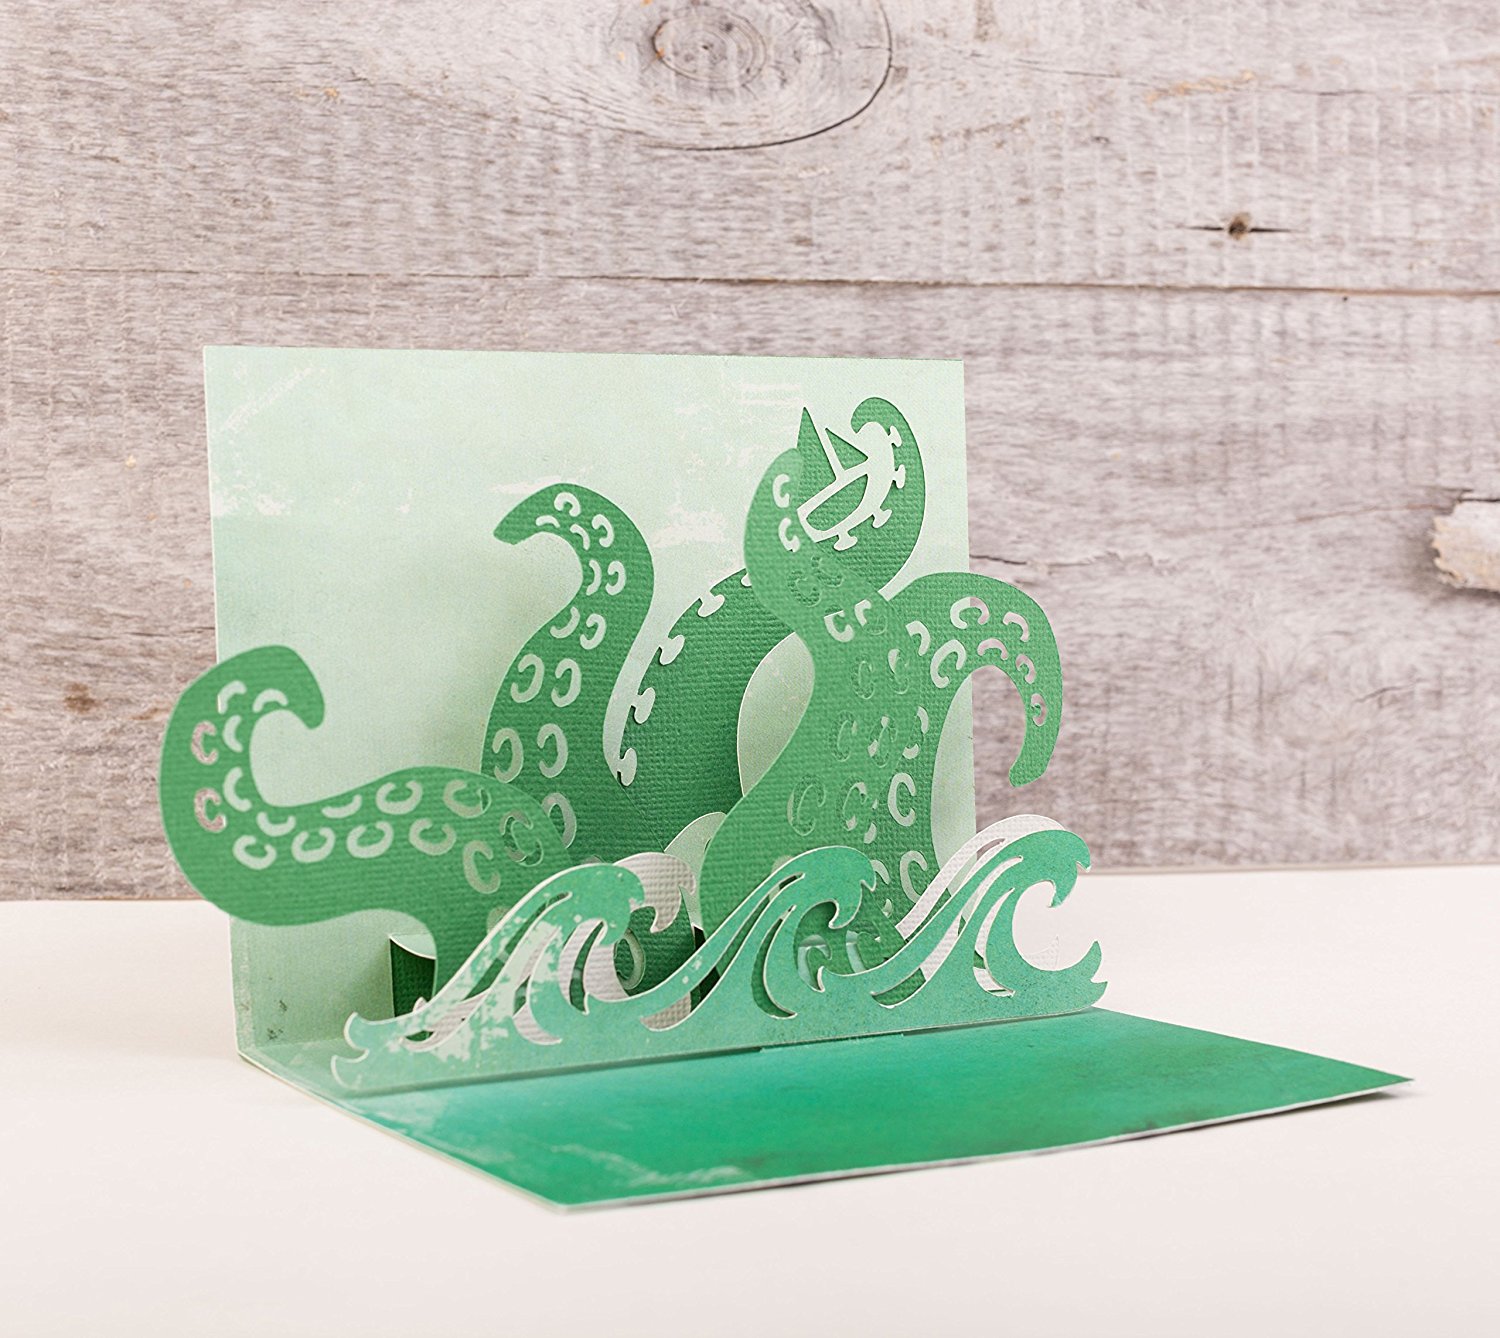
Postcard as a gift to a sailor
In order to make a voluminous postcard for February 23 with your own hands, you will need multi-colored high-density paper, a pencil, and glue.
Leave a sheet of blue cardboard under the base. Fold the boat out of white paper, and slightly straighten the bottom. Attach a flag to the sail. From one side we will place portholes - circles cut out of blue paper. Write the name with a marker.
If desired, you can festively decorate the ship. To do this, you need to make garlands of multi-colored flags. Glue the details on the thread and stretch it from the bow of the ship, through the sail to the stern.
Let's add thematic elements to the composition. From the same white paper, cut out an imitation of seagulls and wave crests.
If it was planned to sign the postcard, then it is better to do this before the work on it is completed.
We place our ship and all the prepared elements on a sheet of blue cardboard. We fix with glue. The gift is ready!
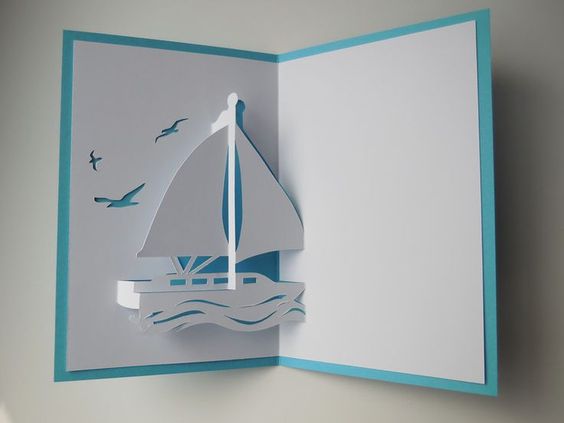
Volumetric postcard as a gift to a sailor
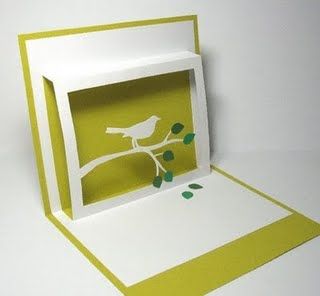
How to make a 3D card for February 23 using the quilling technique
“If children are going to make 3D cards with their own hands, invite them to make a tank”
We prepare cardboard of different colors, including white, strips of colored paper, stationery or other transparent glue, a quilling needle. The latter can be done independently. Find a sewing needle with a large eye in the box and just bite the top bow on it. Stick the needle into a wooden holder the size of a pencil. It can be made from a flat twig or use sushi sticks as this.
We prepare “noodles” from colored paper, up to 0.5 cm wide. We turn the blanks into various figures using a needle.
On the basis of the postcard, sketch out a sketch of the future image and make the appropriate inscriptions. Glue strips of cardboard along the contour of the drawing, placing them on edge. We let the workpiece dry, after which we fill the resulting space with parts made of paper.
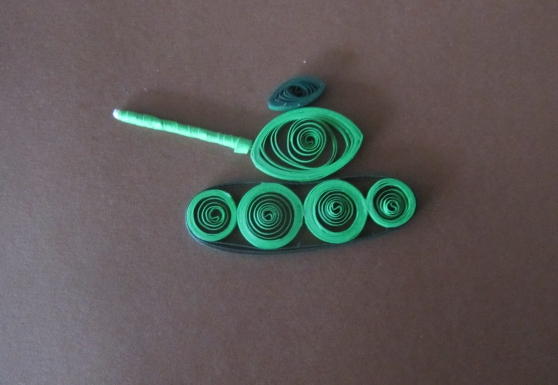
Build a tank from strips of paper
If children are going to make 3D postcards with their own hands, invite them to make a tank. On a piece of white cardboard, lay out the caterpillars of the tank from four rings. We put two larger rolls in the center and add a smaller roll from the sides. We make the tank tower in the shape of an oval. A cocktail straw will help to simulate the muzzle.
If there is a lot of free space left on the base, make a decorative frame and a congratulatory inscription.
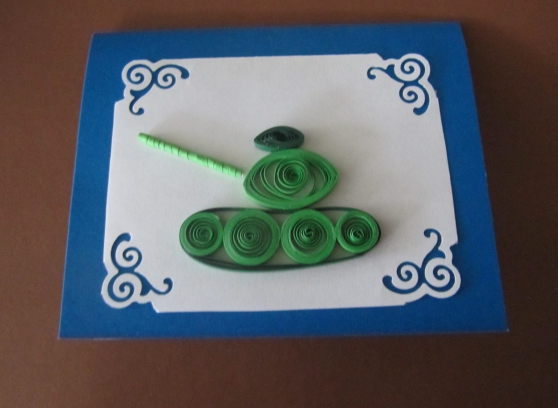
Attach the tank to the postcard
A wonderful voluminous postcard for February 23 with your own hands is ready!
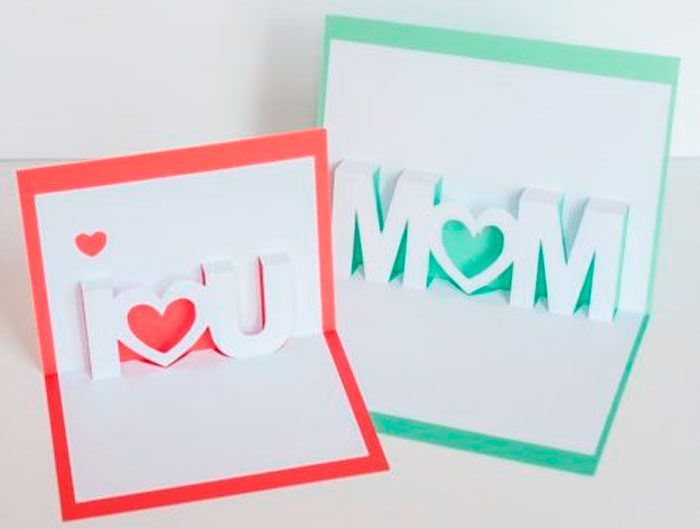
back to index ↑As a gift to mom
Butterfly postcard
Do you want to surprise your birthday? Give him an unusual folding card in the form of a butterfly. It is guaranteed to delight the addressee, regardless of whether it is an adult or a child. Everything about everything will take about 20 minutes.
From the materials you will need:
- thin cardboard;
- a piece of thin wire or rope;
- a few beads;
- double sided tape;
- PVA glue.
First of all, we will make stencils of a large butterfly and a little smaller. Take a sheet of colored cardboard and fold it in half. We apply the largest of the prepared stencils to the fold so that its upper part protrudes slightly beyond the edge. After cutting out, you should have 2 butterflies connected in the area of \u200b\u200bthe upper wings.
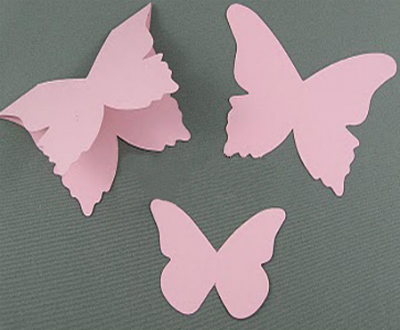
After cutting, you get 2 butterflies
Cut out one more large and one small butterfly. The first is a good idea to make cardboard with a pattern. The main thing here will be to choose a color combination with the main part.
Next, at the double butterfly, fold up one of the lower wings. On this peculiar leg, the decorative part will subsequently be held.
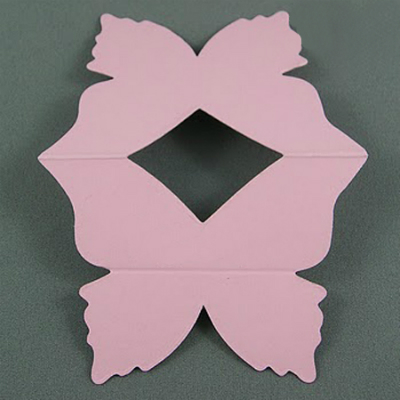
Prepare the base
Along the small butterfly, along the middle line, we glue a narrow strip of double-sided tape and “plant” it on the back of a single multi-colored blank.
Let's repeat the operation, but with a large butterfly, just place the adhesive tape across the part. Let's fix it to the fold we made in advance on the lower wing of the double part.
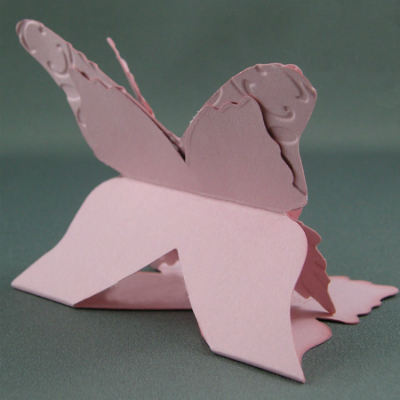
Merge all elements into one
From the rope, wire and beads we will collect the antennae and attach them to the butterfly.
As an additional decor, you can lay out a row of beads along the middle line on the back of a small part.
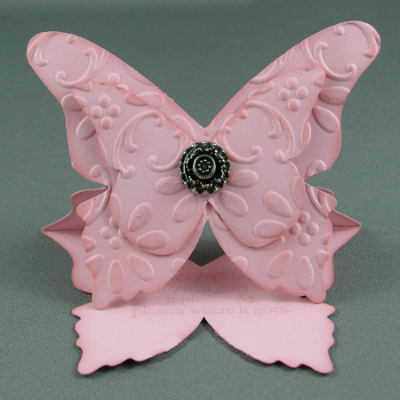
Attach any decoration to the central part
Let's fix the wings. Everything is ready!
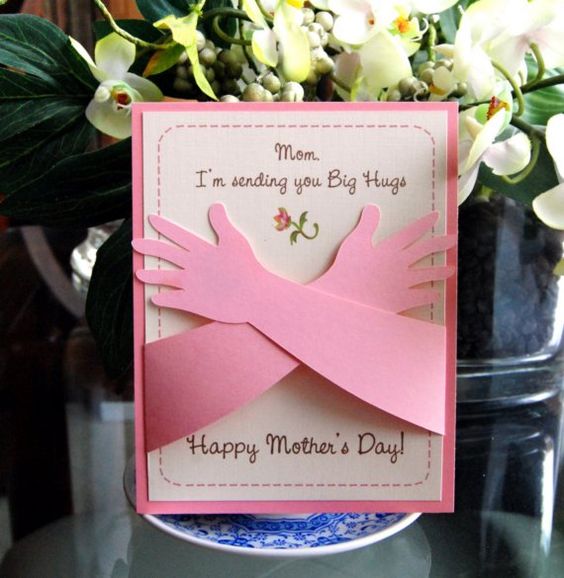
A hand-made 3D card is good for both March 8 and birthday.
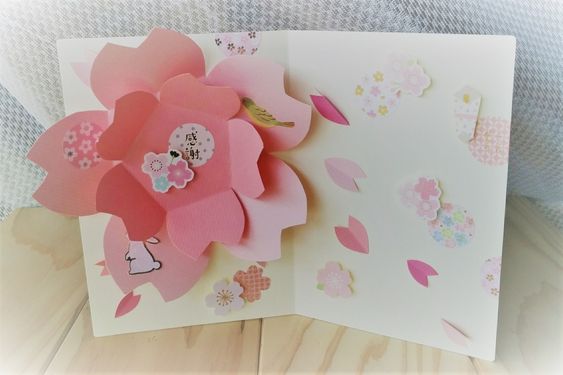
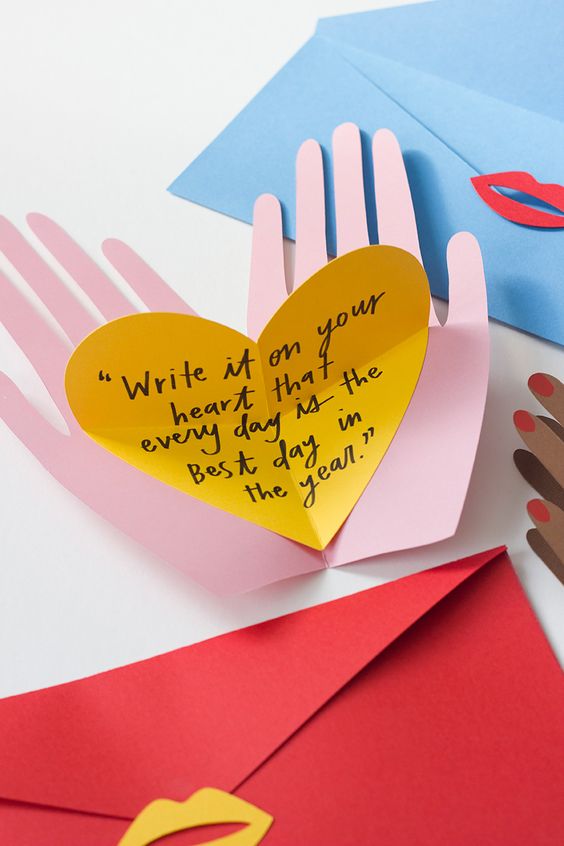
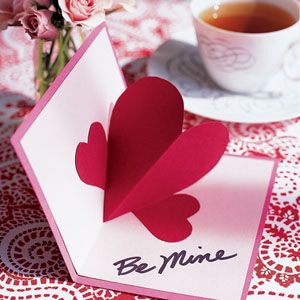
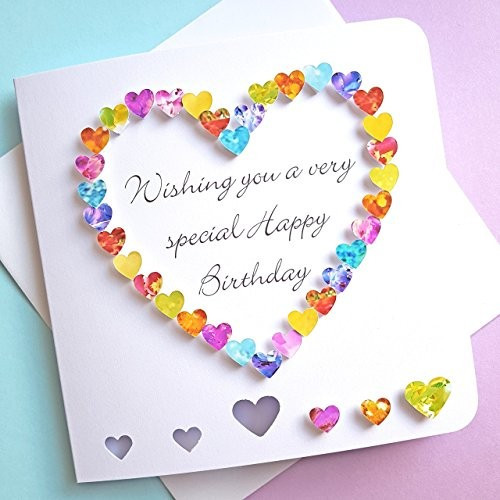
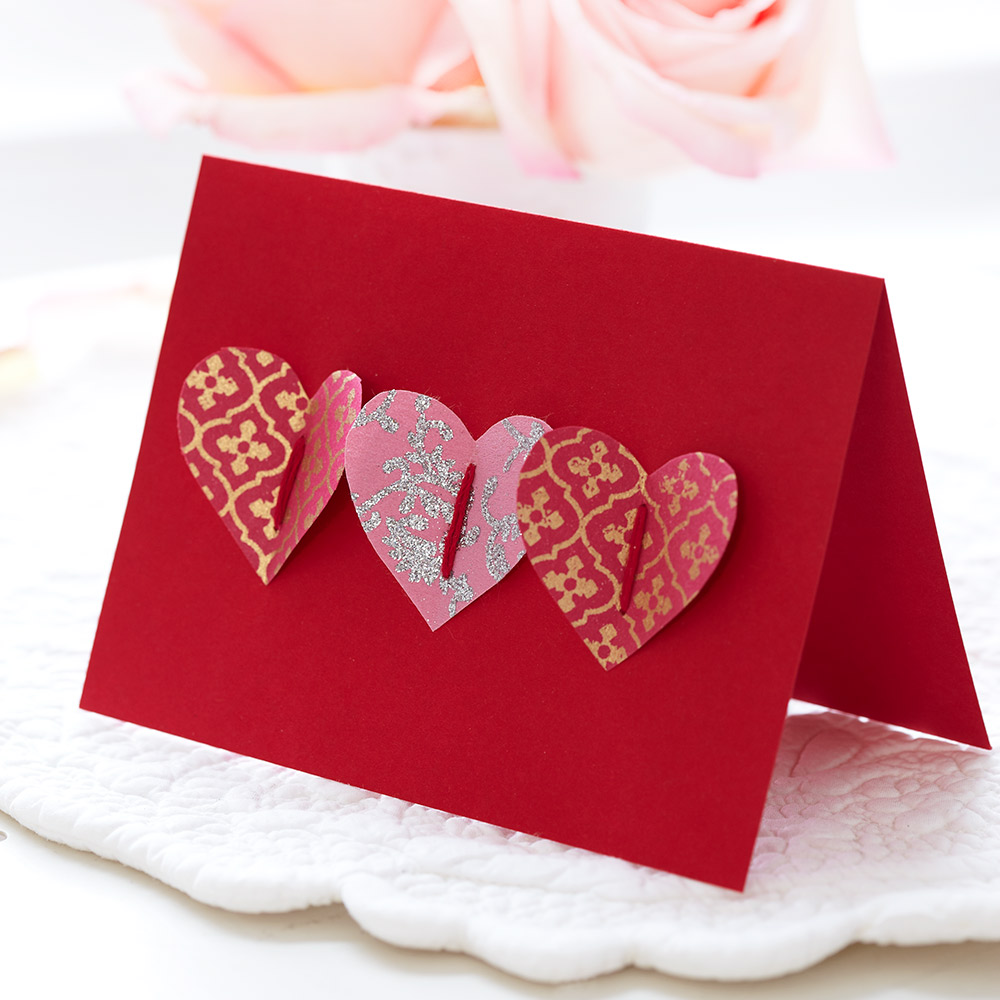
Heart of roses
Another great idea on how to show your love for your mom. To make a pretty congratulation, you will need soft-colored paper, glue and scissors.
Fold sheet A-4 in half. The base is ready. You can proceed to work on roses.
Making buds is not as difficult as it might seem at first glance. The blank is made from a small circle of paper.It must be cut in a spiral, and then rolled up like a serpentine. You need to start twisting the rose from the outer edge. Lubricate the tip of the paper tape with glue and press it to the resulting bud so that it does not fall apart with us.
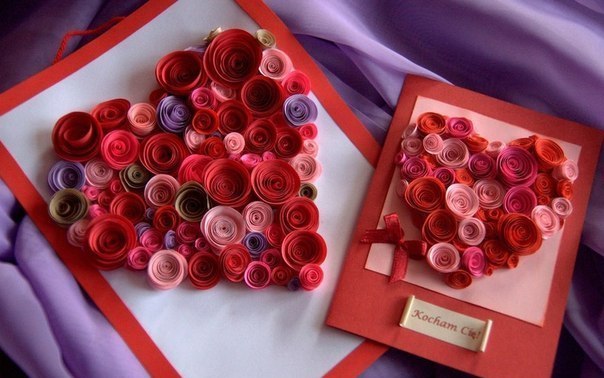
Pretty congratulations with a voluminous heart of roses
Cut out a heart from white or another paper color that blends harmoniously with roses. We will place a composition of rose buds on it and fix the result. Now it can be glued onto the base. Do you want to add additional decor elements and write a few kind words? You are welcome! This will only add to the surprise of romance.
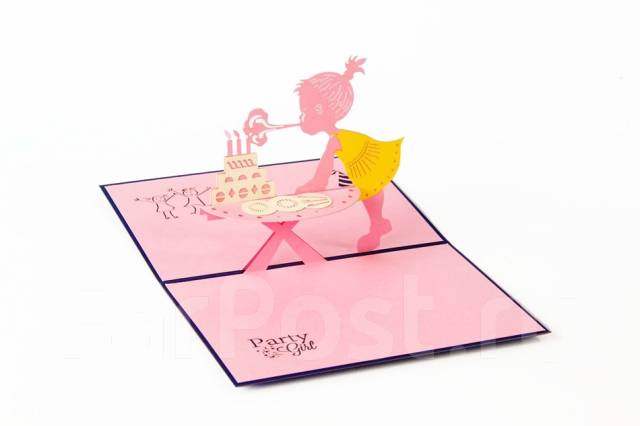
back to index ↑For birthday
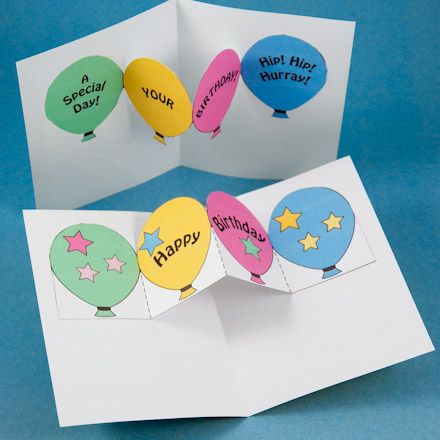
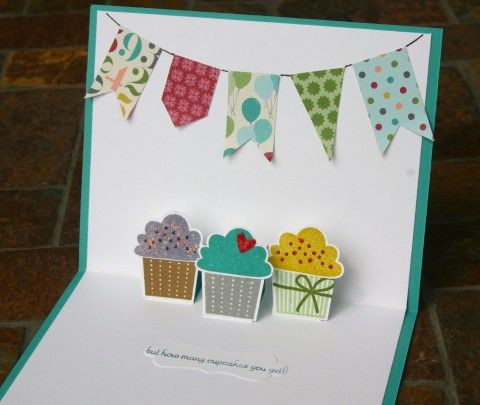
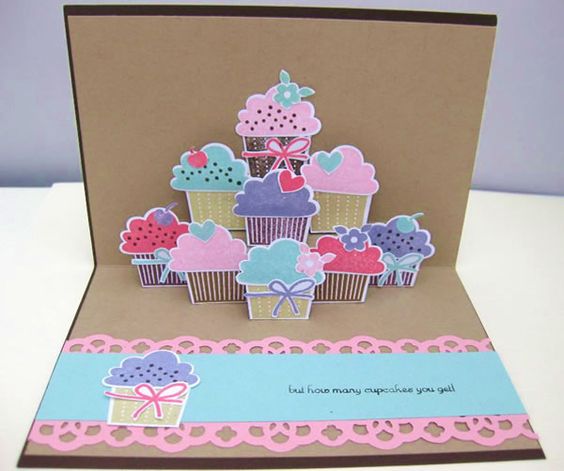
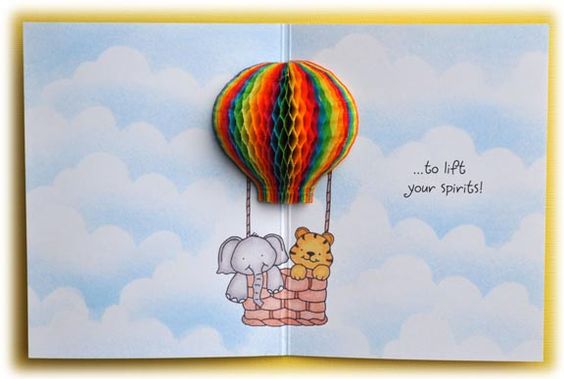
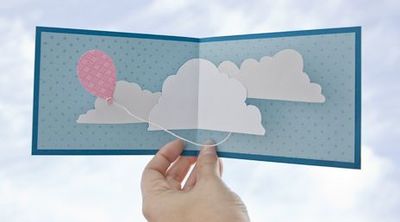
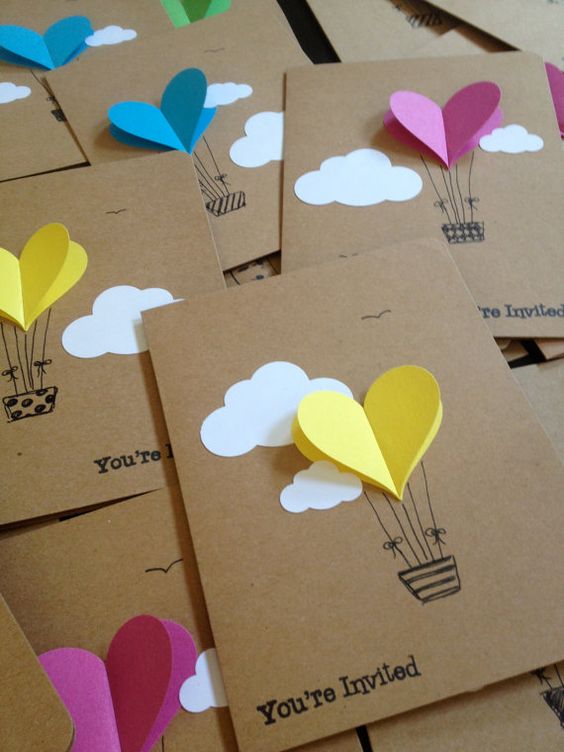
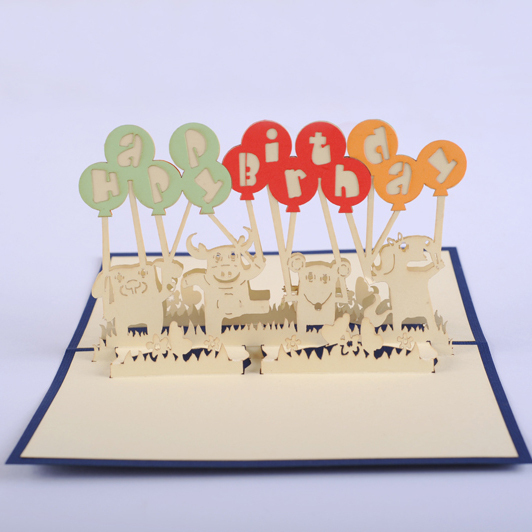
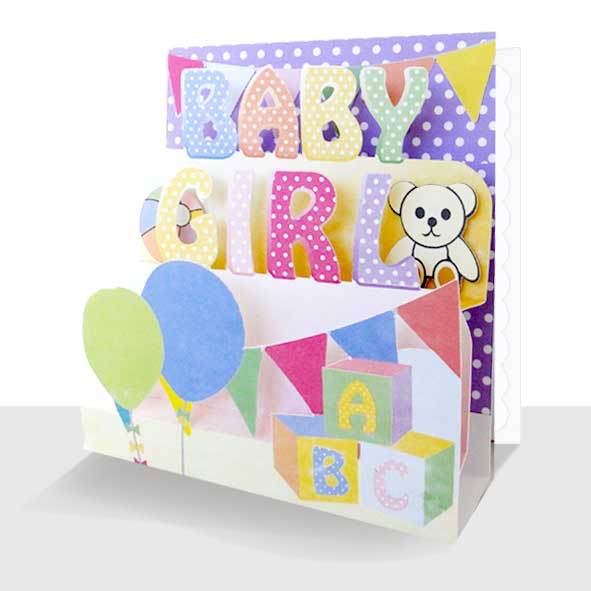
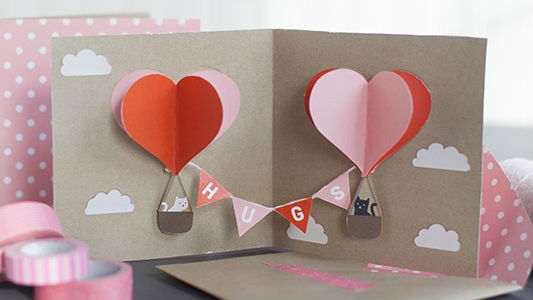
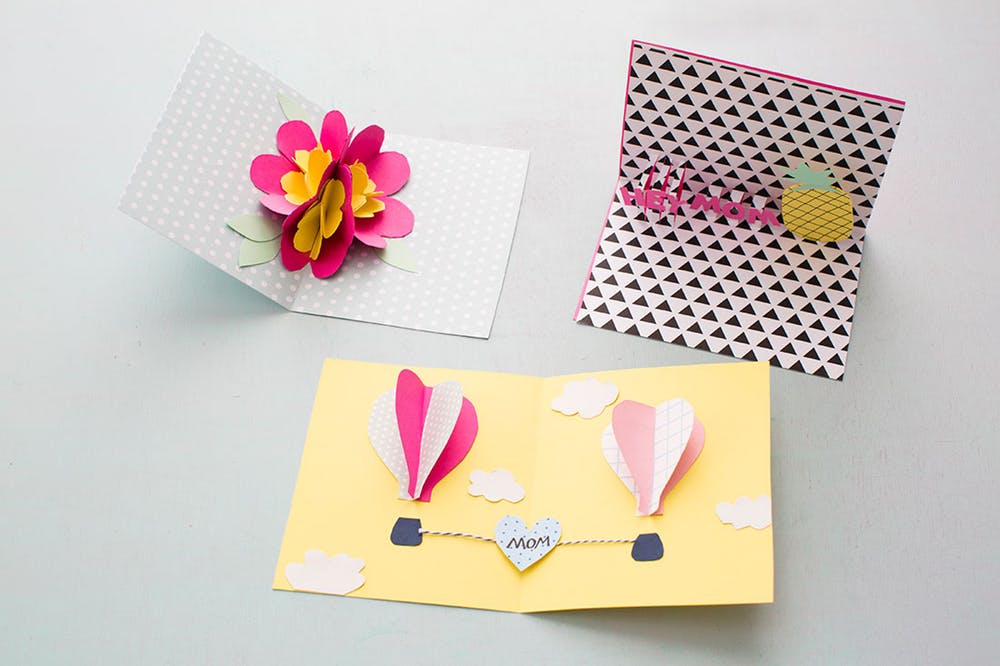
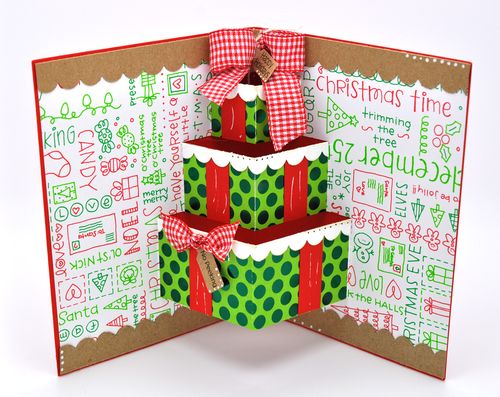
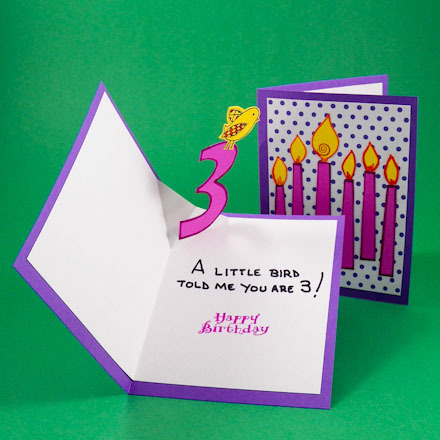
Balloons
“To decorate do-it-yourself volumetric birthday cards, you can use flags, pictures of gifts”
A postcard with the same attributes of the holiday will impress and add the right notes to the mood. To create this miracle, you will need to prepare threads, pieces of colored paper, a piece of A3 cardboard. To fix the elements, we will use double-sided tape and transparent glue.
The cardboard, which is the basis in this case, is folded in half. The choice of its color is, in principle, arbitrary, however, if you opt for blue, then you can realize the idea of balloons floating in the sky. By the way, to decorate do-it-yourself volumetric birthday cards, you can use flags, pictures of gifts. But first things first.
Let's get back to making balloons. They need to be cut out of colored paper in different shapes and diameters. Our elements will consist of two parts: a circle and a triangle. We paste the latter on the circle so that we get an imitation of the tail. We fix the thread on top with double-sided tape. In total, we need 35 such blanks.
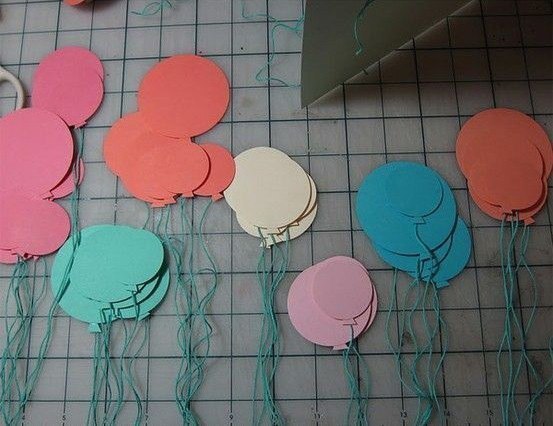
Prepare 35 balloons
In parallel with paper circles, it is necessary to cut rhombuses, from which flags will then be made. They are often used to write wishes. 1 flag = 1 letter. The rhombus is folded in half, so that a triangle is obtained, put on a thread with a fold and its parts are glued together. Thus, the necessary words and phrases are formed.
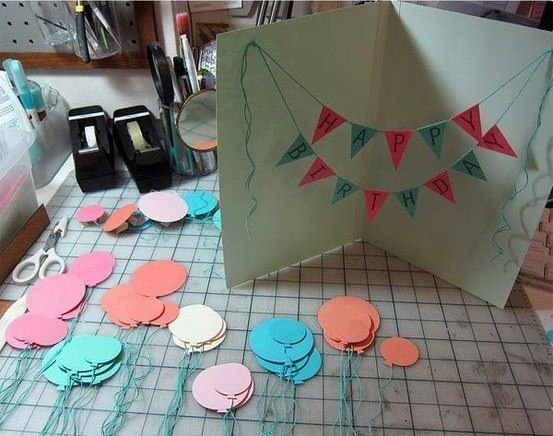
Attach flags to the base
Let's start building the base. We glue 20 balls to it in random order, making sure that the threads do not tangle. The remaining 15, before getting into the postcard, will be supplemented with small accordions-linings. You can make a detail from a strip of paper 2x7 cm. Just cut it out and bend it several times.
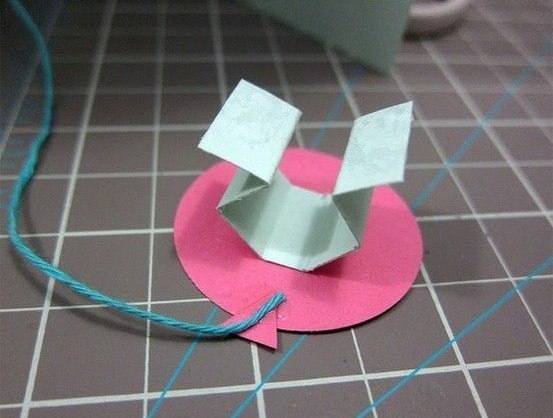
Accordion-lining on the back of the balls
You need to glue the element to the ball from the wrong side, fixing it with the center and leaving springy paw edges. With these paws we will attach the balloon to the card.
Now it remains to weave the threads into a tree, and attach the garlands of flags.
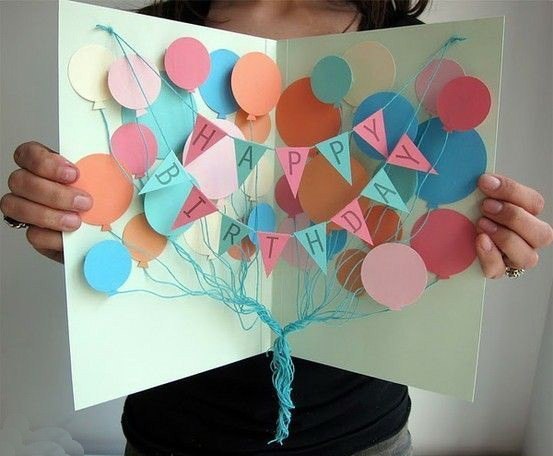
Ready-made birthday card
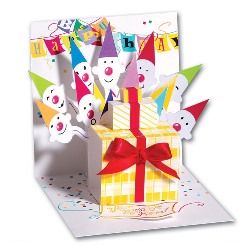
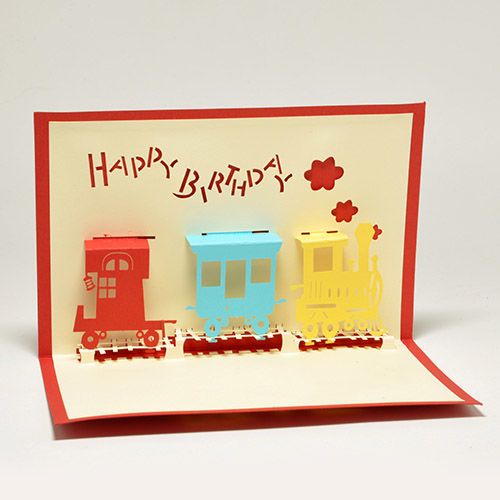
Do-it-yourself postcards made of paper
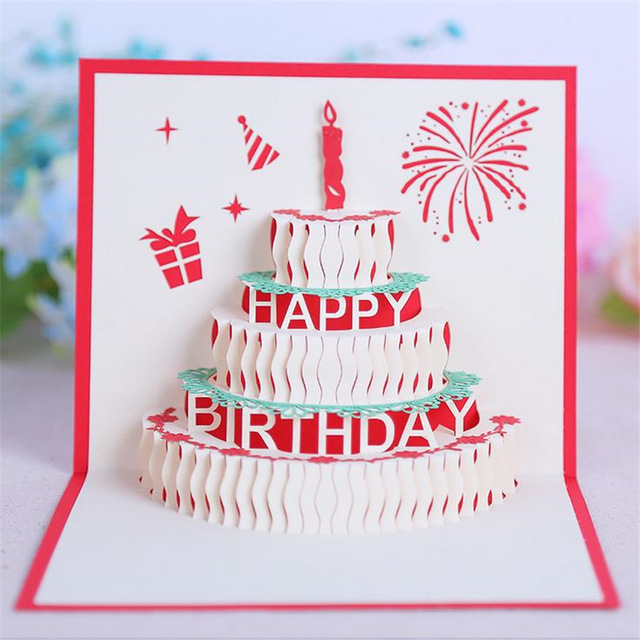
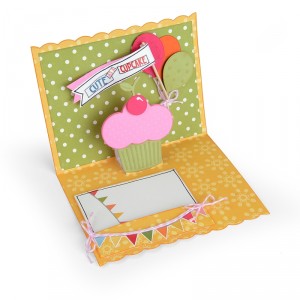
Such a present is built in just 15 minutes. We will need striped wrapping paper and a cardboard base.
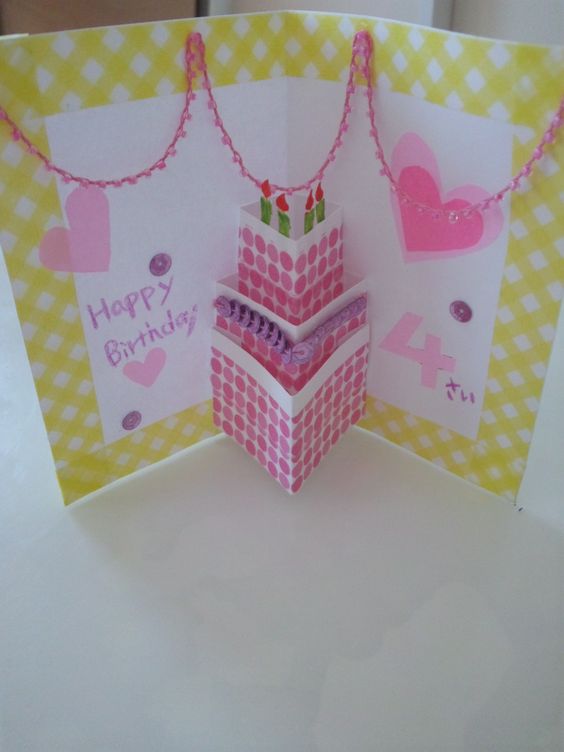
We cut several paper strips and give them the shape of a tube, winding them on a pencil. We fix the edge with glue, and set the blanks to dry. During this time, cut out flames from red or orange (or maybe both) paper. Together we will collect the details on cardboard. A glass of champagne, drawn or made in the form of an appliqué, can be entered into the composition. Candles can be "stuck" into a beaded cake. Placers of shiny stars are also suitable as decor.
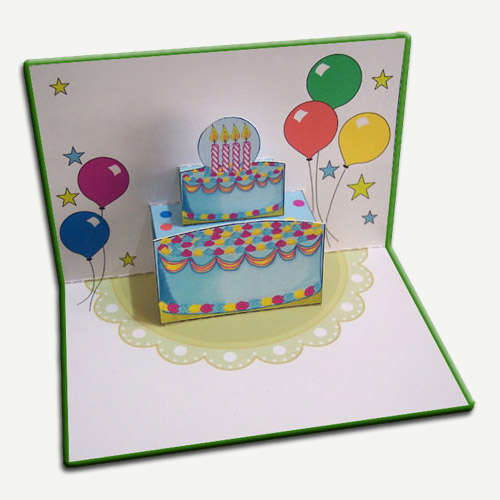
Volumetric card with a birthday cake
Conclusion
By and large, options for how to make a 3D postcard with your own hands can be considered for days. It should be understood that these are just ideas.
It is possible that you have your own visions of making a masterpiece, so do not get hung up on the Internet!
Photo gallery - voluminous postcard


Video